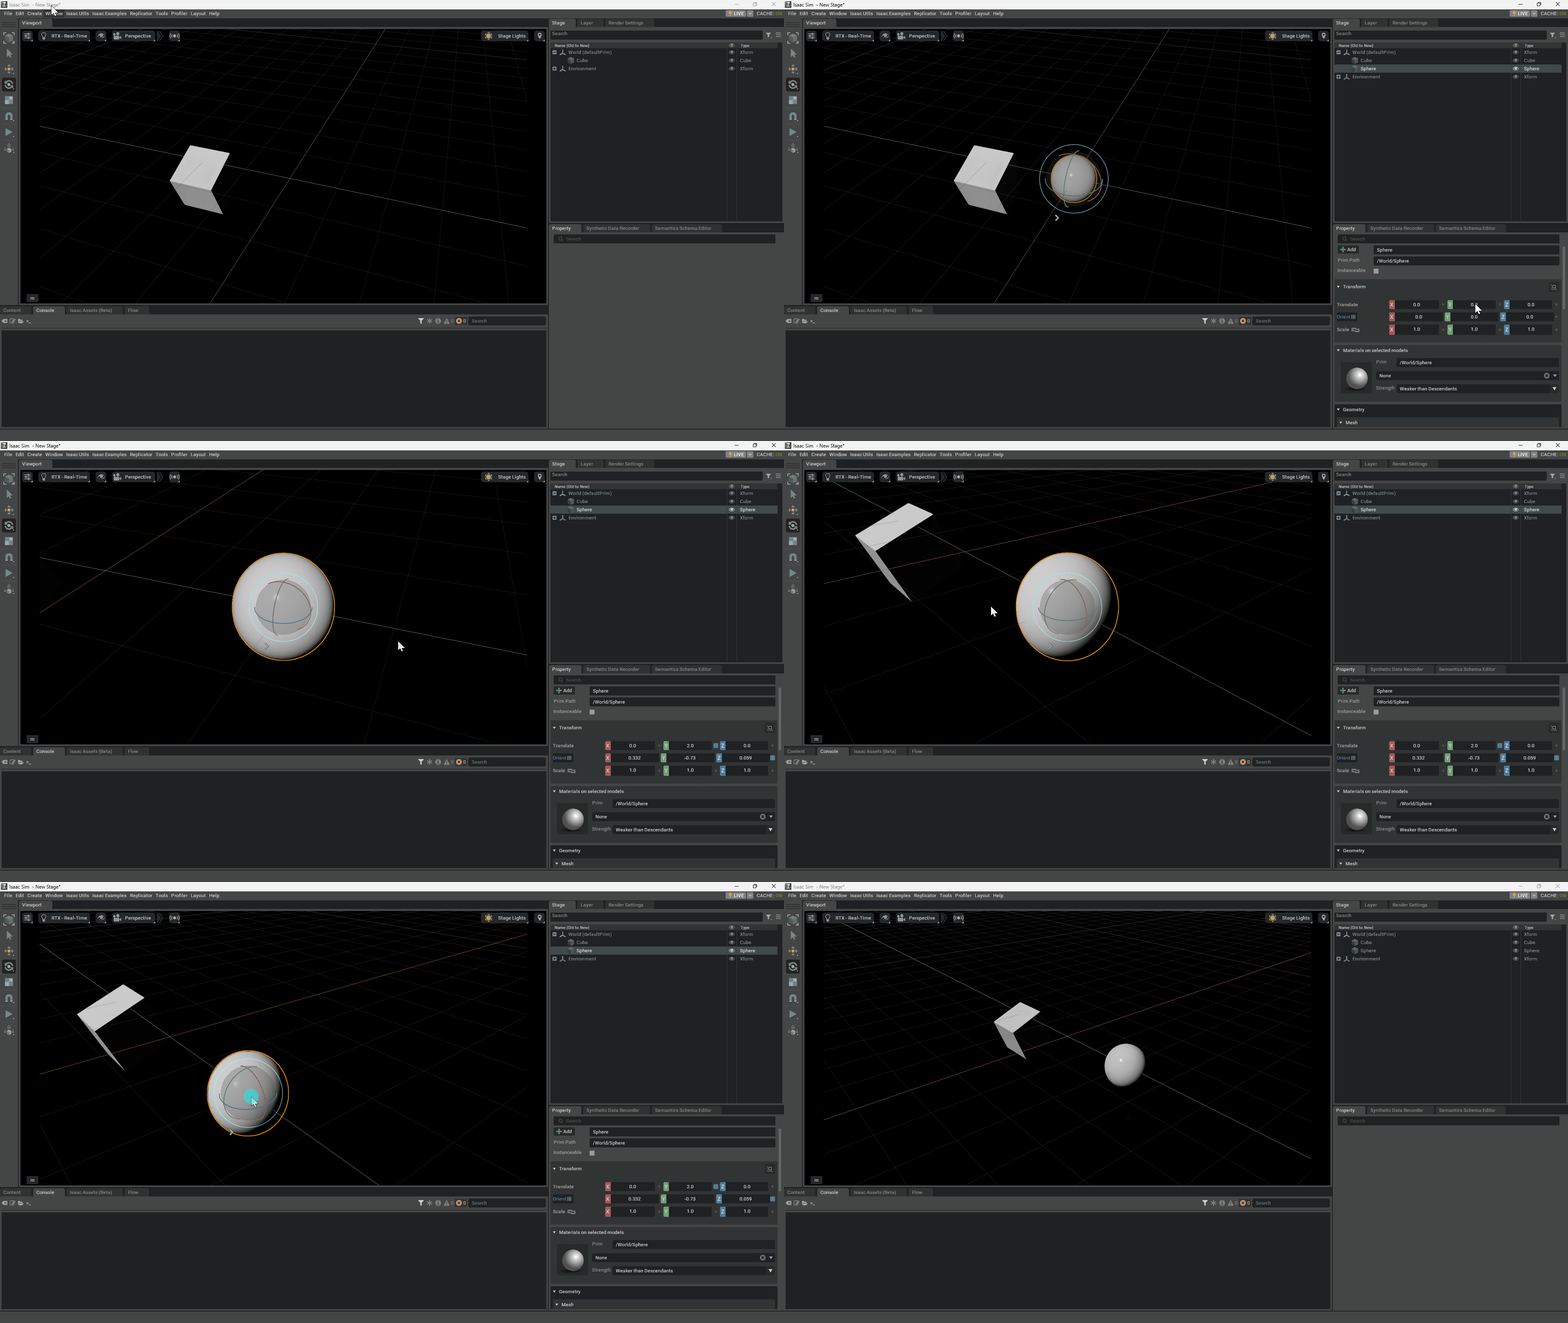
Isaac Sim Interface#
Learning Objectives#
This tutorial introduces the most commonly used user-interface buttons, menus, and controls in Isaac Sim. After this tutorial, you should be more confident in navigating and discovering content in the Isaac Sim interface.
5-10 Minute Tutorial
Getting Started#
Prerequisites
Review What Is Isaac Sim? prior to beginning this tutorial.
Begin by adding a cube to the scene. Go to the top Menu Bar and Click Create > Shapes > Cube.
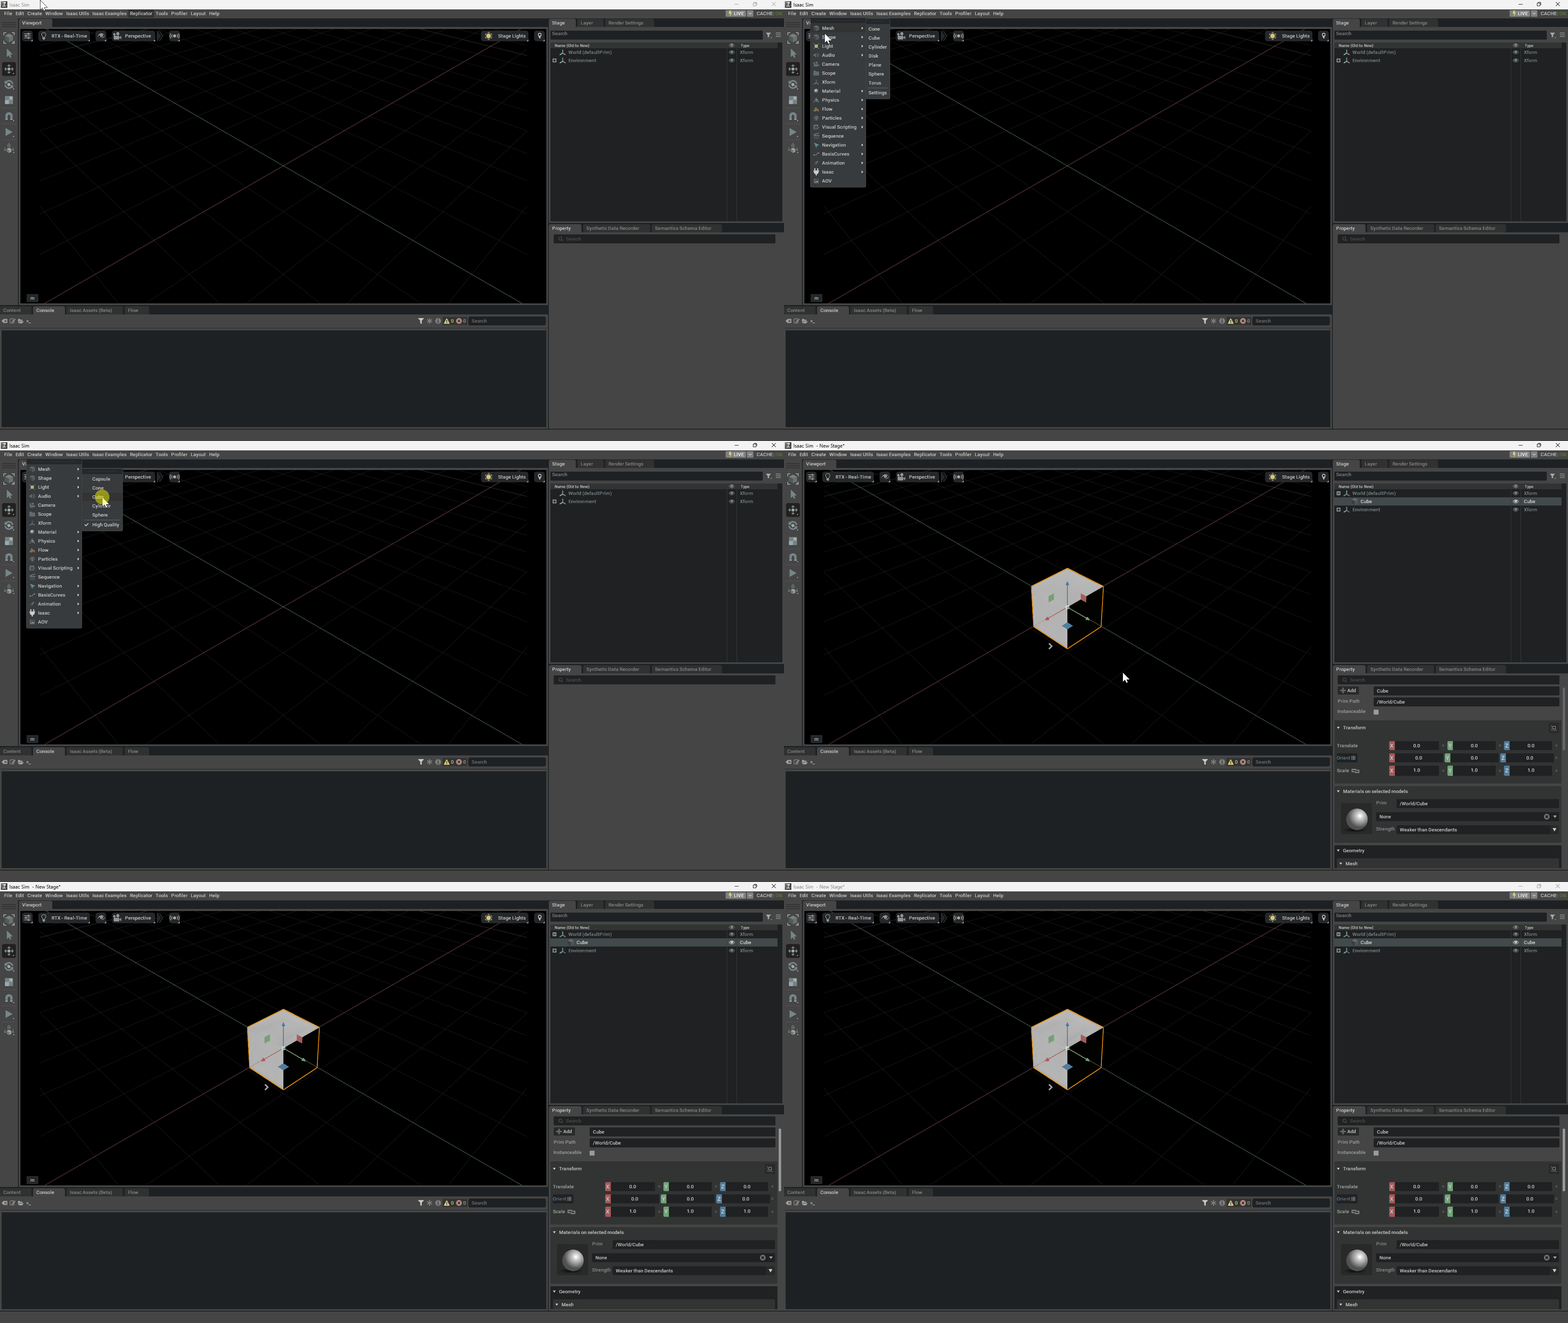
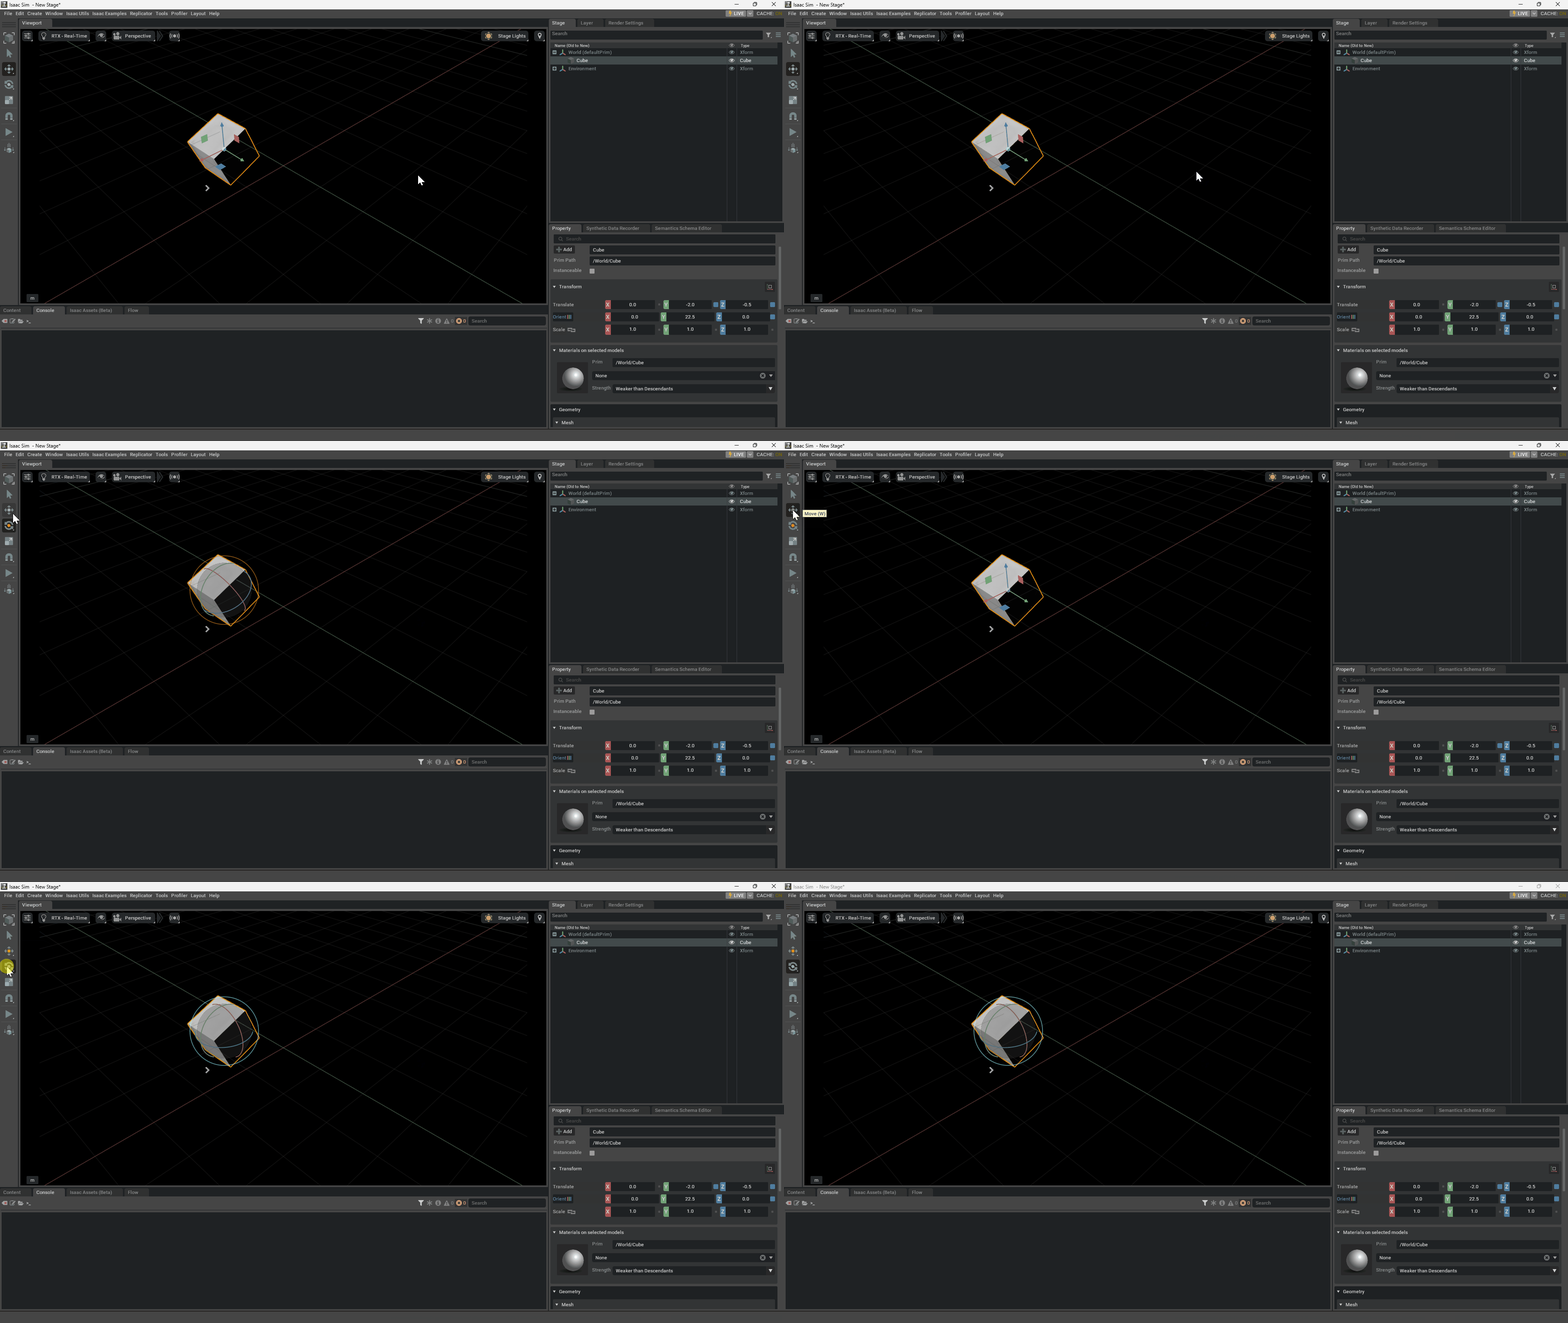
Verify that there is a Cube in the center of the Viewport. The Cube is Selected (highlighted in orange), and the Move (W) command is enabled by default.
Practice transforming the Cube:
Hover over and then click the Move Gizmo to drag and move the Cube.
Press “E” to switch to the Rotate Gizmo, and then click and drag the gizmo to rotate the Cube.
Press “R” to switch to the Scale, and then click and drag the gizmo to rotate the Cube.
Press “W” to switch back to the Move Gizmo.
Press “W” again to toggle Move with Local Coordinates. Click and drag the gizmo to move the Cube on its local axes.
Press “ESCAPE” to Deselect the Cube.
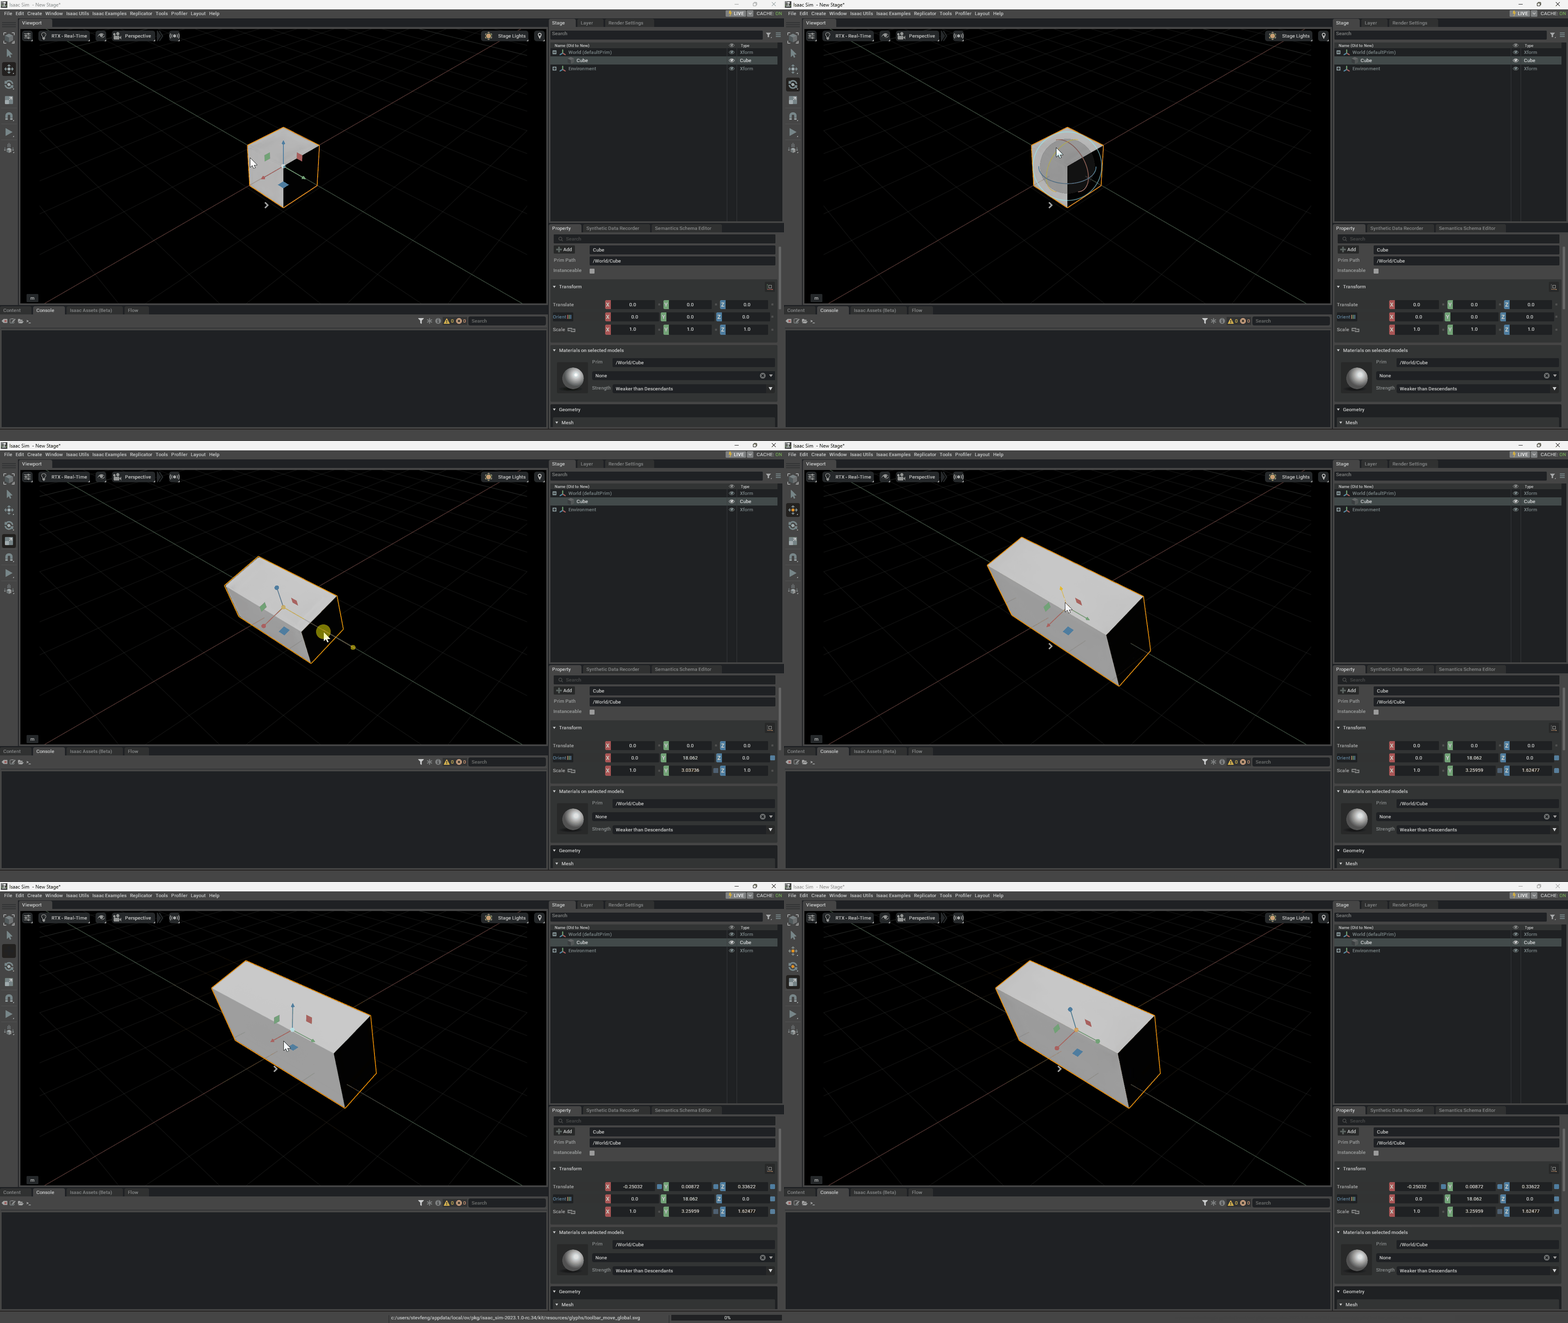
Moving, rotating, and scaling the Cube in the Viewport also updates the Transform Properties of the Cube in the Property panel on the bottom right of the Workspace.
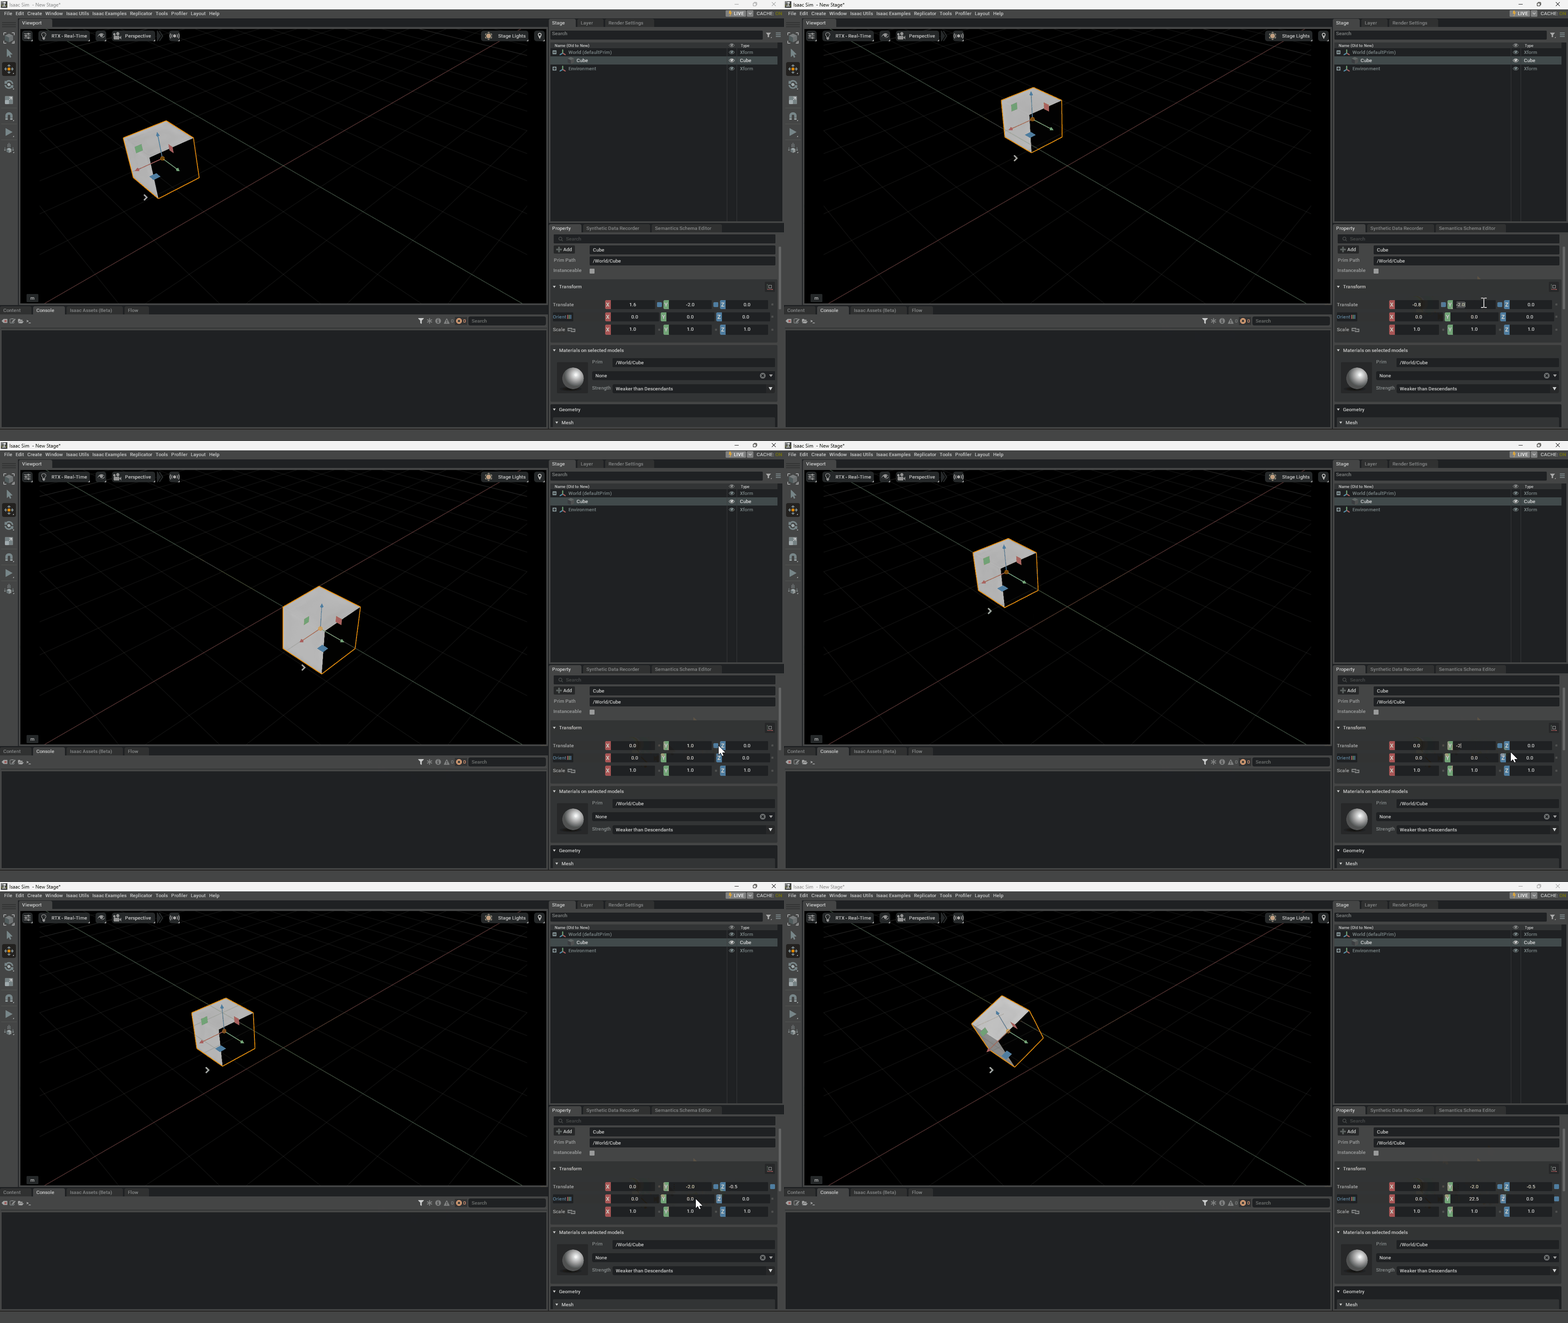
Now, practice transforming the Cube through its Property panel:
Select the Cube to populate the Property panel.
In the Transform > Translate field, click and drag the X value left and right to move the Cube along the X-Axis.
Double Click the Y value and type “1” to move the Cube to Y=1.
Click the blue square all the way to the right of the Z value to reset the Translate value to its default setting (0,0,0).
Reset the Rotate and Scale values to their default setting.
Set the Cube Translate to {X: 0, Y: -2, Z: -0.5} and Rotate to {X: 0, Y: 22.5, Z: 0} by double-clicking on the corresponding X, Y, Z values and typing in the values.
Toggling Local and World Coordinates#
Press “W” multiple times to toggle between Move Global and Move Local.
Press “E” multiple times to toggle between Rotate Global and Rotate Local.
Pressing and holding the Move/Rotate Icons in the Toolbar can also be used to select the coordinate system.
Each Toolbar Icon turns Orange when the Local coordinate system is active.
Using the Stage and Properties Panels#
Objects are directly selectable in the Viewport or in the Stage, which is the Panel at the top right of the Workspace. The Stage is a powerful tree-based widget for organizing and structuring all the content in an Isaac Sim scene.
There is a lot to learn about this tool; these steps take you through the basics:
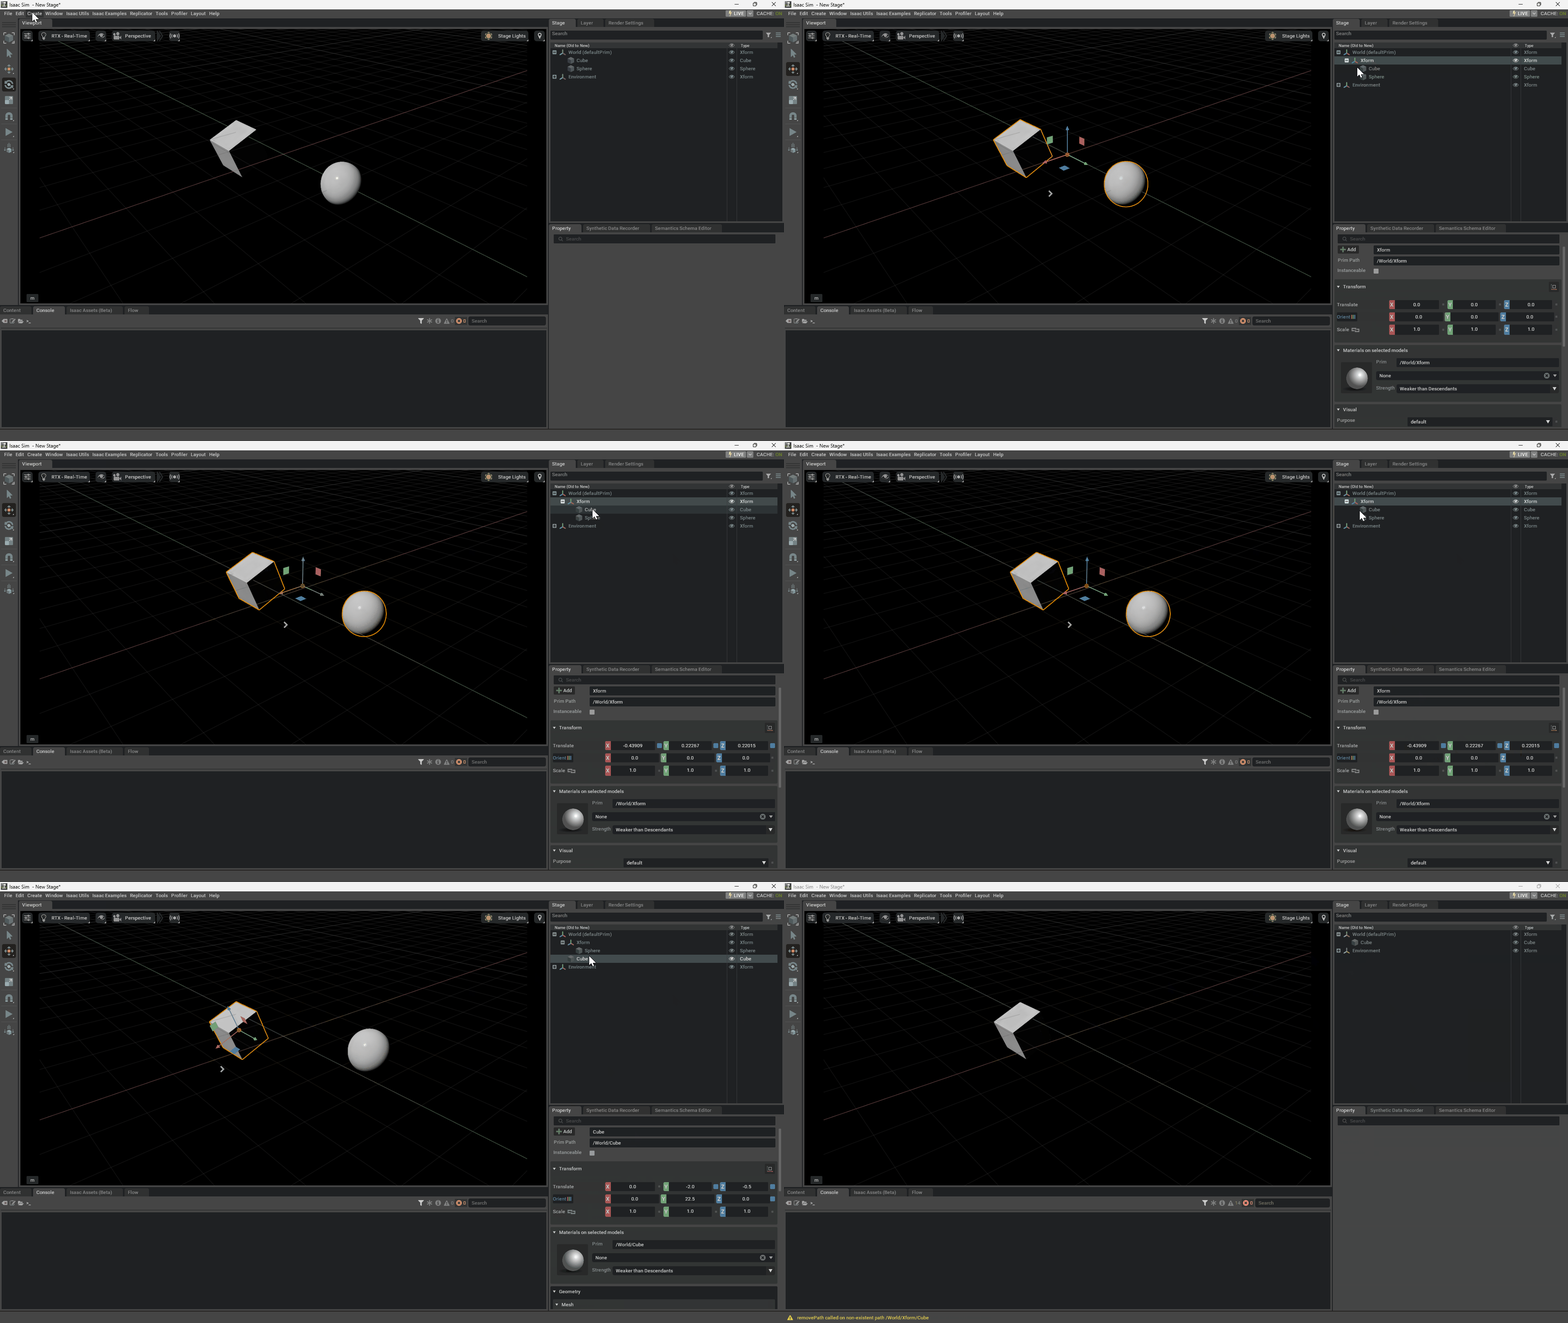
Go to the top Menu Bar and click Create > Xform. Verify that there is an empty Xform prim in the Stage panel, nested under World.
Select the Cube line item from Stage, and drag and drop it onto the Xform. Then, select the Sphere and drag and drop it onto the Xform as well.
Nothing changes in the Viewport, but you have just created a Parent-Child relationship between the Xform, the Sphere, and the Cube.
Select the Xform, press “W” to enable the Move Gizmo, then grab and move the Xform.
Moving the Xform moves both the Sphere and the Cube, because child objects inherit the transforms of their parents.
This is an important concept for how Omniverse Isaac Sim constructs articulated objects, such as Robots.
Select just the Cube. Notice that its Transform Properties in the Property panel are the same, no matter how you move the Xform.
An object’s Transform Properties are a local transform, relative to its Parent.
Unparent the Cube, by selecting the Cube from the Stage, then dragging and dropping it onto the World line item. Right-click on the Xform and click Delete.
Notice that the Cube’s Transform Properties now reflects the world transform.
Notice how the sphere is deleted as well because it is a child of the Xform.
We have been exploring the Transform Properties inside the Property panel. However, this panel has a lot of useful UI inputs for interfacing directly with geometric, material, visual, and USD properties.
Select the
Cubefrom the Stage and Scroll through its Property panel. Clicking the header of each sub-panel collapses or shows it.Select
defaultLightfrom the Stage. Scroll through its Property panel and note the different information it shows compared to the Cube.Select the
World (defaultPrim)from the Stage and note how its Property panel differs.
The data in each Property panel differs because World (defaultPrim), Cube, and
defaultLight are all different data types in Isaac Sim (see the USD Prim
for more details). As noted in the right-most column of the Stage, the World is an Xform, the
defaultLight is a DistantLight, and the Cube is a Cube.
The details of these different data structures are covered in a later tutorial.
Raw USD Properties#
The most important sub-panel in the Property panel is the Raw USD Properties sub-panel, which is always last. The Raw USD Properties sub-panel contains every active USD property for the selected object. This sub-panel is a useful reference when developing more advanced applications in Omniverse Isaac Sim.
Information in this sub-panel is ordered alphabetically.
Customizing the Workspace#
The workspace in Isaac Sim is very customizable. It is easy to resize, dock, undock, add, and remove panels in the user interface (UI).
Begin customizing the UI by adding another Viewport to the workspace:
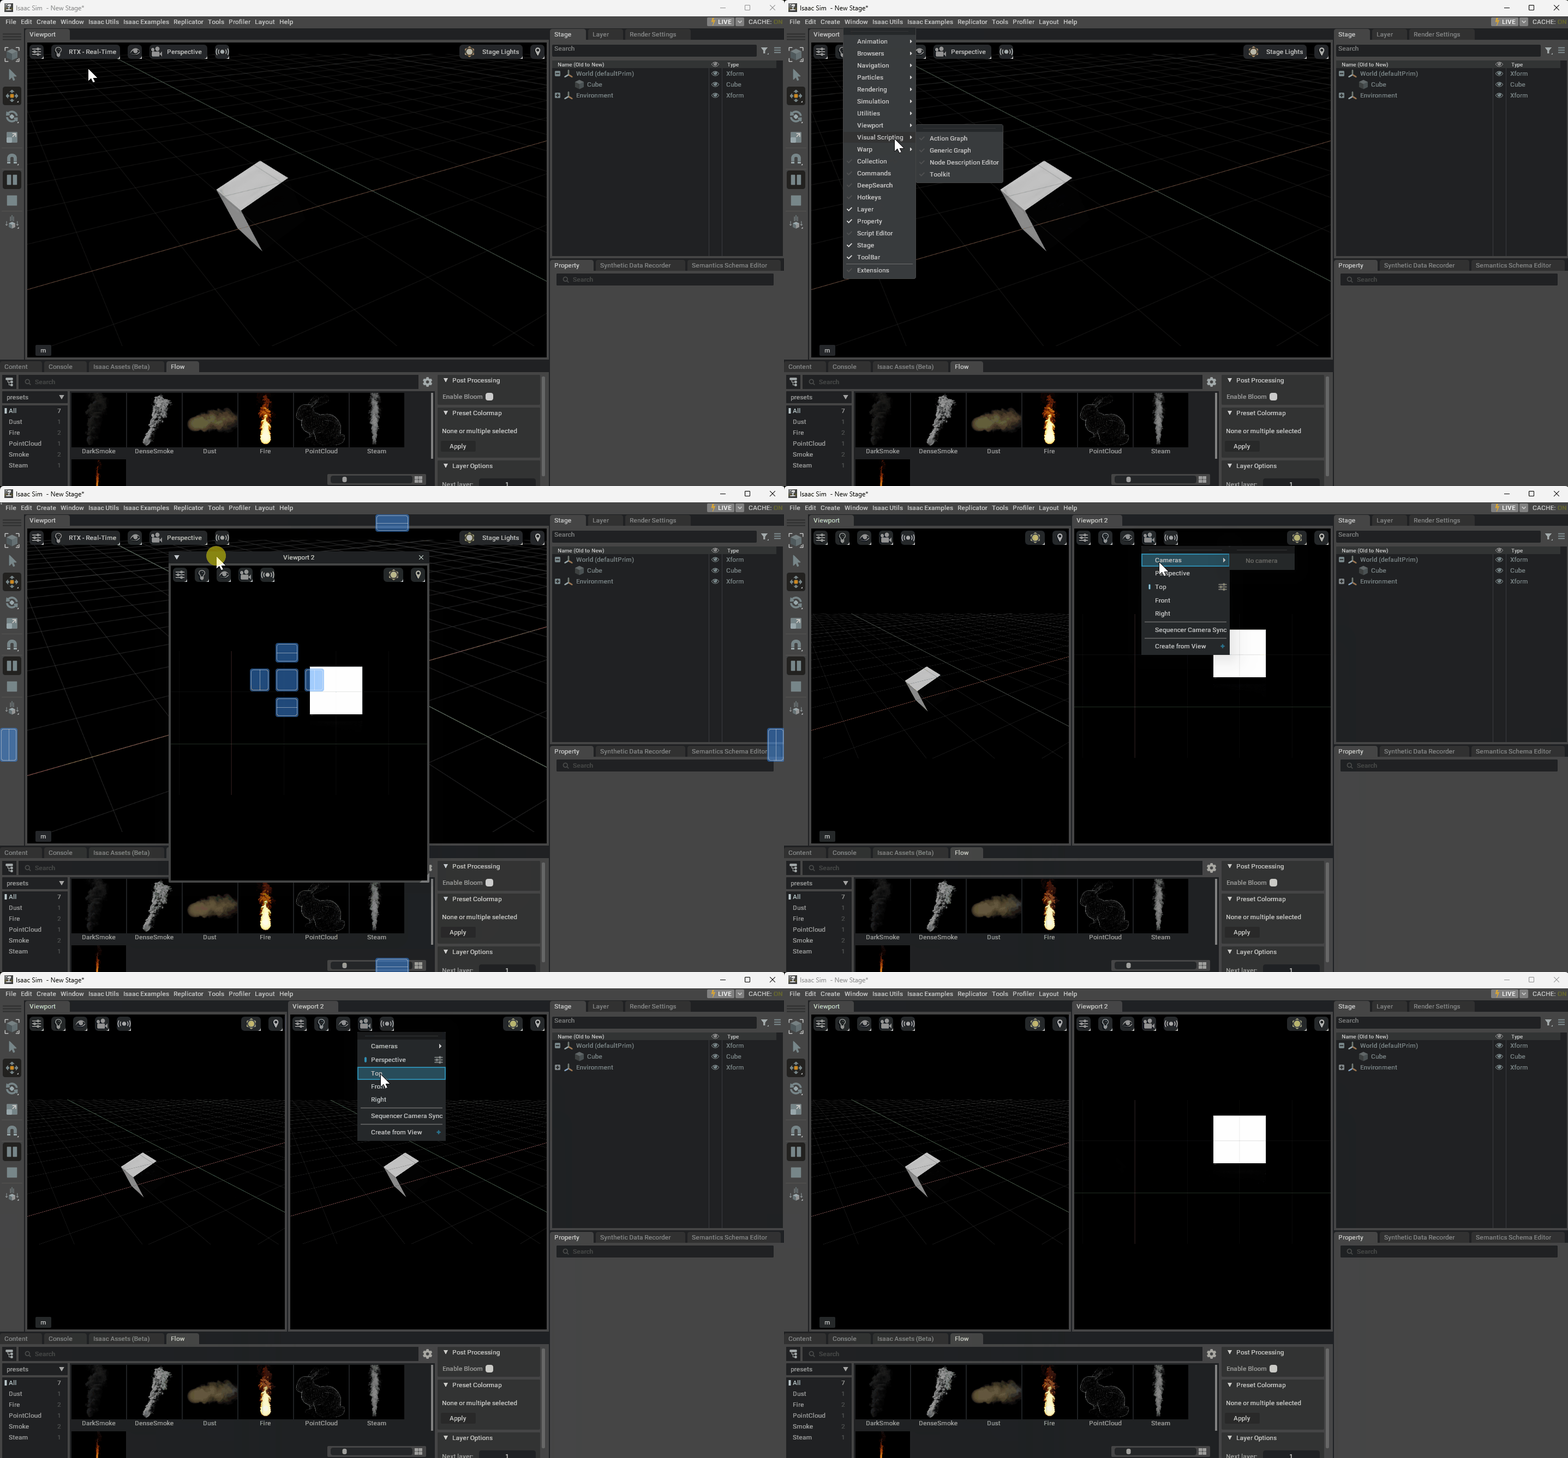
Go to the top Menu Bar and click Window > Viewport > Viewport 2 at the very bottom of the dropdown menu.
Verify that there is a new viewport called Viewport 2 floating in the workspace.
If you want to create additional viewoports, follow the Camera Inspector Extension.
Click and drag the top header of Viewport 2 to the activate the Docking widget. Drag and drop to the right of the original Viewport to place the viewports side-by-side.
Click and drag the left side of Viewport 2 to the left to make the viewports equal sizes.
In the button overlay area in Viewport 2, click the Perspective camera button in the top left and change the camera to a Top View.
To dynamically hide/reveal Viewport 2 using the Window > Viewport > Viewport 2 dropdown:
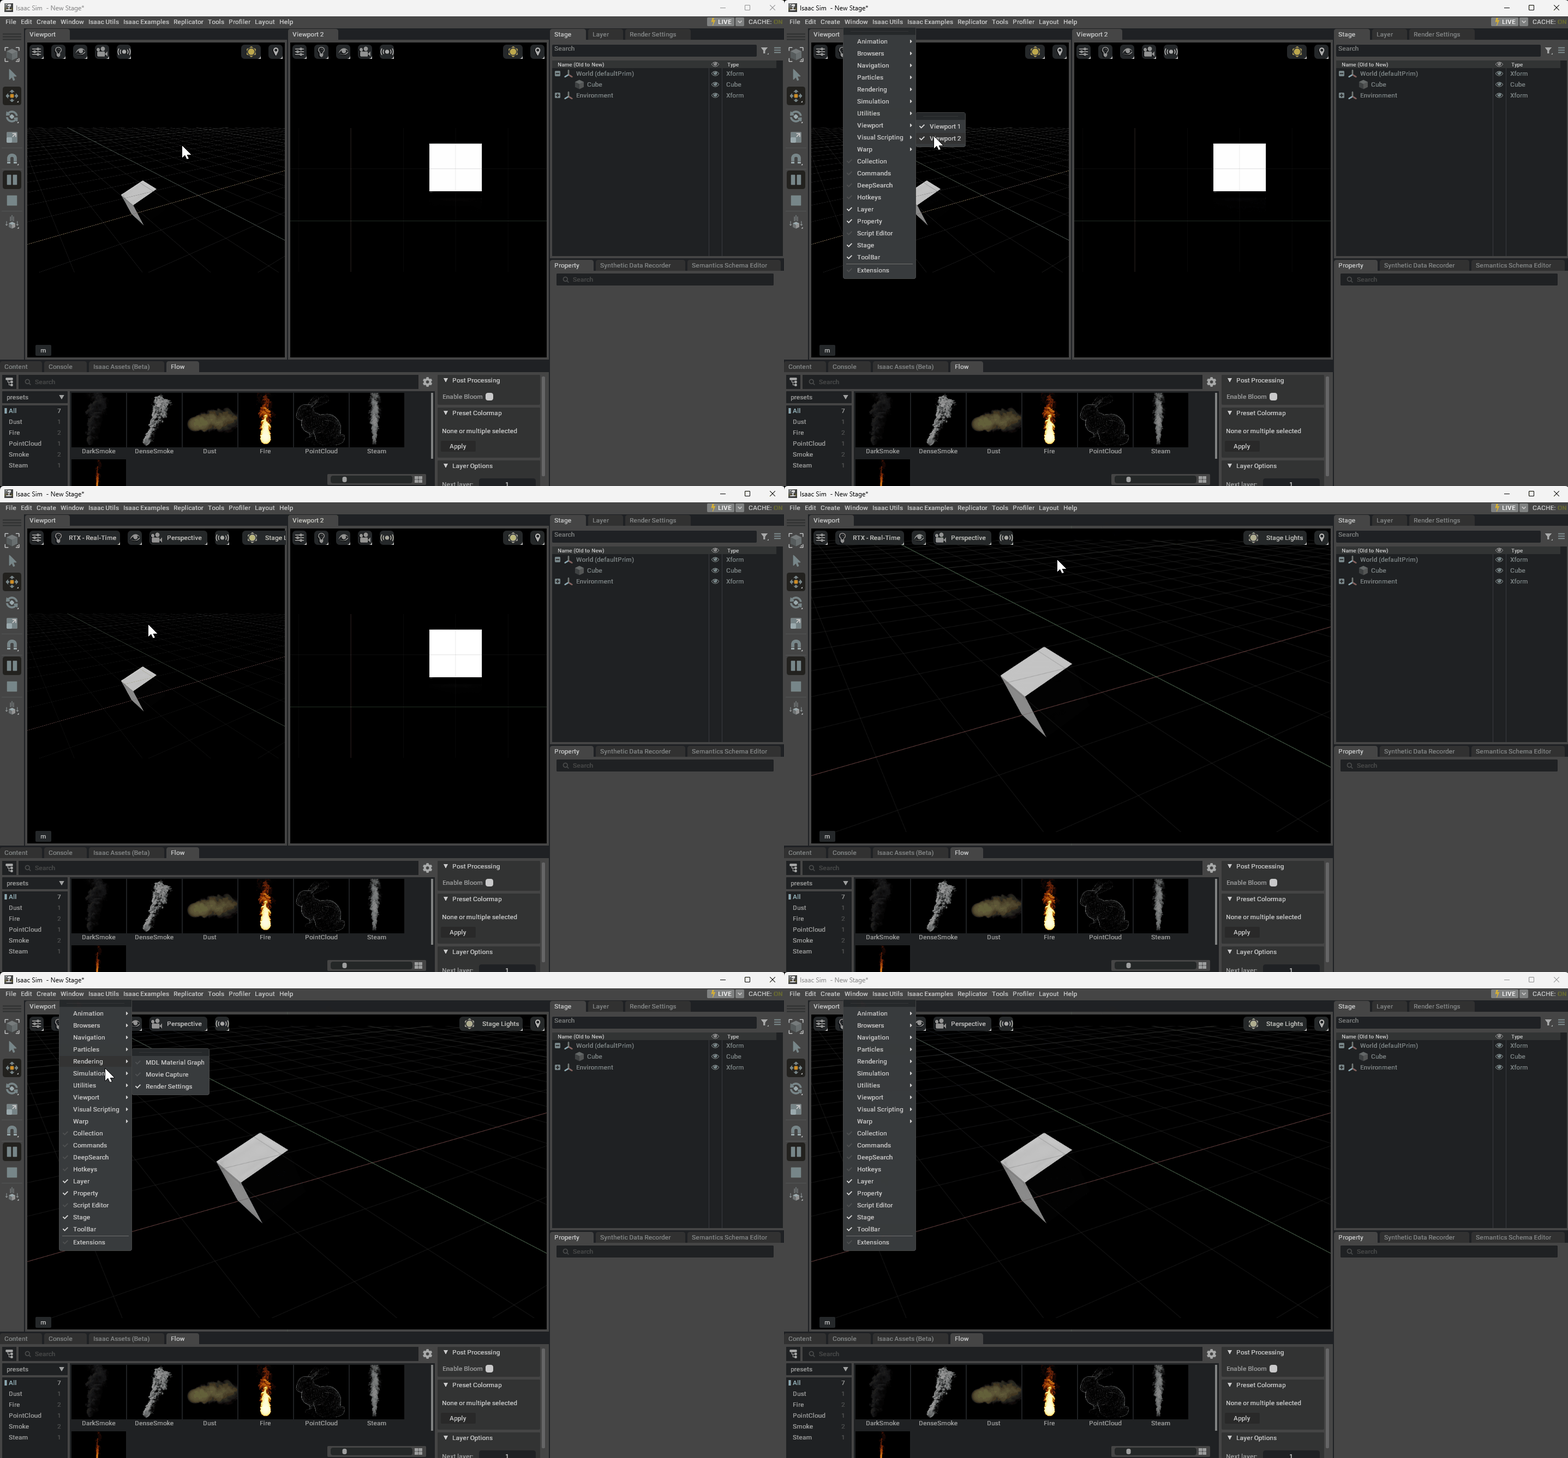
Go back to the top Menu Bar and Click Window.
Viewport 2 (with a check mark next to it).
Click Viewport 2 to hide the new viewport, and click again to turn it back on. Alternatively, click the x by the viewport tab to close it and create it using the Camera Inspector Extension.
Look at the other items in the Window dropdown. The items with check marks are already visible in the Workspace.
Click a few items off and on to see what happens in the workspace (for example, Console, Stage, Property, Profiler)
Running the Simulation#
To use any simulation features in Isaac Sim, like joints, scripting, or collision meshes, the simulation must be running.
Press the Play button in the Toolbar to begin the simulation.
After pressing it, the Play button turns into a Pause button, which can be used to stop the simulation temporarily but allow it to continue from its current state.
While the simulation is running or paused, the Stop button is also visible below the Play or Pause button. The Stop button ends the simulation and resets it, allowing it to be played again from its starting configuration.
Timeline#
Timeline is an extension that allows developers to see and modify settings for a scrollable and customizable timeline. Timeline is disabled by default, to enable it, go to Window > Extensions, type in omni.anim.window.timeline in the search bar, and click on the toggle. Then, at the bottom of the screen, the timeline widget appears.
When you press the Play button, the timeline marker begins to move, and loops over the timeline.
The simulation’s start/stop progress can also be viewed on the Timeline at the bottom of the default layout.
Summary#
This tutorial covered the following topics:
Adding Content to the Scene
Navigating the Viewport
Navigating the Stage and Properties Panels
Adding, Docking, and Removing Window Panels
Starting/Stopping the Timeline and Simulation
Next Steps#
Continue on to the next tutorial, Environment Setup, to learn more about getting the environment ready for your virtual world.
Further Learning#
For a more in-depth look at the concepts covered in this tutorial, see the following reference materials:
Adding Content to the Scene
See the User Interface Reference for an overview of menu items, UI elements, and keyboard shortcuts.
Navigating the Viewport
The video tutorial Navigation Basics in Omniverse introduces navigation and controls in Omniverse Kit application viewports. It shows the combinations of mouse, scroll wheel, and keyboard commands you can use to navigate through scenes. The Hotkeys that use Modifiers (Ctrl, Alt, Opt) may be different for Linux than this Windows tutorial.
The following table highlights the most commonly used Inputs for Viewport Control and Navigation. We recommend getting comfortable with these hotkey combinations to effectively navigate the Viewport.
Input |
Result |
|---|---|
LMB |
Select
|
ESCAPE |
Deselect
|
Select + ‘F’ |
Zoom Camera to Selected Object(s)
|
Deselect + ‘F’ |
Zoom Camera to All
|
LMB + ‘OPT’ |
Orbit about the Viewport Center
|
RMB + ‘OPT’ |
Zoom
|
Scroll Wheel |
Zoom
|
MMB |
Pan
|
RMB + ‘W’ |
Move Forward
|
RMB + ‘S’ |
Move Backward
|
RMB + ‘A’ |
Move Left
|
RMB + ‘D’ |
Move Right
|
RMB + ‘W/S/A/D’ + SHIFT |
Move at Double Speed
|
RMB + ‘W/S/A/D’ + CTRL |
Move at Half Speed
|
See the Viewport Controls Cheat Sheet for the full list of input mappings.
Navigating the Stage and Property Panels
For a more in-depth look at USD types, see the tutorial Working with USD Python Libraries.
Using the Extension Manager
The video tutorial Overview of Omniverse Kit Extension Manager is an in-depth walkthrough for effectively browsing, searching for, autoloading, and enabling/disabling extensions in the Extension Manager.
