URDF Importer#
About#
Note
Starting from the Isaac Sim 2023.1.0 release, the URDF importer has been open-sourced. Source code and information for contributing can be found at our github repo.
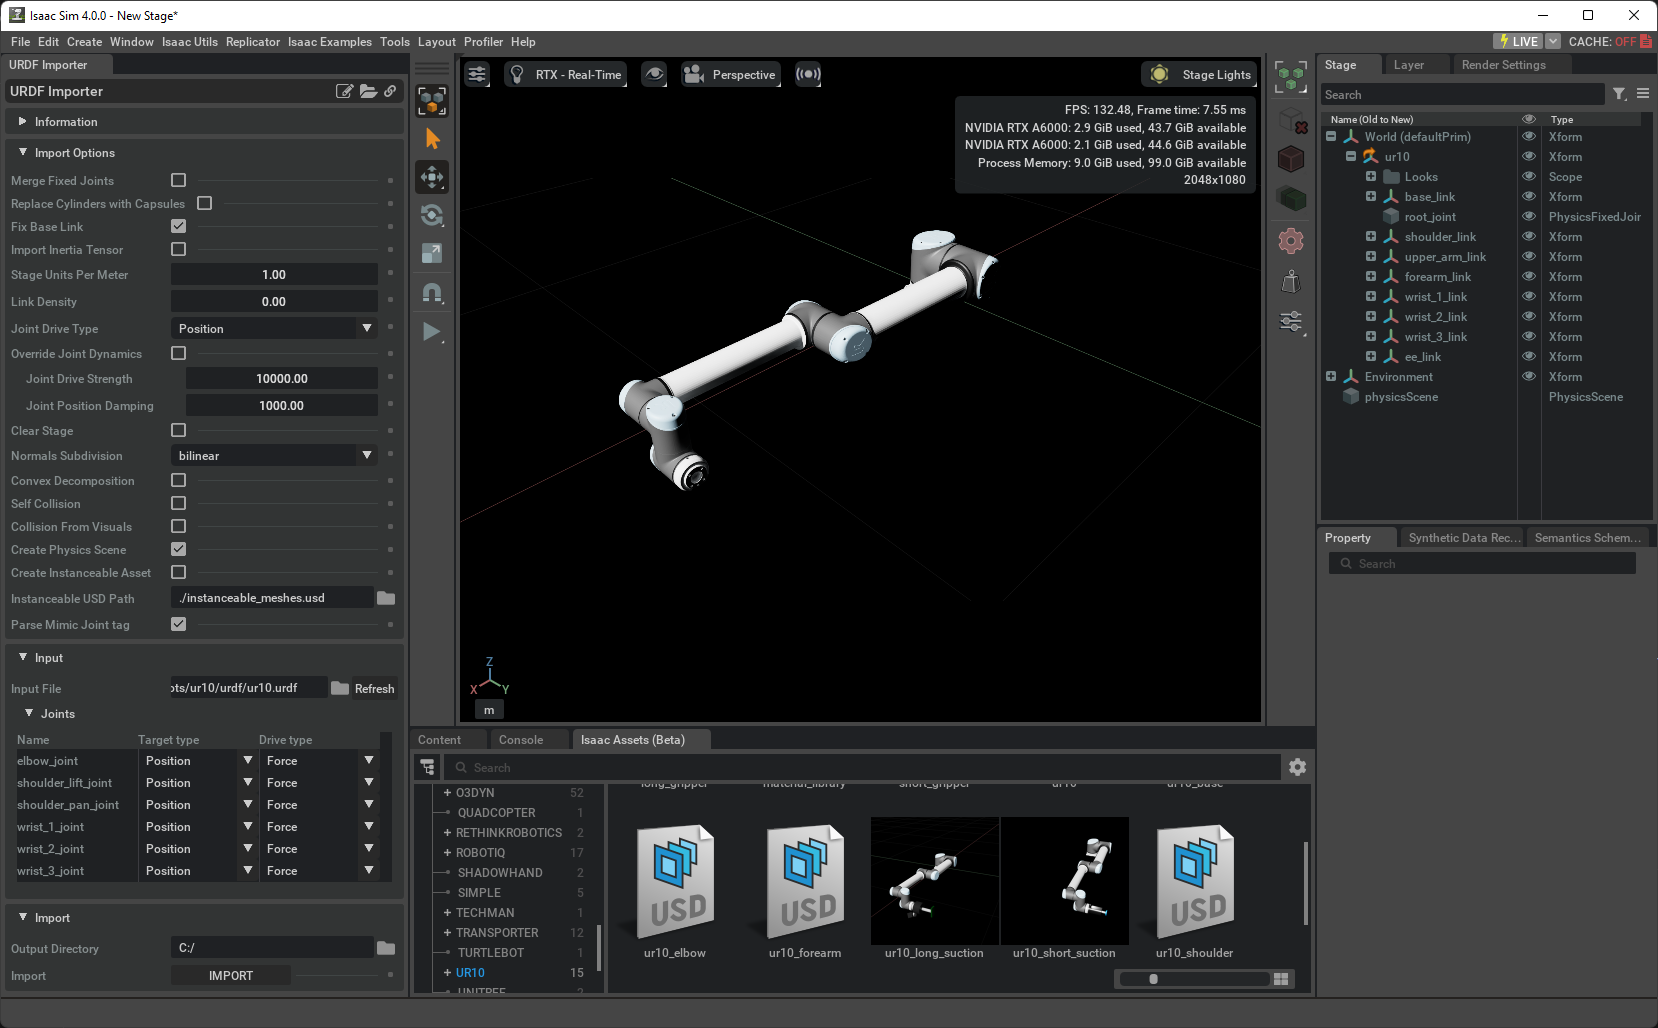
The URDF Importer Extension is used to import URDF representations of robots. Unified Robot Description Format (URDF), is an XML format for representing a robot model in ROS.
To access this Extension, go to the top menu bar and click Isaac Utils > Workflows > URDF Importer.
This extension is enabled by default. If it is ever disabled, it can be re-enabled from the Extension Manager
by searching for omni.importer.urdf.
Conventions#
Warning
To comply with USD prim name conventions, special characters in link or joint names are not supported and will be replaced with an underscore. In the event that the name starts with an underscore due to the replacement, an a is pre-pended. It is recommended to make these name changes in the urdf directly.
See the Isaac Sim Conventions documentation for a complete list of Omniverse Isaac Sim conventions.
User Interface#
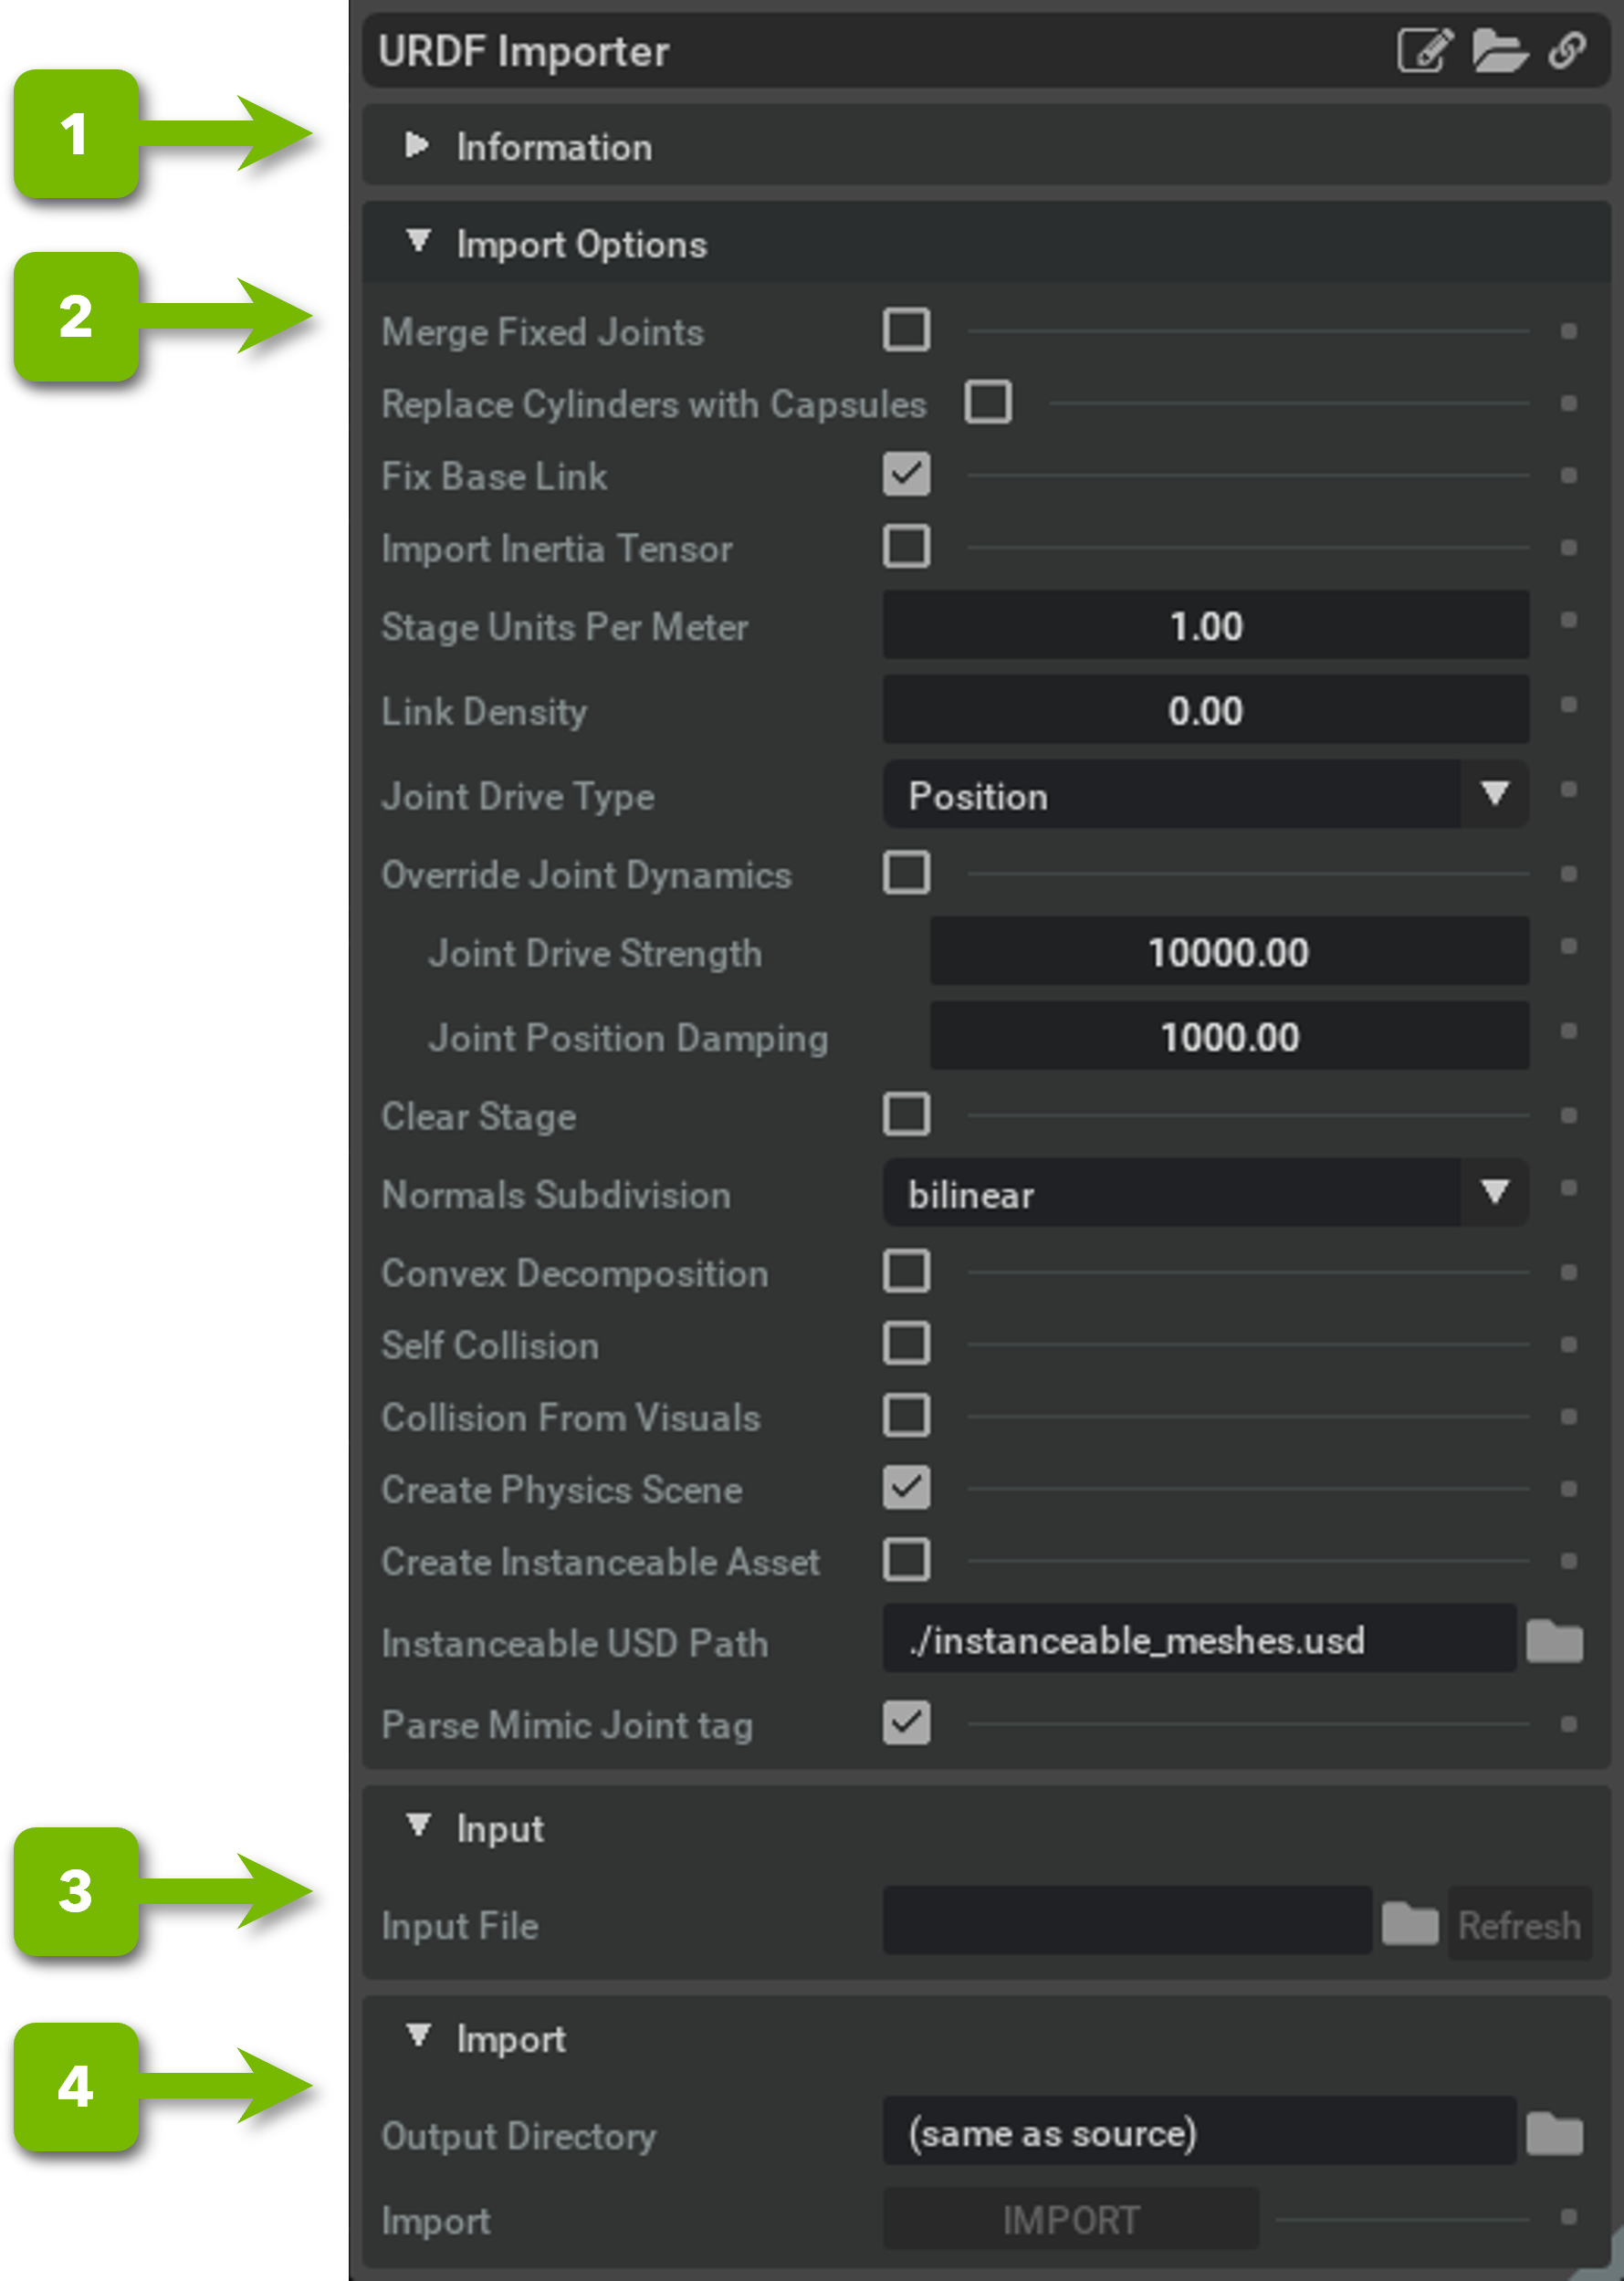
Ref # |
Item |
Description |
|---|---|---|
1 |
Information |
This panel has useful information about this extension.
|
2 |
Import Options |
This panel has utility functions for testing the gains being set for the Articulation. See Import Options below for full details.
|
3 |
Input |
This panel has the Input Options (By default through a URDF File).
|
4 |
Import |
This panel holds the destination path and import button.
|
— |
|
Path to save converted URDF.
|
— |
|
Button to import and save out the URDF as USD.
|
Import Options#
Item |
Description |
|---|---|
Merge Fixed Joints |
Consolidate links that are connected by fixed joints, so that an articulation is only applied to joints that move. Merged frames will still appear as children of the parent Frame they were merged to.
|
Replace Cylinders with Capsules |
Replaces all Cylinder primitibes (that would have been converted to meshes instead) with Capsules primitives.
|
Fix Base Link |
When checked, the robot will have its base fixed where it’s placed in world coordinates.
|
Import Inertia Tensor |
Check to load inertia from urdf directly. If the urdf does not specify an inertia tensor, identity will be used and scaled by the scaling factor. If unchecked, Physx will compute it automatically. non-diagonal Inertia matrix components will be used to compute a principal axis representation along with a diagonal.
|
Stage Units Per Meter |
Omniverse Kit default length unit is centimeters. Here you can set the scaling factor to match the unit used in your URDF. Currently, the URDF importer only supports uniform global scaling. Applying different scaling for different axes and specific mesh parts (i.e. using the
scale parameter under the URDF mesh label) will be available in future releases. If you have a scale parameter in your URDF, you may need to manually adjust the other values in the URDF so that all parameters are in the same unit. |
Link Density |
If a link does not have a given mass, uses this density (in Kg/m^3) to compute mass based on link volume. A value of 0.0 can be used to tell the physics engine to automatically compute density as well.
|
Joint Drive Type |
Default Joint drive type, Values can be None, Position, and Velocity. This can also be changed individually per joint prior to import.
|
Override Joint Dynamics |
If checked, uses the Joint drive strength and damping regardless of values provided in the URDF.
|
Joint Drive Strength |
The drive strength is the joint stiffness for position drive, or damping for velocity driven joints
|
Joint Position Drive Damping |
If the drive type is set to position this is the default damping value used.
|
Clear Stage |
When checked, cleans the stage before loading the new URDF, otherwise loads it on current open stage at position (0,0,0)
|
Normals Subdivision |
Mesh Normal subdivision scheme. If the imported mesh contains authored Normals, select none to avoid overriding them.
|
Convex Decomposition |
If Checked, the collision objects will be made a set of Convex meshes to better match the visual asset. Otherwise a convex hull over the Collision objects will be used.
|
Self Collision |
Enables self collision between adjacent links. It may cause instability if the collision meshes are intersecting at the joint.
|
Collision From Visuals |
If Collisions are not authored as their own mesh, check this to use the visual meshes to define the colliders.
|
Create Physics Scene |
Creates a default physics scene on the stage. Because this physics scene is created outside of the robot asset, it won’t be loaded into other scenes composed with the robot asset.
|
Create Instanceable Asset |
Select this to create an asset that has instanceable Meshes. This is useful for scenes that contain multiple instances of the same robot (e.g. Reinforcement Learning tasks).
|
Parse Mimic Joint Tag |
If Selected, the Mimic tag will be parsed on import, otherwise the joint will be imported, but not added as a Mimic.
|
Note
It is recommended to set Self Collision to false unless you are certain that links on the robot are not self colliding
Note
Known Issue: If more than one asset in URDF contains the same material name, only one material will be created, regardless if the parameters in the material are different (e.g two meshes have materials with the name “material”, one is blue and the other is red. both meshes will be either red or blue.). This also applies for textured materials.
Note
You must have write access to the output directory used for import, it will default to the current open stage, change this as necessary.
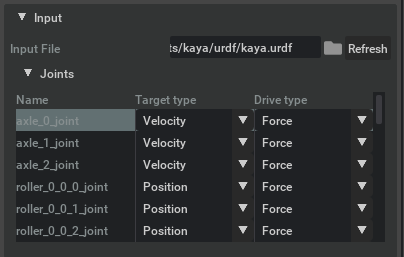
Per-joint Drive settings#
Once you select the source, a list of all robot joints display on the screen, allowing you to select the joint drive type and mode that suits each joint better. For example - A mobile base co-joined with a 6-DOF arm would have Velocity driven wheel joints, and Position-based arm joints.
Import Workflow#
Select the Import Options that better match your needs
Select the input to be used for conversion to USD
Review Joints and Drives
Import
Importing URDF from a ROS2 Node#
To enable this feature enable the extension omni.isaac.ros2_bridge.robot_description. This will include a change in the URDF importer UI that allows to switch between picking a urdf file or a ROS2 Node containing a robot description.
To select the appropriate node, type in the name of the node in the Node text box. If changes were made to the import settings, or to the published node hit Refresh. If the node name is in
Note
This feature will only be available when the ROS2 bridge is enabled.

Robot Properties#
There might be many properties you want to tune on your robot. These properties can be spread across many different Schemas and APIs.
The general steps of getting and setting a parameter are:
Find which API is the parameter under. Most common ones can be found in the Pixar USD API.
Get the prim handle that the API is applied to. For example, Articulation and Drive APIs are applied to joints, and MassAPIs are applied to the rigid bodies.
Get the handle to the API. From there on, you can Get or Set the attributes associated with that API.
For example, if we want to set the wheel’s drive velocity and the actuators’ stiffness, we need to find the DriveAPI:
 1# get handle to the Drive API for both wheels
 2left_wheel_drive = UsdPhysics.DriveAPI.Get(stage.GetPrimAtPath("/carter/chassis_link/left_wheel"), "angular")
 3right_wheel_drive = UsdPhysics.DriveAPI.Get(stage.GetPrimAtPath("/carter/chassis_link/right_wheel"), "angular")
 4
 5# Set the velocity drive target in degrees/second
 6left_wheel_drive.GetTargetVelocityAttr().Set(150)
 7right_wheel_drive.GetTargetVelocityAttr().Set(150)
 8
 9# Set the drive damping, which controls the strength of the velocity drive
10left_wheel_drive.GetDampingAttr().Set(15000)
11right_wheel_drive.GetDampingAttr().Set(15000)
12
13# Set the drive stiffness, which controls the strength of the position drive
14# In this case because we want to do velocity control this should be set to zero
15left_wheel_drive.GetStiffnessAttr().Set(0)
16right_wheel_drive.GetStiffnessAttr().Set(0)
Alternatively you can use the Omniverse Commands Tool Extension to change a value in the UI and get the associated Omniverse command that changes the property.
Note
The drive stiffness parameter should be set when using position control on a joint drive.
The drive damping parameter should be set when using velocity control on a joint drive.
A combination of setting stiffness and damping on a drive will result in both targets being applied, this can be useful in position control to reduce vibrations.
Tutorials & Examples#
The following tutorials and examples showcase how to best use this extension:
Tutorials#
Importing from a ROS2 Node#
Note
These tutorials are only supported on Linux.
Prerequisites
A ROS 2 workspace with a robot description (e.g. Universal Robots ROS2 Description ).
For ROS 2 Humble, follow the tutorials on how to set up a ROS2 workspace (Humble) and include a robot description like the one in this example, along with all its dependencies.
Warning
ROS 2 Foxy is no longer tested or supported. This may result in potential issues when ROS 2 Foxy is used in conjunction with Isaac Sim 4.2 or later.
For ROS 2 Foxy, follow these steps:
sudo apt install ros-foxy-ur-description
sudo apt install ros-foxy-ur-robot-driver
Next, rebuild the ROS 2 workspace with Python 3.10.
Steps
- Terminal 1
Source ROS 2
Launch a transform publisher for the robot description node (e.g.
ros2 launch ur_description view_ur.launch.py ur_type:=ur10e)
- Terminal 2
Source ROS 2
Pick the ROS 2 node name for the node just created with
ros2 node list. (e.g.robot_state_publisher)
- Terminal 3
Source ROS 2
Start isaac sim
Enable the extension
omni.isaac.ros2_bridge.robot_descriptionOpen the URDF Importer using the Isaac Utils > Workflows > URDF Importer menu
In the Input section, check the Use ROS2 Node
Put the node name in the text box
Define an output directory
Import
Extra steps to try:
- Terminal 1
Stop the publisher, change it to another robot and start service again (e.g.
ros2 launch ur_description view_ur.launch.py ur_type:=ur3)
- Terminal 3
Click on the Refresh button
Change the output directory
Import
Examples#
Carter Example: Isaac Examples > Import Robot > Carter URDF
Franka Example: Isaac Examples > Import Robot > Franka URDF
Kaya Example: Isaac Examples > Import Robot > Kaya URDF
UR10 Example: Isaac Examples > Import Robot > UR10 URDF
Note
For these examples, please wait for materials to get loaded. You can track progress on the bottom right corner of the UI.
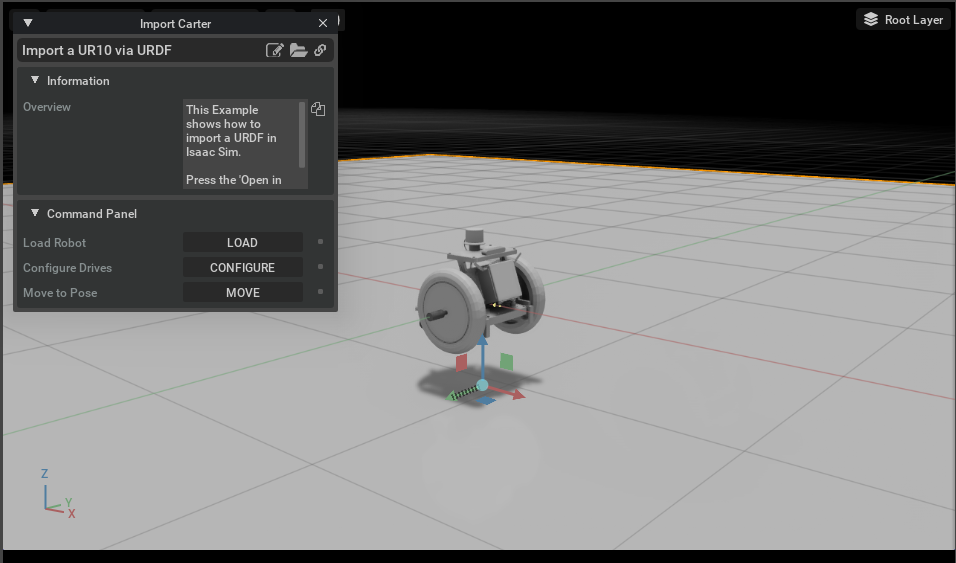
Carter URDF Example#
To run the Example:
Go to the top menu bar and click Isaac Examples > Import Robots > Carter URDF.
Press the
Load Robotbutton to import the URDF into the stage, add a ground plane, add a light, and a physics scene.Press the
Configure Drivesbutton to configure the joint drives and allow the rear pivot to spin freely.Press the Open Source Code button to view the source code. The source code illustrates how to import and integrate the robot using the Python API.
Press the
PLAYbutton to begin simulating.Press the
Move to Posebutton to make the robot drive forward.
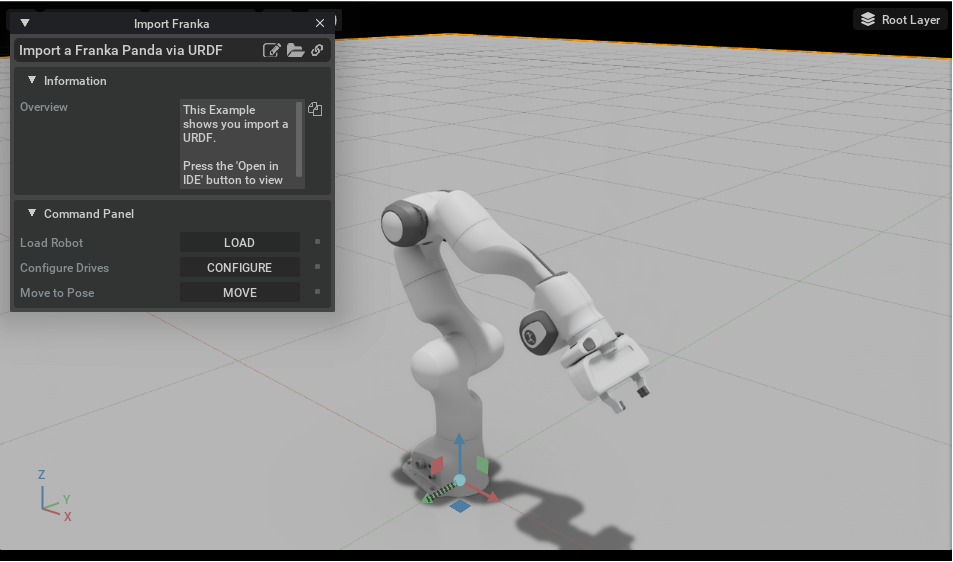
Franka URDF Example#
Go to the top menu bar and click Isaac Examples > Import Robots > Franka URDF.
Press the
Load Robotbutton to import the URDF into the stage, add a ground plane, add a light, and a physics scene.Press the
Configure Drivesbutton to configure the joint drives. This sets each drive stiffness and damping value.Press the Open Source Code button to view the source code. The source code illustrates how to import and integrate the robot using the Python API.
Press the
PLAYbutton to begin simulating.Press the
Move to Posebutton to make the robot move to a home/rest position.
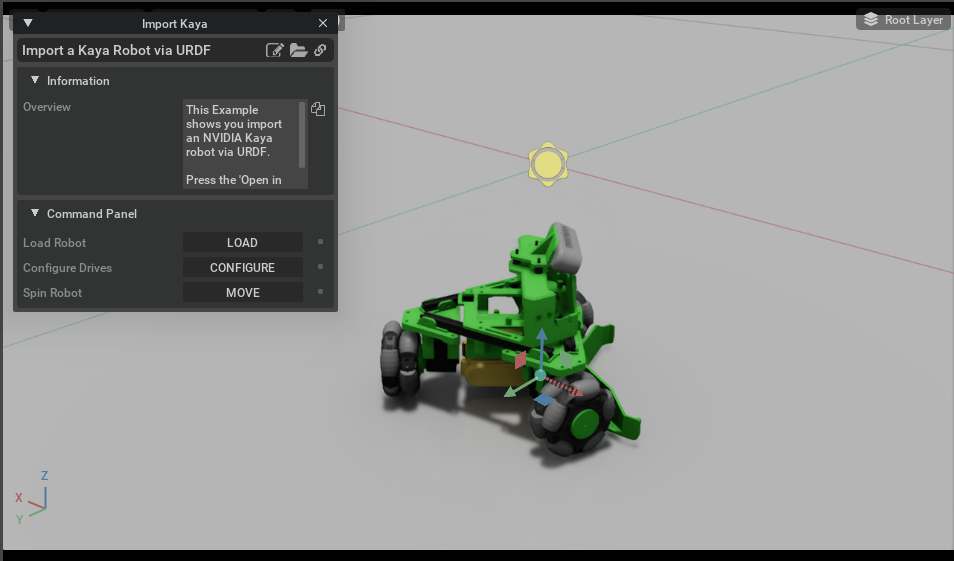
Kaya URDF Example#
Go to the top menu bar and click Isaac Examples > Import Robots > Kaya URDF.
Press the
Load Robotbutton to import the URDF into the stage, add a ground plane, add a light, and a physics scene.Press the
Configure Drivesbutton to configure the joint drives. This sets the drive stiffness and damping value of each wheel, sets all of its rollers as freely rotating.Press the Open Source Code button to view the source code. The source code illustrates how to import and integrate the robot using the Python API.
Press the
PLAYbutton to begin simulating.Press the
Move to Posebutton to make the robot rotate in place.
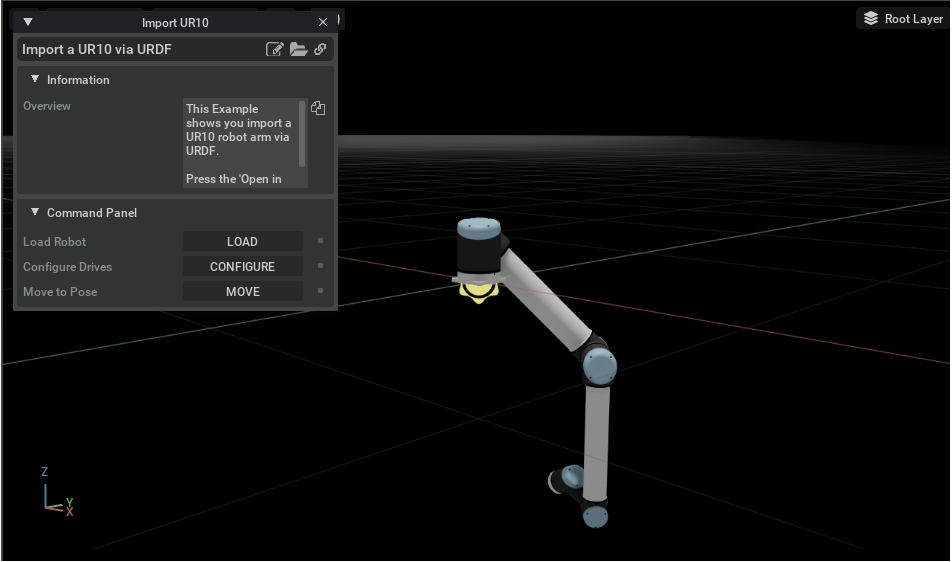
UR10 URDF Example#
Go to the top menu bar and click Isaac Examples > Import Robots > Kaya URDF.
Press the
Load Robotbutton to import the URDF into the stage, add a ground plane, add a light, and a physics scene.Press the
Configure Drivesbutton to configure the joint drives. This sets each drive stiffness and damping value.Press the Open Source Code button to view the source code. The source code illustrates how to import and integrate the robot using the Python API.
Press the
PLAYbutton to begin simulating.Press the
Move to Posebutton to make the robot move to a home/rest position.
