OmniGraph: Pick-and-Place Controller Node#
Learning Objectives#
This tutorial shows how to use Omniverse Isaac Sim OmniGraph Pick-and-Place Controller node to build a pick and place task via visual scripting. After this tutorial, you will better understand OmniGraph visual scripting principles, including how to Read Prim Attributes, Make Arrays, and actuate robots with included controller nodes.
10-15 Minute Tutorial
Getting Started#
Prerequisites
Review the GUI Tutorial series, specifically OmniGraph, prior to beginning this tutorial.
Adding the USD Assets#
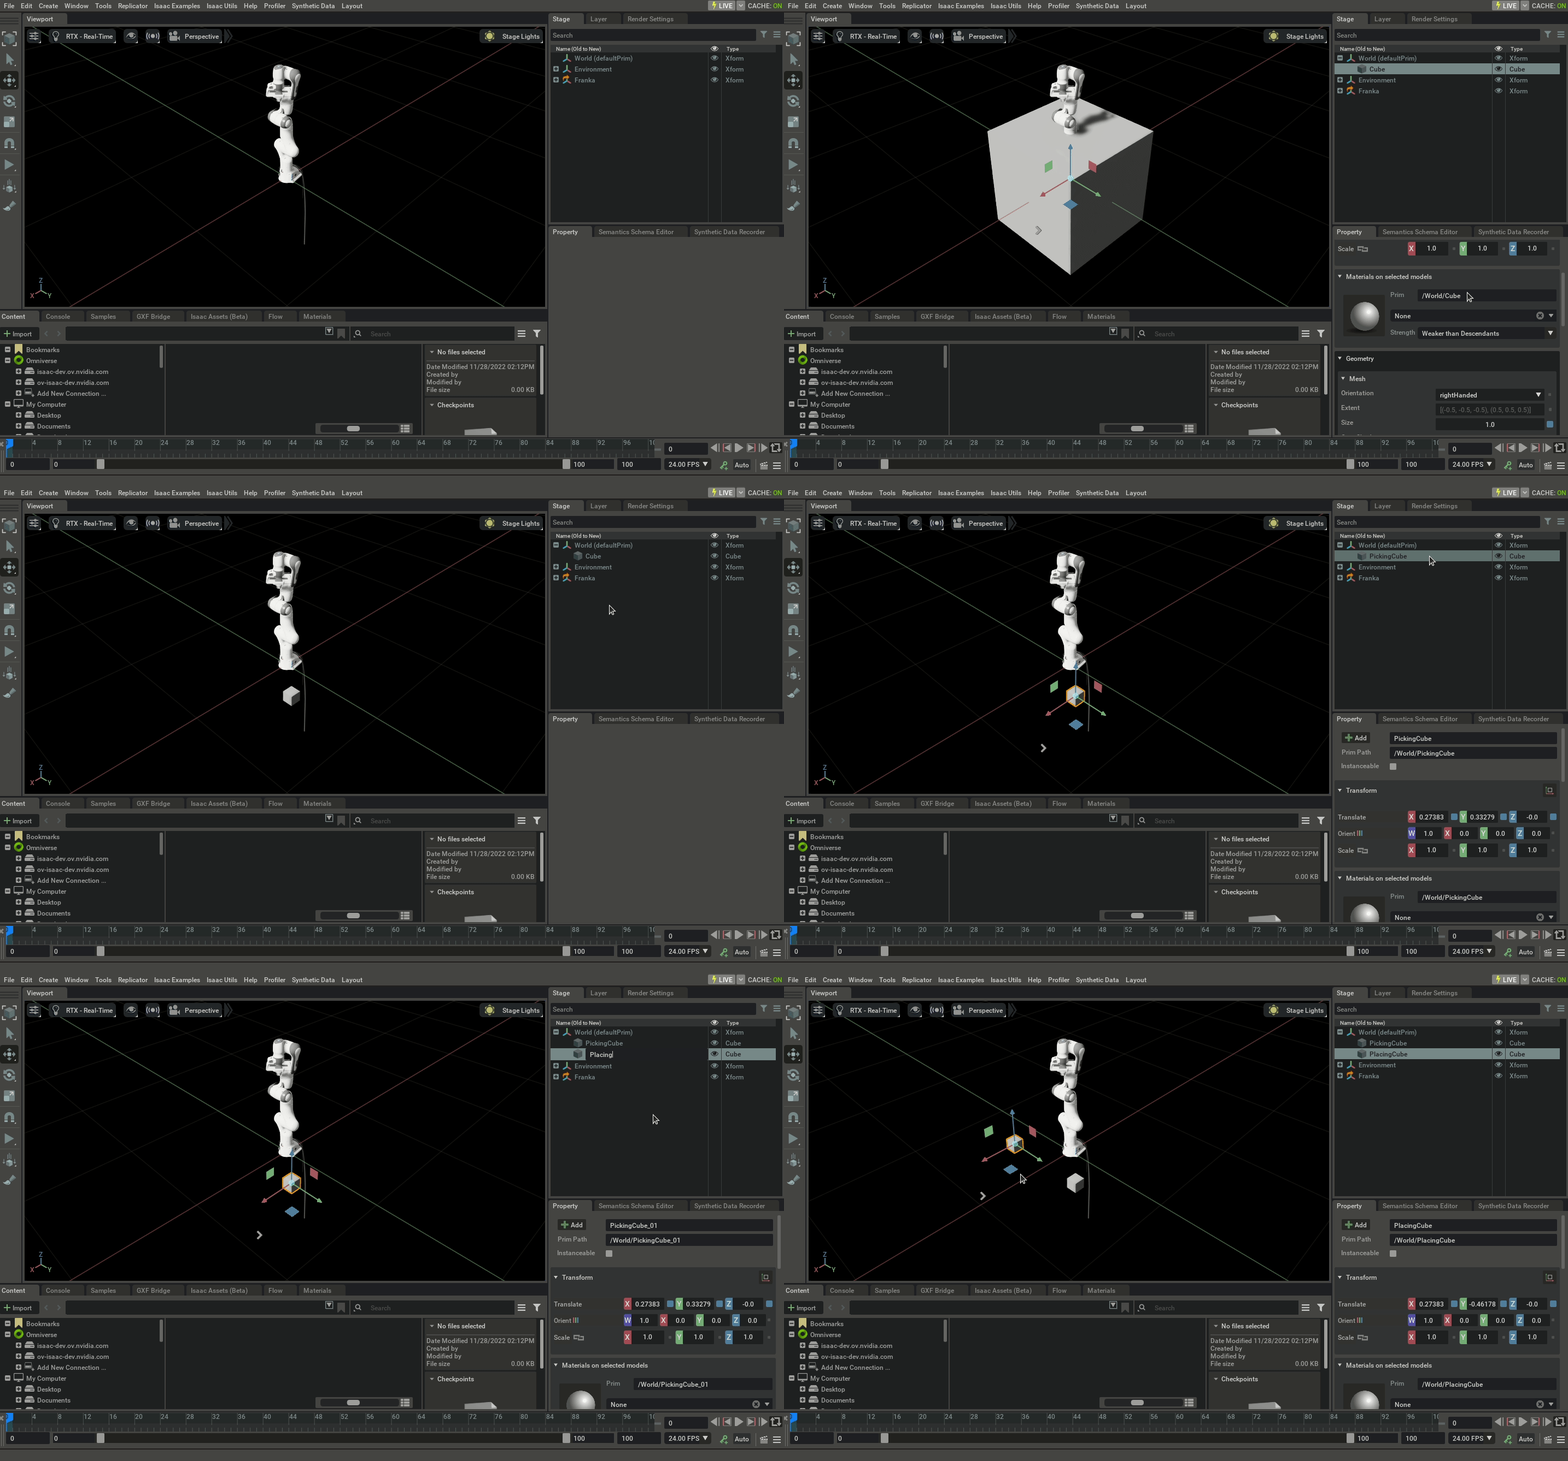
Begin by adding a Franka manipulator and two cubes to the scene:
Add the Franka asset from the Create > Isaac > Robots > Franka menu.
Add two cubes from the Create > Shape > Cube.
Resize as needed, and rename to
PickingCubeandPlacingCube.Move the
PickingCubeandPlacingCubeto a desired picking and placing location within reach of the robot.
Omnigraph Setup#
Now lets set up the OmniGraph to make the robot execute a Pick-and-Place action:
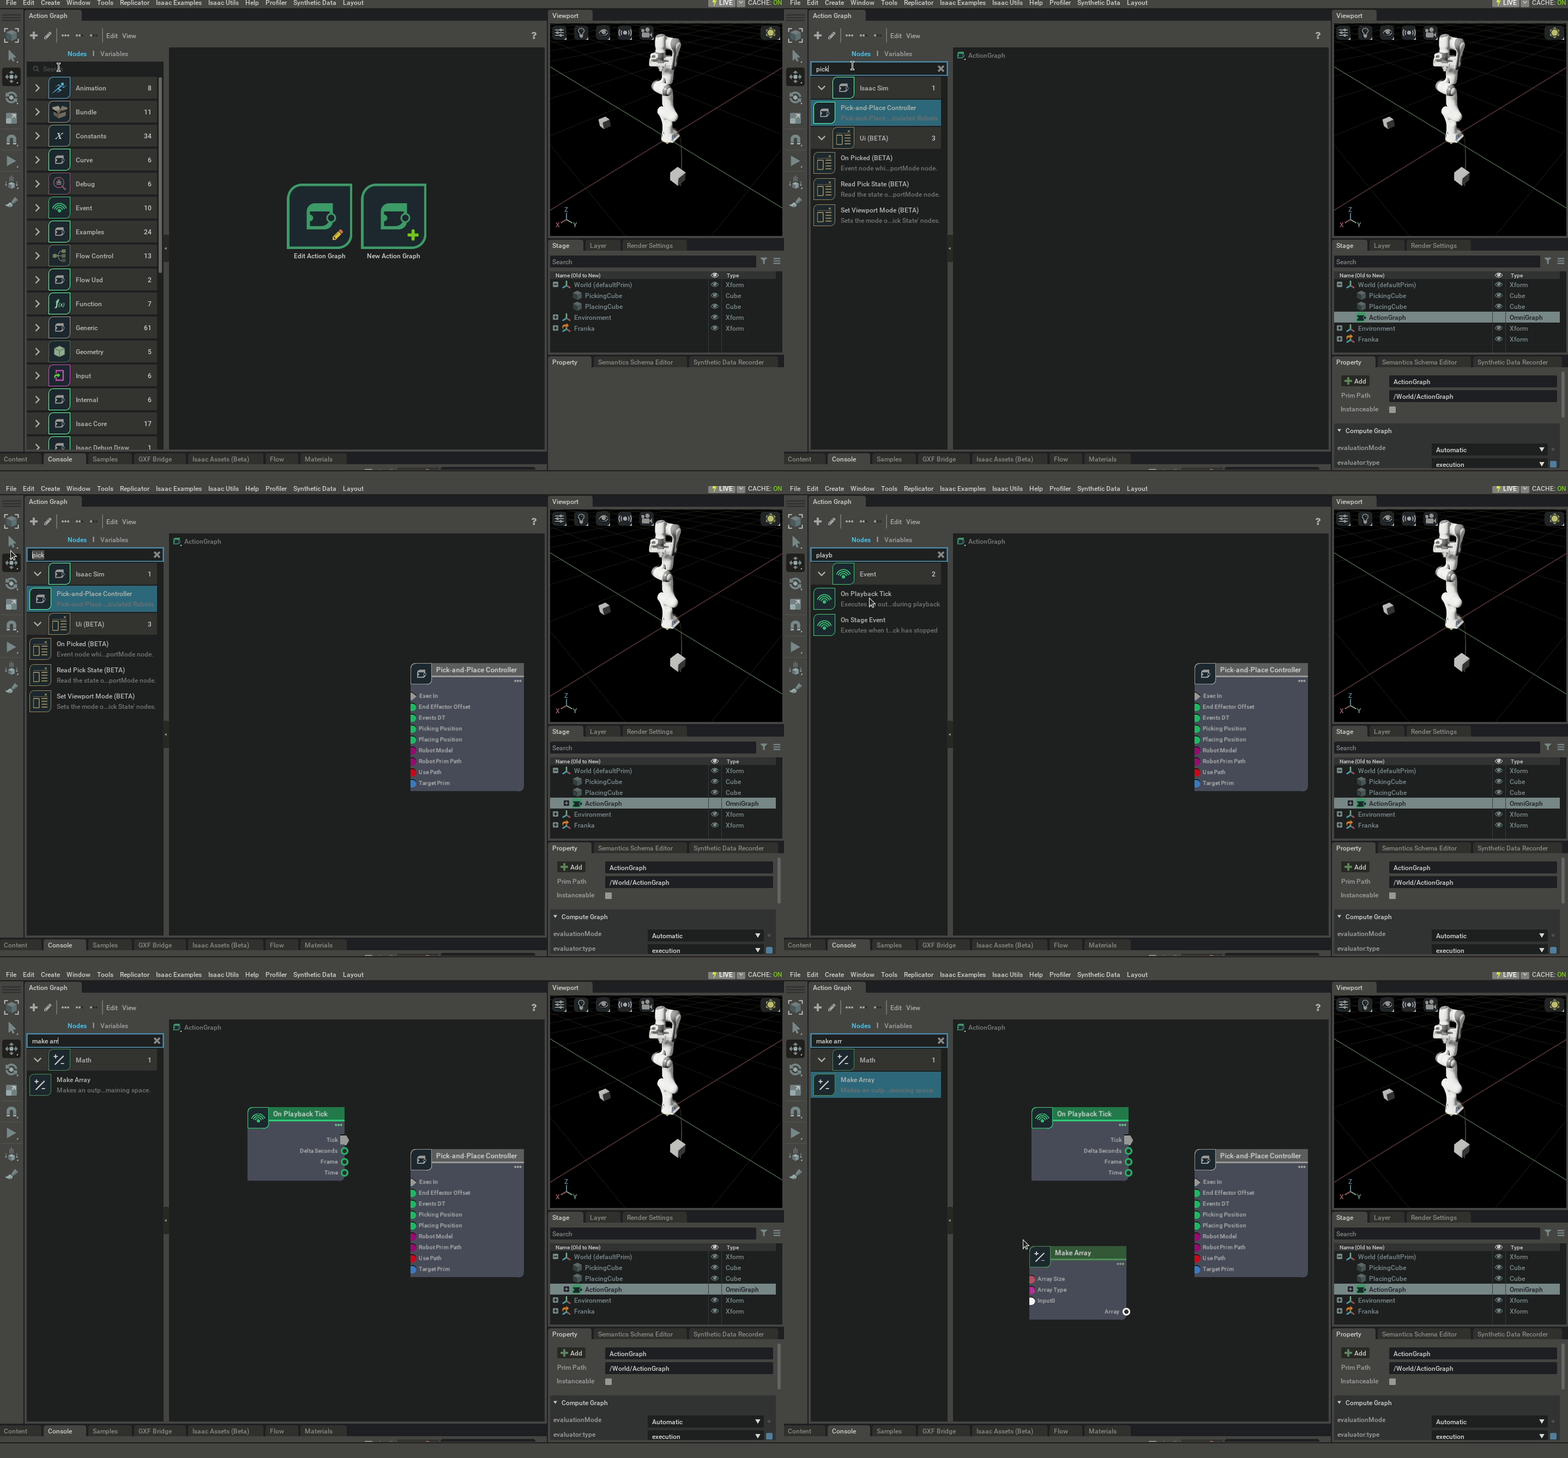
Create the new action graph by navigating to Window > Visual Scripting > Action Graph.
By default, the Action Graph loads into the bottom group on panels. Reposition the Action Graph and viewport panels as you like.
In the Action Graph panel, select New Action Graph add a new graph to the simulation.
Now add the following nodes to the graph:
On Playback Tick node executes the graph nodes every simulation timestep.
Isaac Pick-and-Place Controller node articulate the robot.
Make Array node to hold the pick-and-place event timings.
Note
You can “Quick Save” your Visual Scripting Layout by pressing Ctrl+7 hotkey, and then “Quick Load” it by pressing Ctrl+8. This is helpful for bouncing between Default and Visual Scripting layouts.
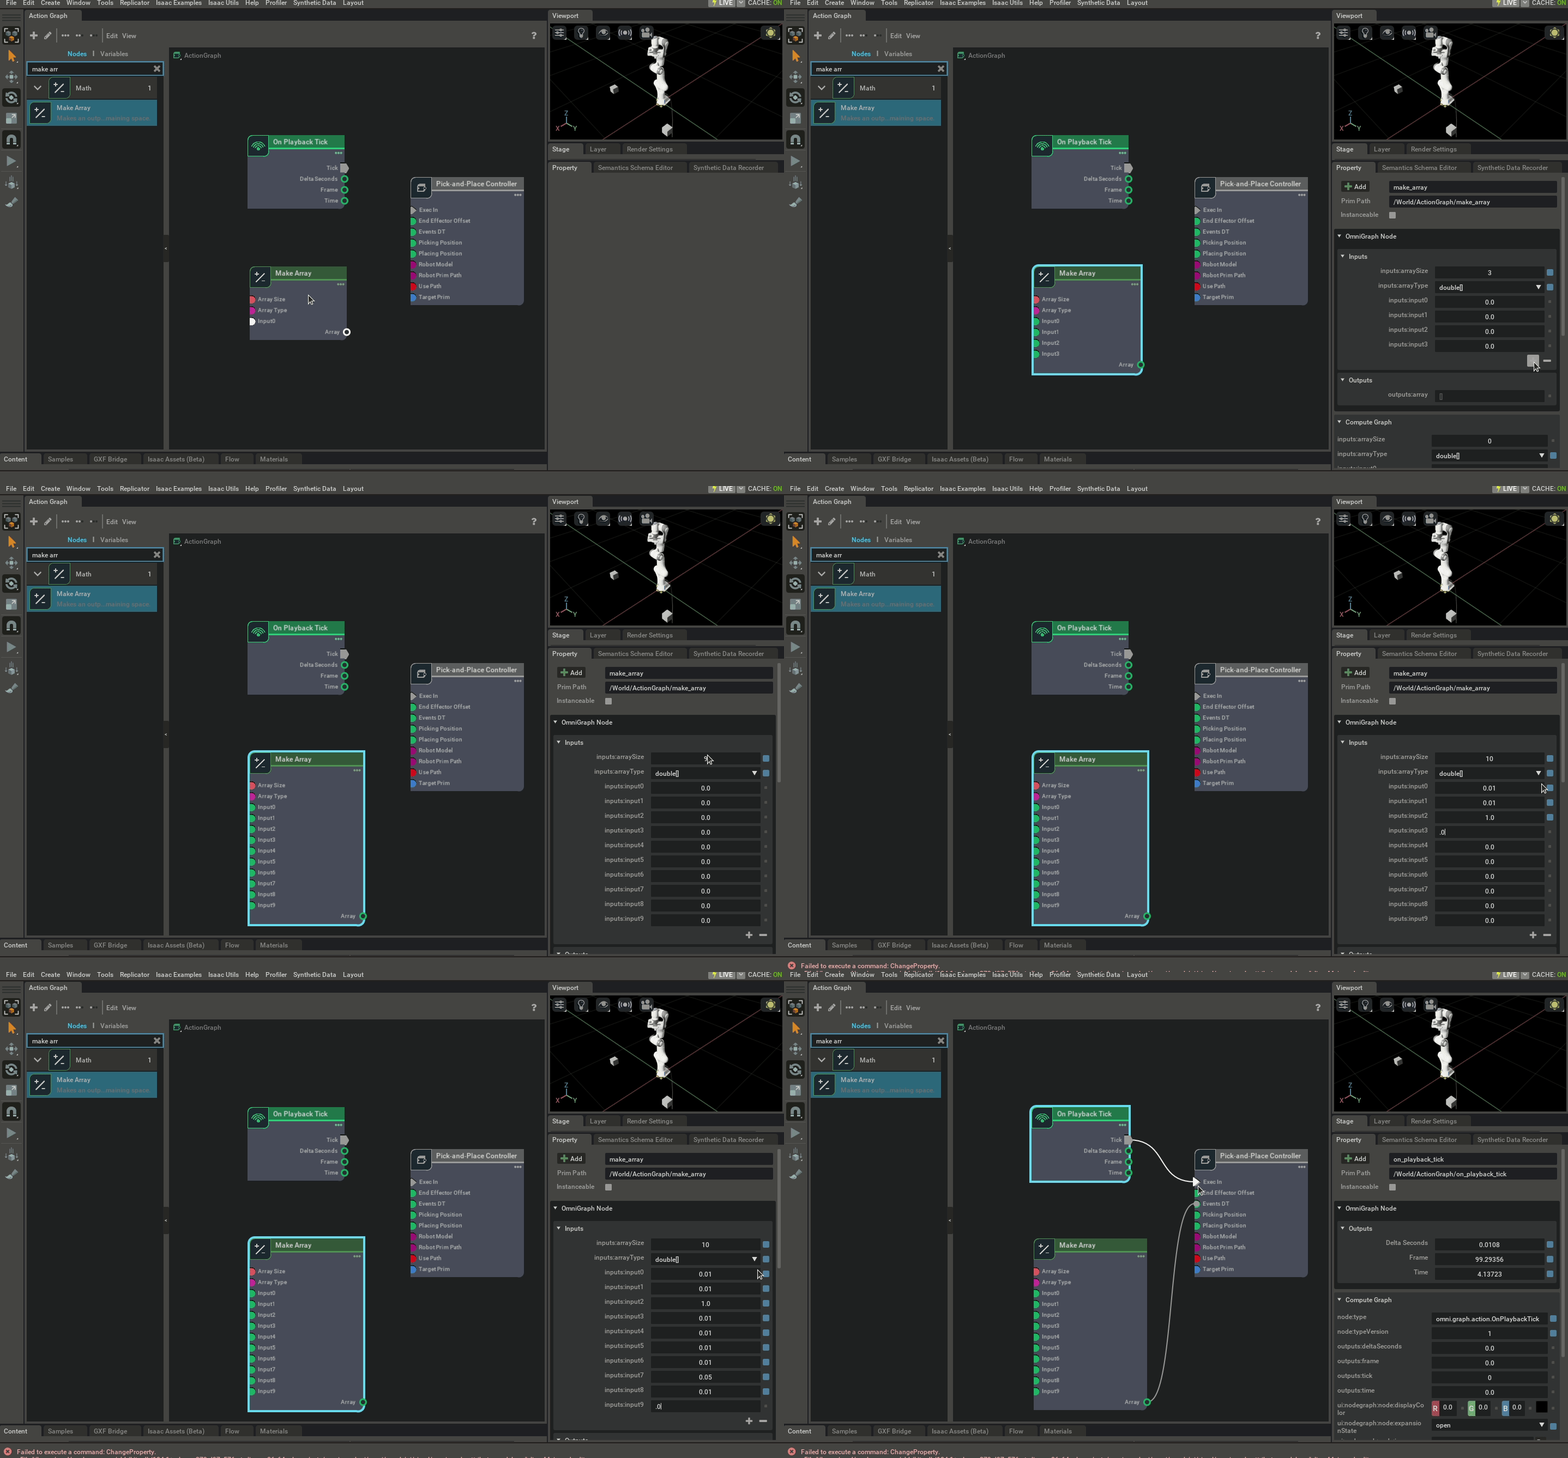
In the Make Array node, let’s add 10 entries that make the pick-and-place event timing
Set the array type to
double[].Press the
+button 9 more times to make an array of size 10. Verify the size is 10 in the Property Panel.We suggest starting with the following time deltas:
[0.01, 0.01, 1.0, 0.01, 0.01, 0.01, 0.01, 0.05, 0.01, 0.08]Connect to the
Events DTinput.
Omnigraph: Reading Attributes#
Now let’s get the PickingCube and PlacingCube positions:
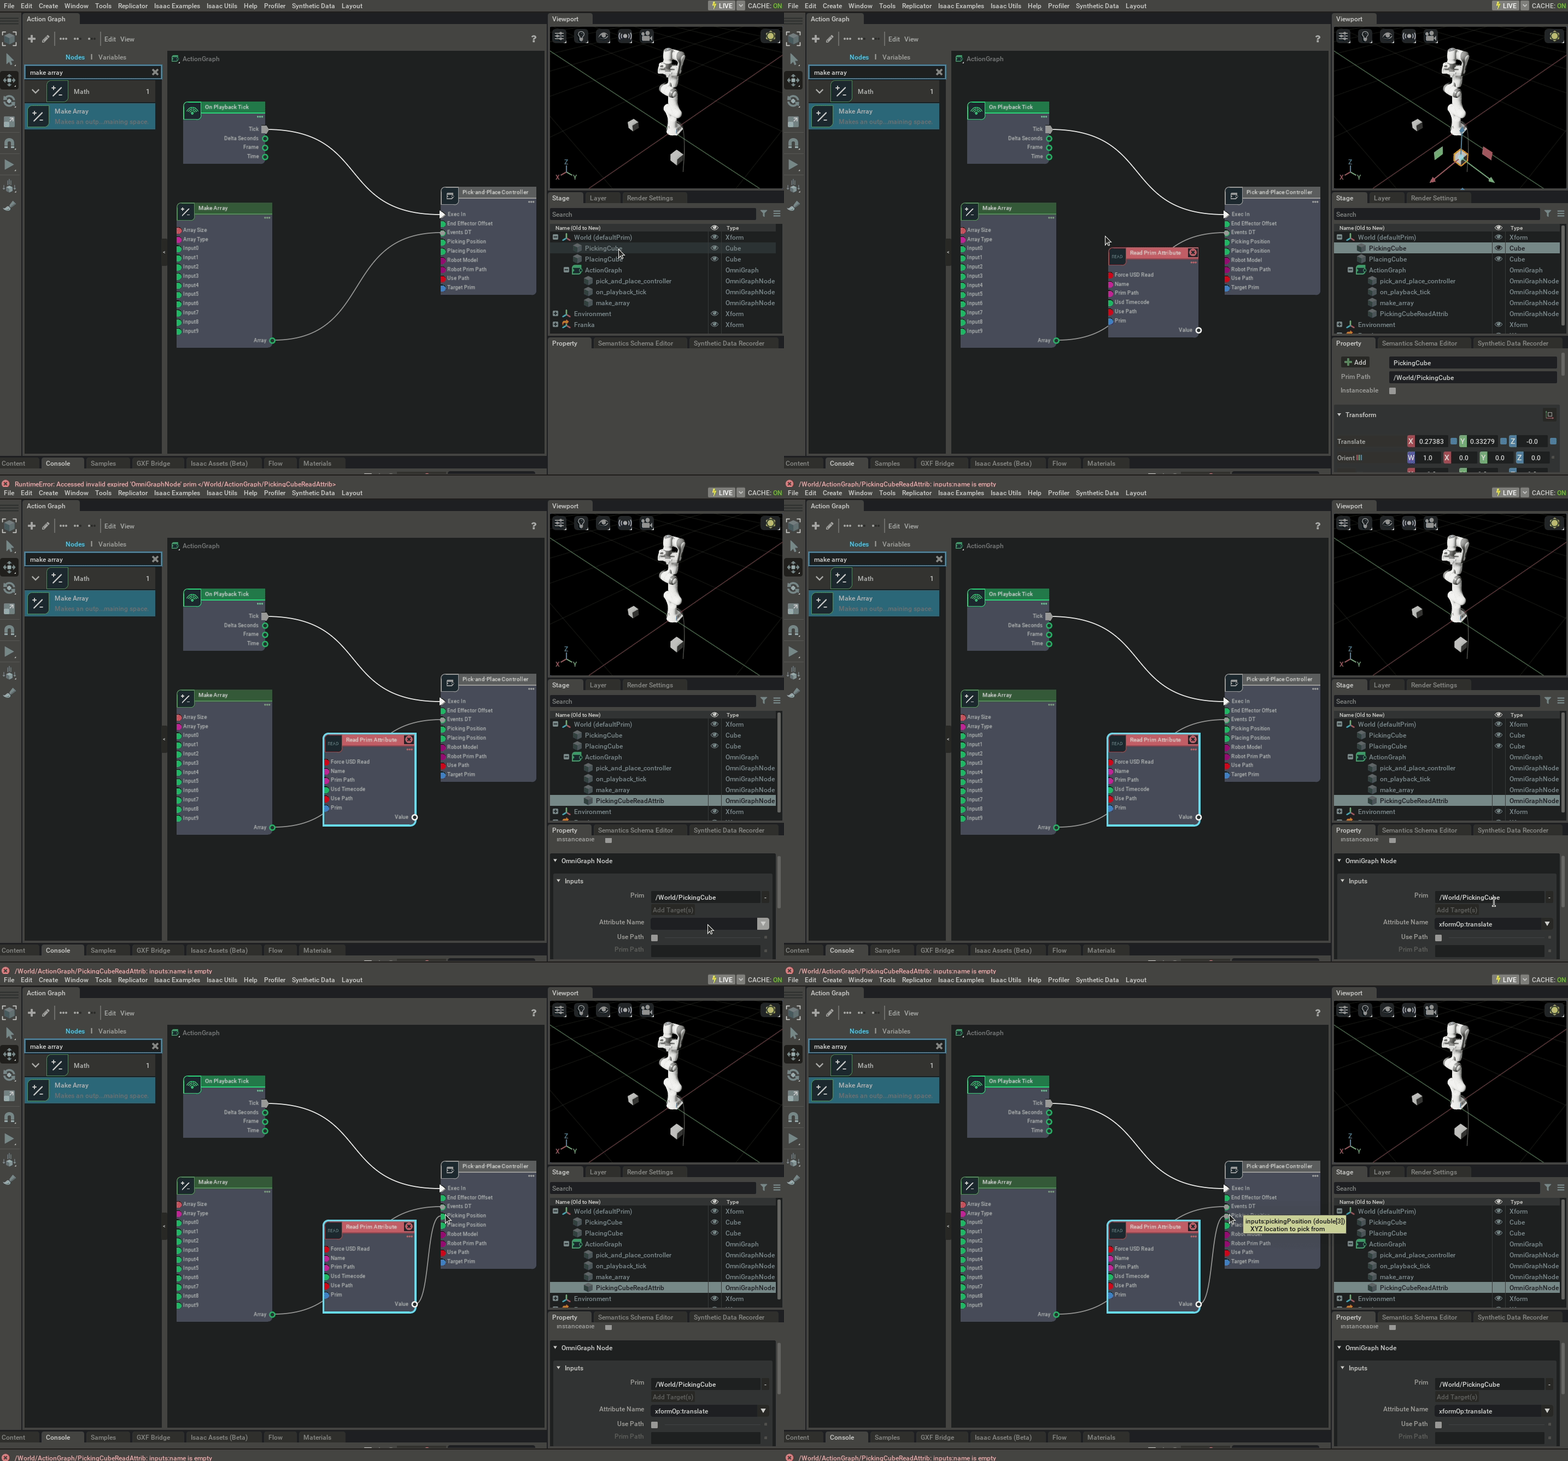
From the Stage, drag and drop
PickingCubeonto the ActionGraph.Select Read Attribute from the pop-up window to create a new Read Attribute node.
Navigate to the Attribute dropdown in the properties panel and select
xformOp::translate.Connect the output of
PickingCube’s Read Attribute node to thePicking Positioninput.Repeat this process for the
PlacingCube, connecting its output to thePlacing Positioninput.
Omnigraph: Pick-and-Place Controller Node#
Lastly, let’s finalize the Pick-and-Place Controller node’s properties:
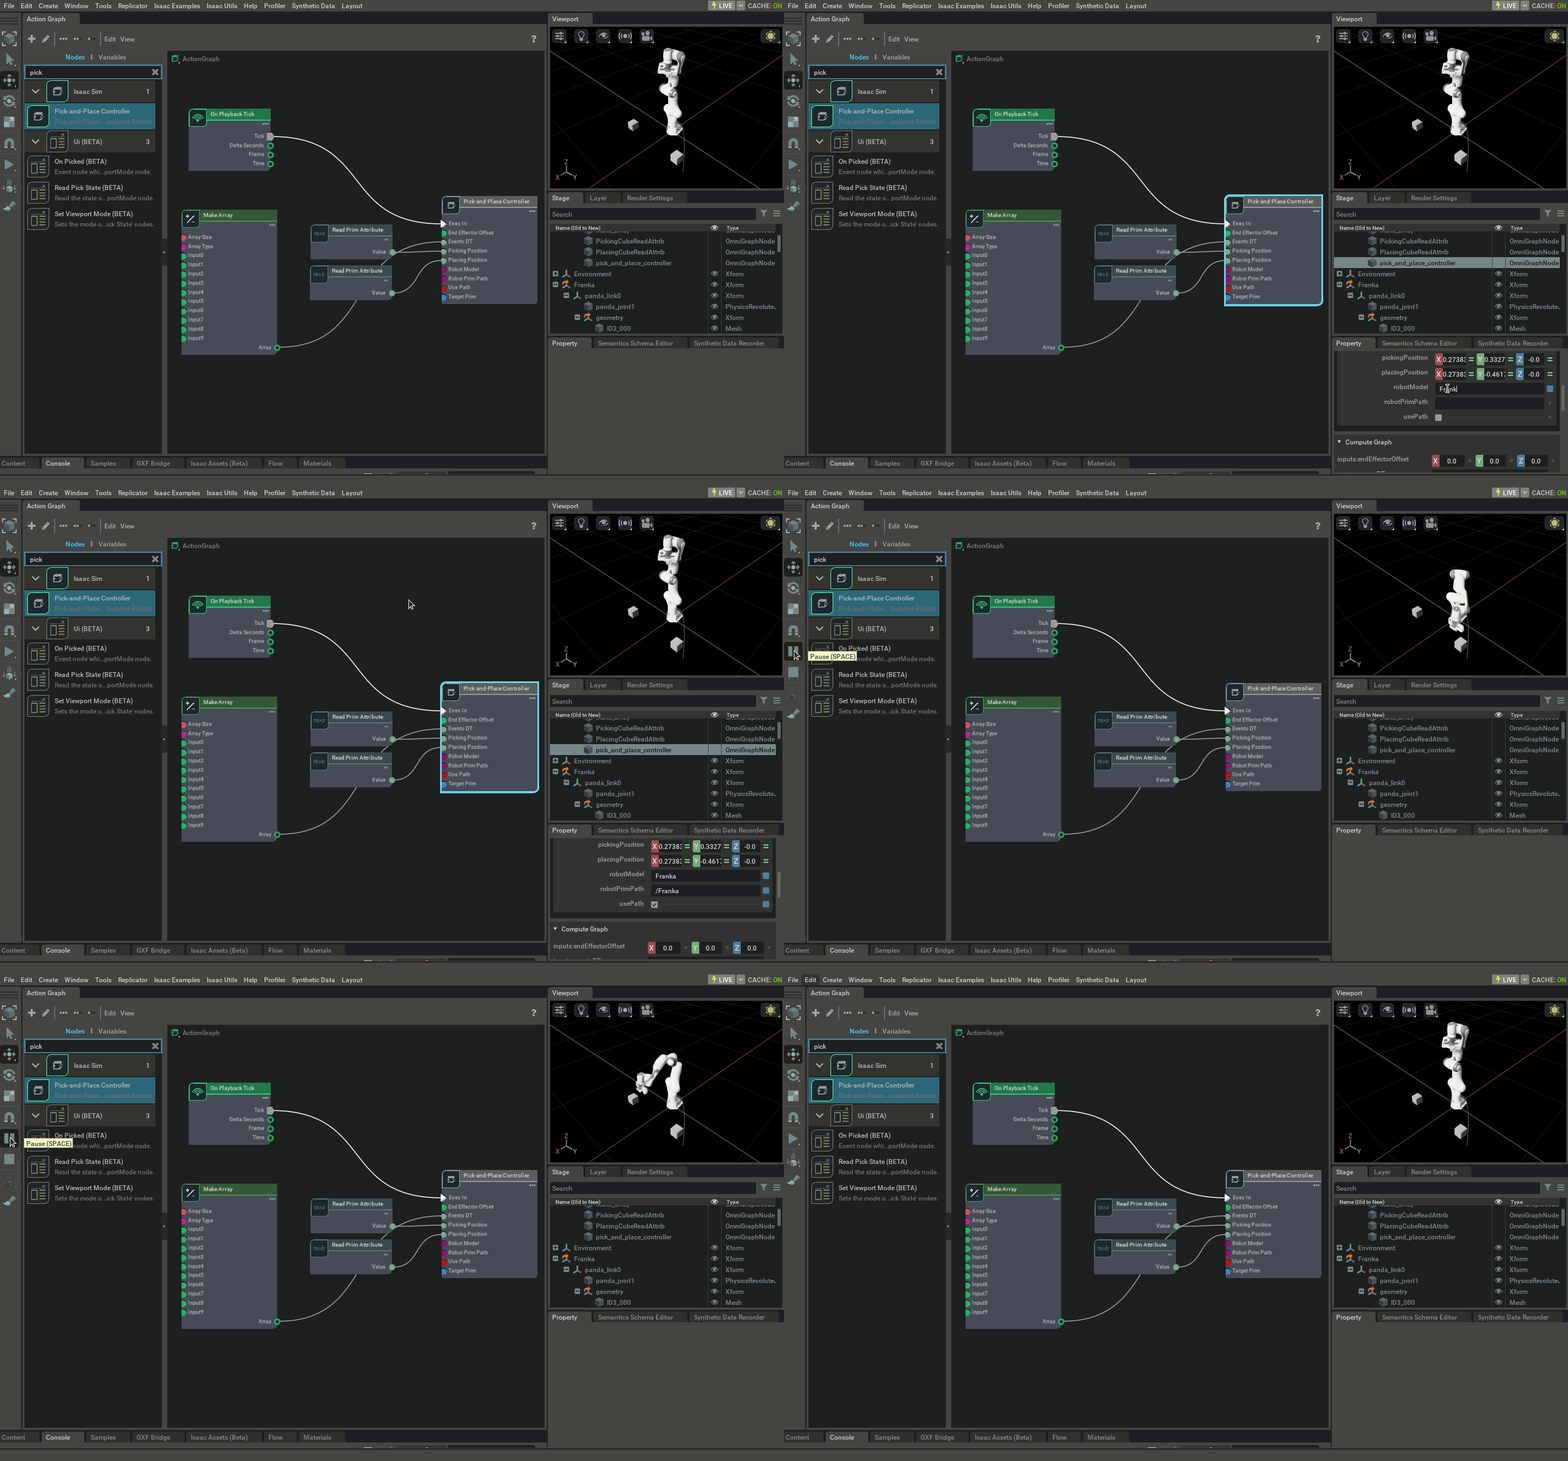
Select the node and input “Franka” for its Robot Model property.
Input “/Franka” for its Robot Prim Path property.
Click usePrimPath so the controller can find its prim via the user input path.
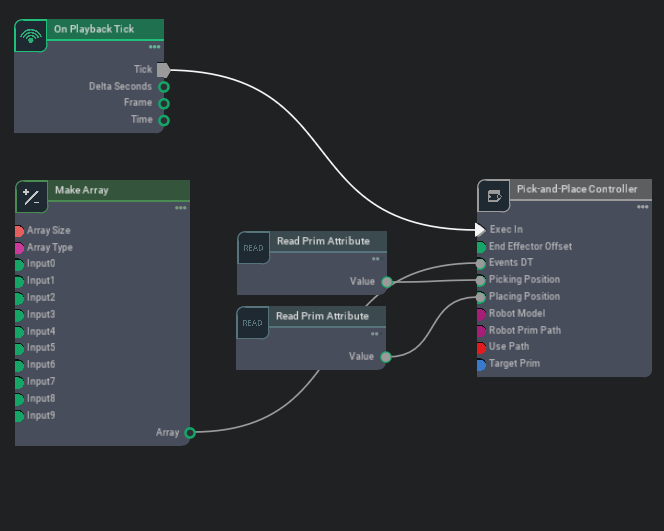
Now we should be ready to simulate. Verify that you have connected the nodes similar to this:
Now hit the SPACEBAR or Play button on the GUI. If set up correctly, the Franka robot should move towards the PickingCube, close its gripper, then move towards the PlacingCube, and finally open its gripper.
Summary#
In this tutorial, we introduced the Isaac Pick-and-Place Controller Node and its functionality. We also detailed different OmniGraph input techniques.
Further Reading#
To learn more about Omniverse Isaac Sim OmniGraph, see the other advanced tutorials in this series: