Verification and Publishing#
Verification of Front End and Back End Samples#
Open the specified URL in your browser, and ensure that the <portal_page_URL> matches the Common Name (CN) field in the certificate presented by the webpage.
This Fully Qualified Domain Name (FQDN) must resolve to the IP address hosting the reverse proxy. If the proxy is running on a server, use the IP address of that server’s network interface.
In our example, the portal is configured for https://myovc.com. On navigating to the URL on a browser, users will be prompted to sign in through the federated identity provider (IDP).
The screenshot below shows that no OVC applications have been configured or added to the portal.

To access the Swagger UI for the poetry backend, visit https://<portal page URL>/api
In our example, our poetry backend is running at https://myovc.com/api
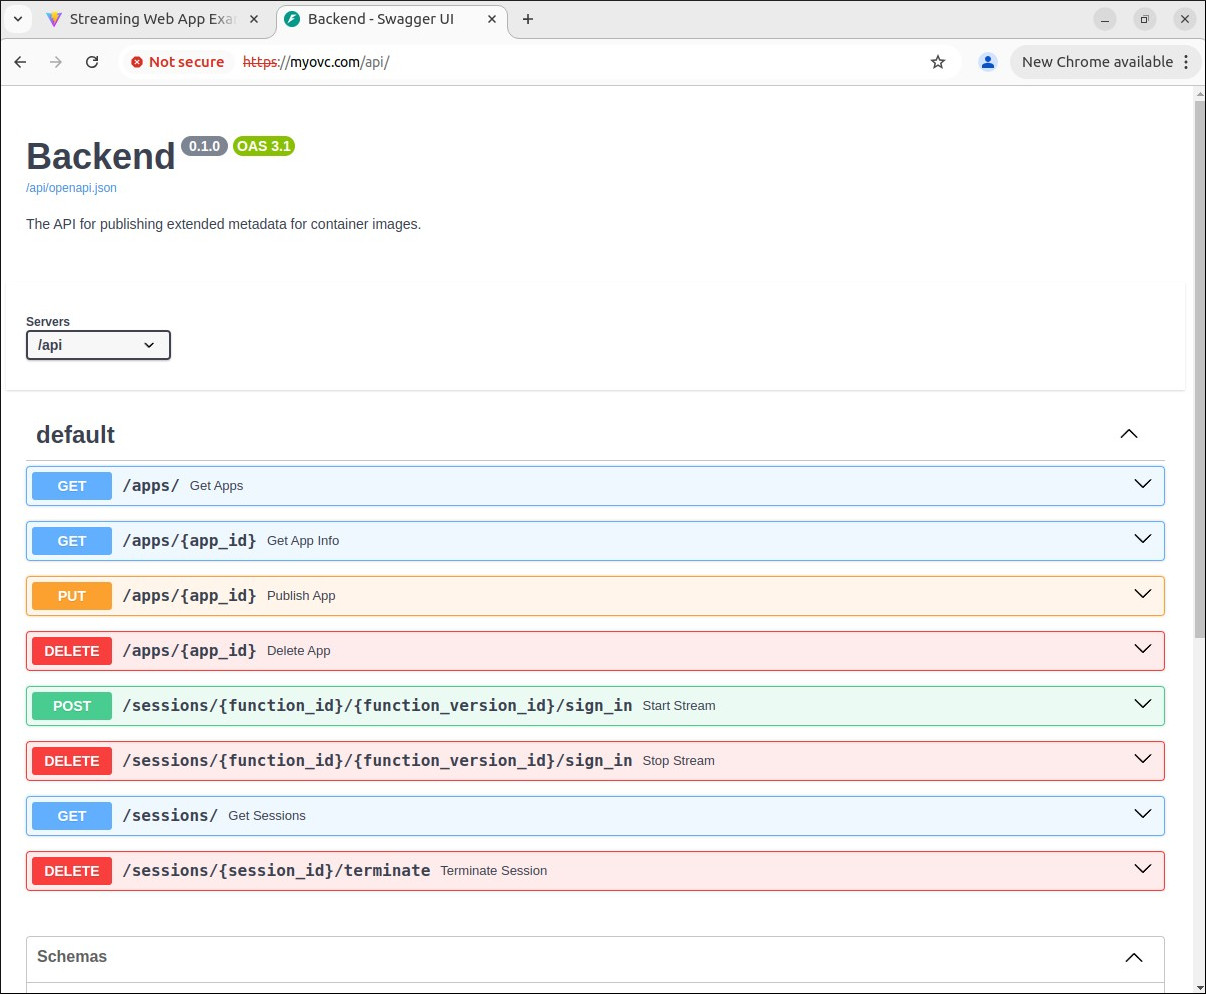
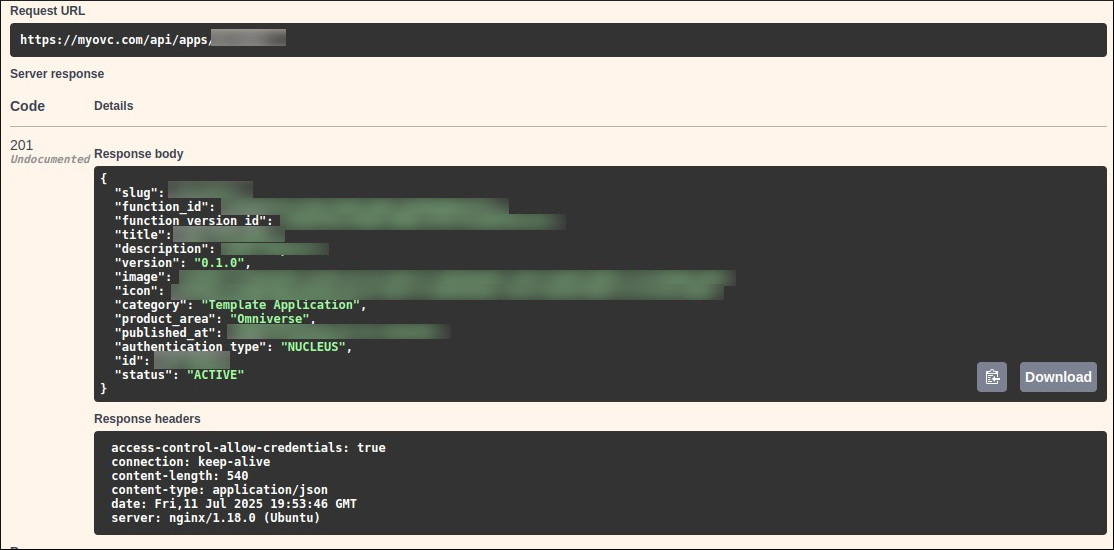
Visit https://<portal page URL>/api and then execute GET /apps/ request (select “Execute”)
Note
The response is the empty array [], meaning none of the applications were published yet.
Publish Kit Apps to the Portal Sample#
To publish an application, you’ll need to retrieve the output that you generated towards the end of the Deploying Kit Apps page. These values include the FunctionID and FunctionVersionID.
Gather Variables#
The objective is to submit variables into the /apps/{app_id} endpoint of the API.
Below is the default output of this endpoint:
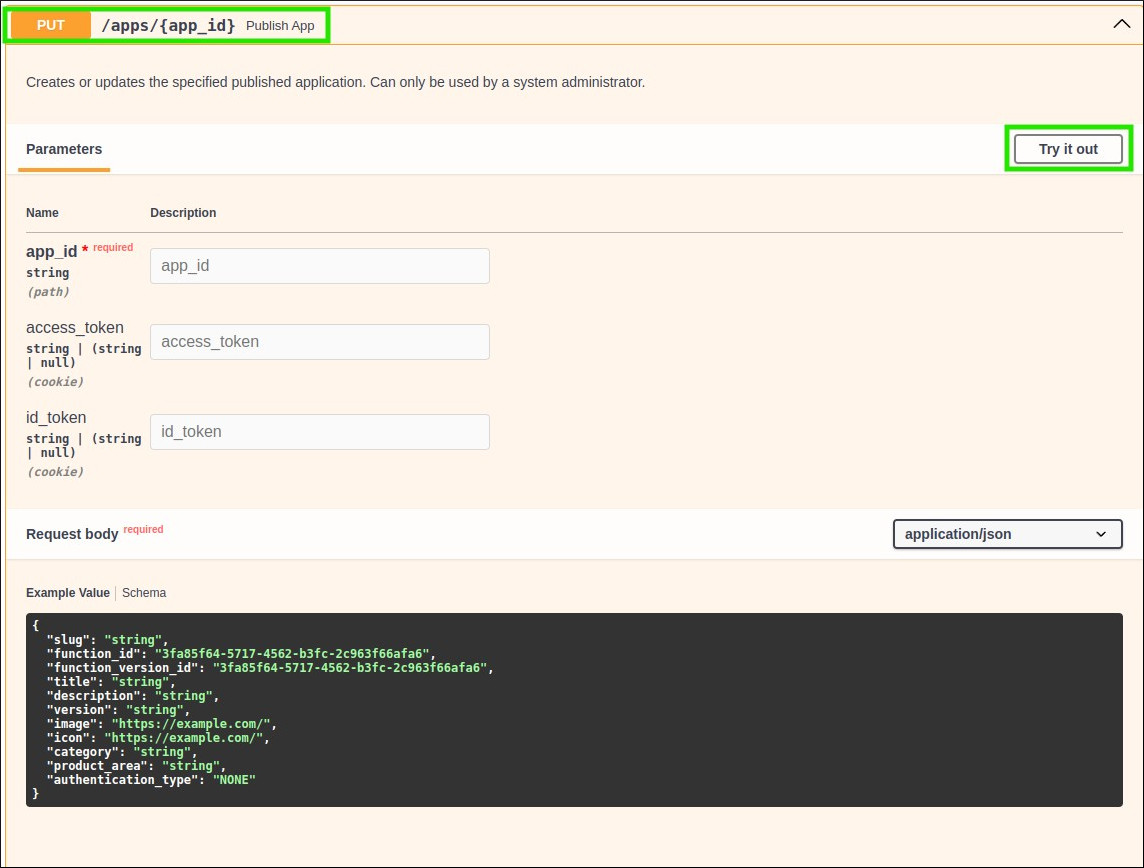
Parameters#
The parameters section needs to be completed:
FIELD |
EXAMPLE |
EXPLANATION |
|---|---|---|
app_id |
my-usd-composer |
Application identifier -. The app identifier in the database. A technicality, should match the following regex [a-zA-Zd-_]+. e.g., my-usd-c_2025_1. |
Request Body#
A sample request body is available within the corresponding Swagger API endpoint:
{
 "slug": "string",
 "function_id": "3fa85f64-5717-4562-b3fc-2c963f66afa6",
 "function_version_id": "3fa85f64-5717-4562-b3fc-2c963f66afa6",
 "title": "string",
 "description": "string",
 "version": "string",
 "image": "https://example.com/",
 "icon": "https://example.com/",
 "category": "string",
 "product_area": "string",
 "authentication_type": "NUCLEUS",
 "media_server": "string",
 "media_port": 0
 }
slug |
my-usd-composer |
Application group identifier for the application group should match the following regex [a-zA-Zd-_]+ |
function_id |
Function_ID from NVCF |
Function ID is obtained from the deployed function from the nvcf.ngc.nvidia.com. |
function_version_id |
Function_Version_ID from NVCF |
Function Version ID is obtained from the deployed function from the nvcf.ngc.nvidia.com |
title |
My USD Composer |
Application group title. (e.g., My USD Composer). Will go into the title field in the API call that follows. |
description |
This is my USD Explorer |
Will go into the description field in the API call that follows. |
version |
106.5.0 |
The app version MUST conform to https://semver.org/ spec. Will go into the version field in the API call that follows. |
image |
https://www.nvidia.com/industrial-digital-twins-warehouse.jpeg |
Link to the application bitmap image that will populate the card on the front end. Will go into the image field in the API call that follows. |
icon |
Link to the application bitmap icon that will populate the card on the front end. Will go into the icon field in the API call that follows. |
|
category |
Template Application |
Free form text field |
product_area |
Omniverse |
Free form text field |
authentication_type |
NUCLEUS |
If Nucleus must be mounted to the Omniverse application in OVC, this field must be set to NUCLEUS. |
media_server |
null |
If using Private Streaming, this value needs to be the Private Endpoint IP Address. If Public Streaming is used, leave this value empty. |
media_port |
0 |
The port on the media server in which the stream is received. |
Publishing Kit Apps using an API from the Swagger UI#
We’re using Swagger UI to make the request because it’s convenient, and the browser already holds the OIDC ID token—allowing the administrator to update the application list seamlessly.
Note
Access the Swagger front end by navigating to the DNS entry through the reverse proxy. The URL is:
https://<my_domain>/api/You must run the command as a user who belongs to the admin group. The name of this group can be found in the admin_group field within the
./settings.tomlfile located in the backend sample directory.Avoid accessing the Swagger API directly via the backend (e.g.,
https://127.0.0.1/api), as this method does not transmit authentication details from the client.
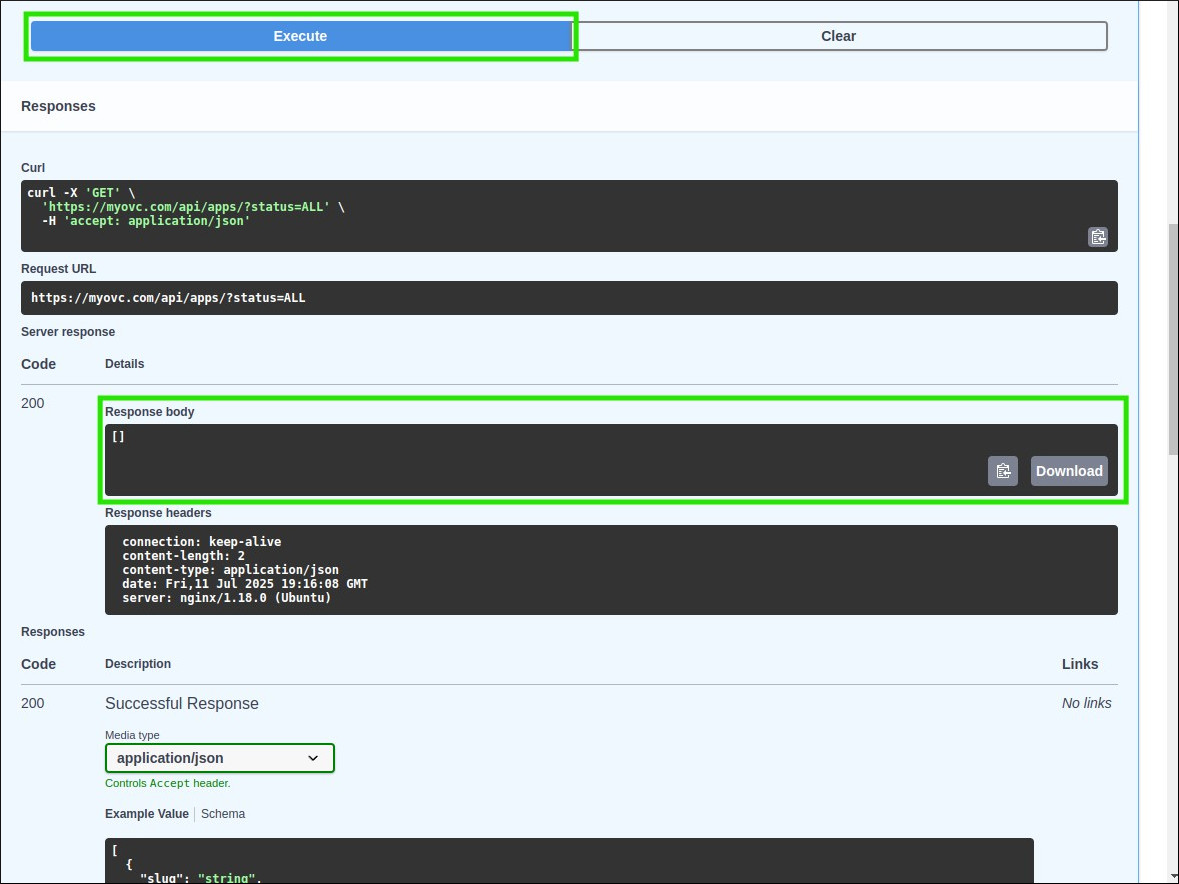
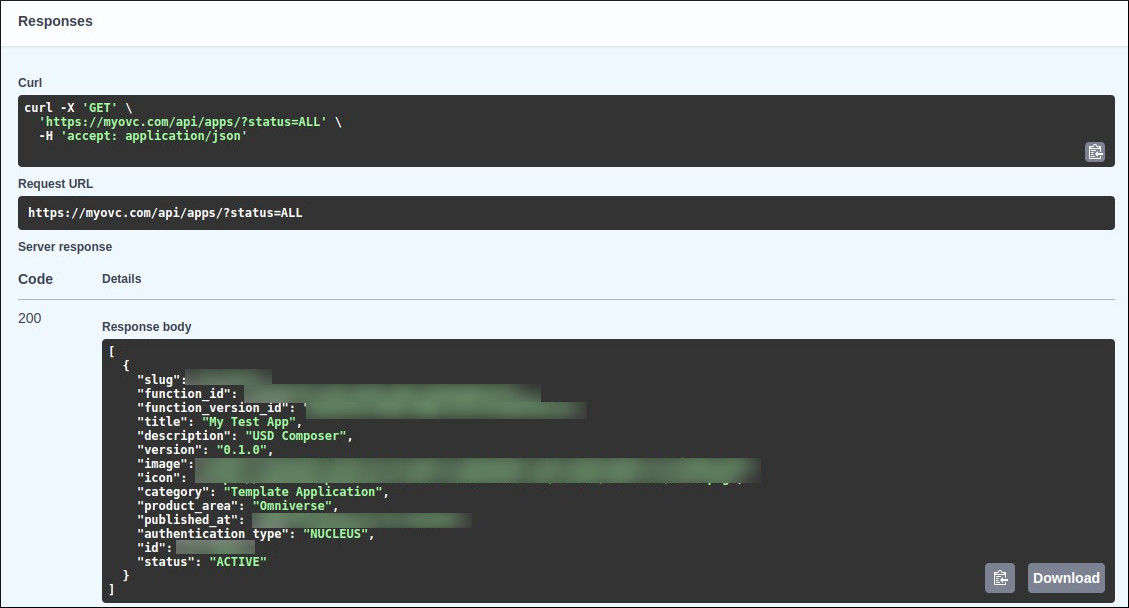
Complete the Swagger PUT /apps/{app_id} form and click Execute to submit the request.
If the API request is successful, the response will be displayed as shown below.
Verifying Published Kit Apps using the Swagger UI#
In the Swagger UI, verify that the application appears in the list and is marked as active.

The values returned by the GET request should match the variables specified in the earlier PUT request.
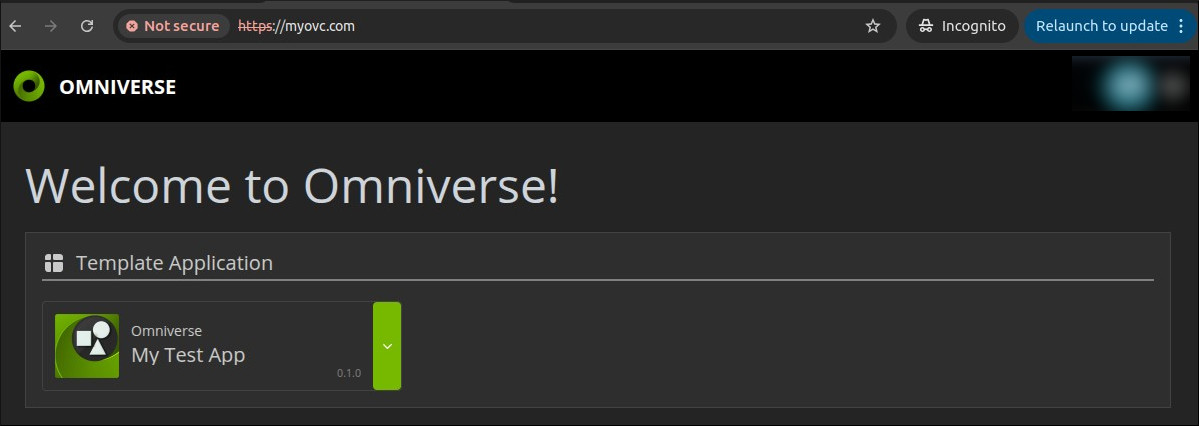
Return to the portal and check the front end to confirm that your newly added application is now visible.
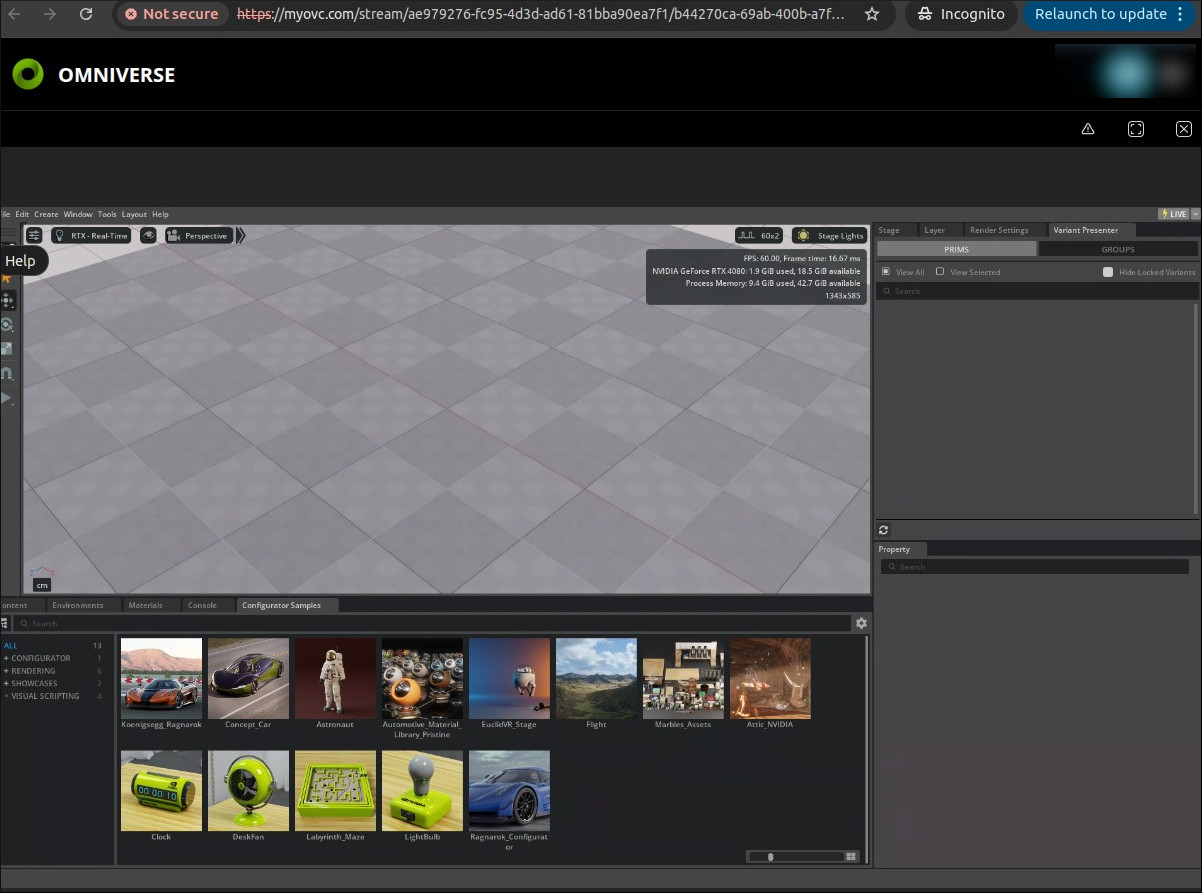
Launch the Kit App#
Click on the Kit App created on the front end at the https://portal_url to launch the application stream.
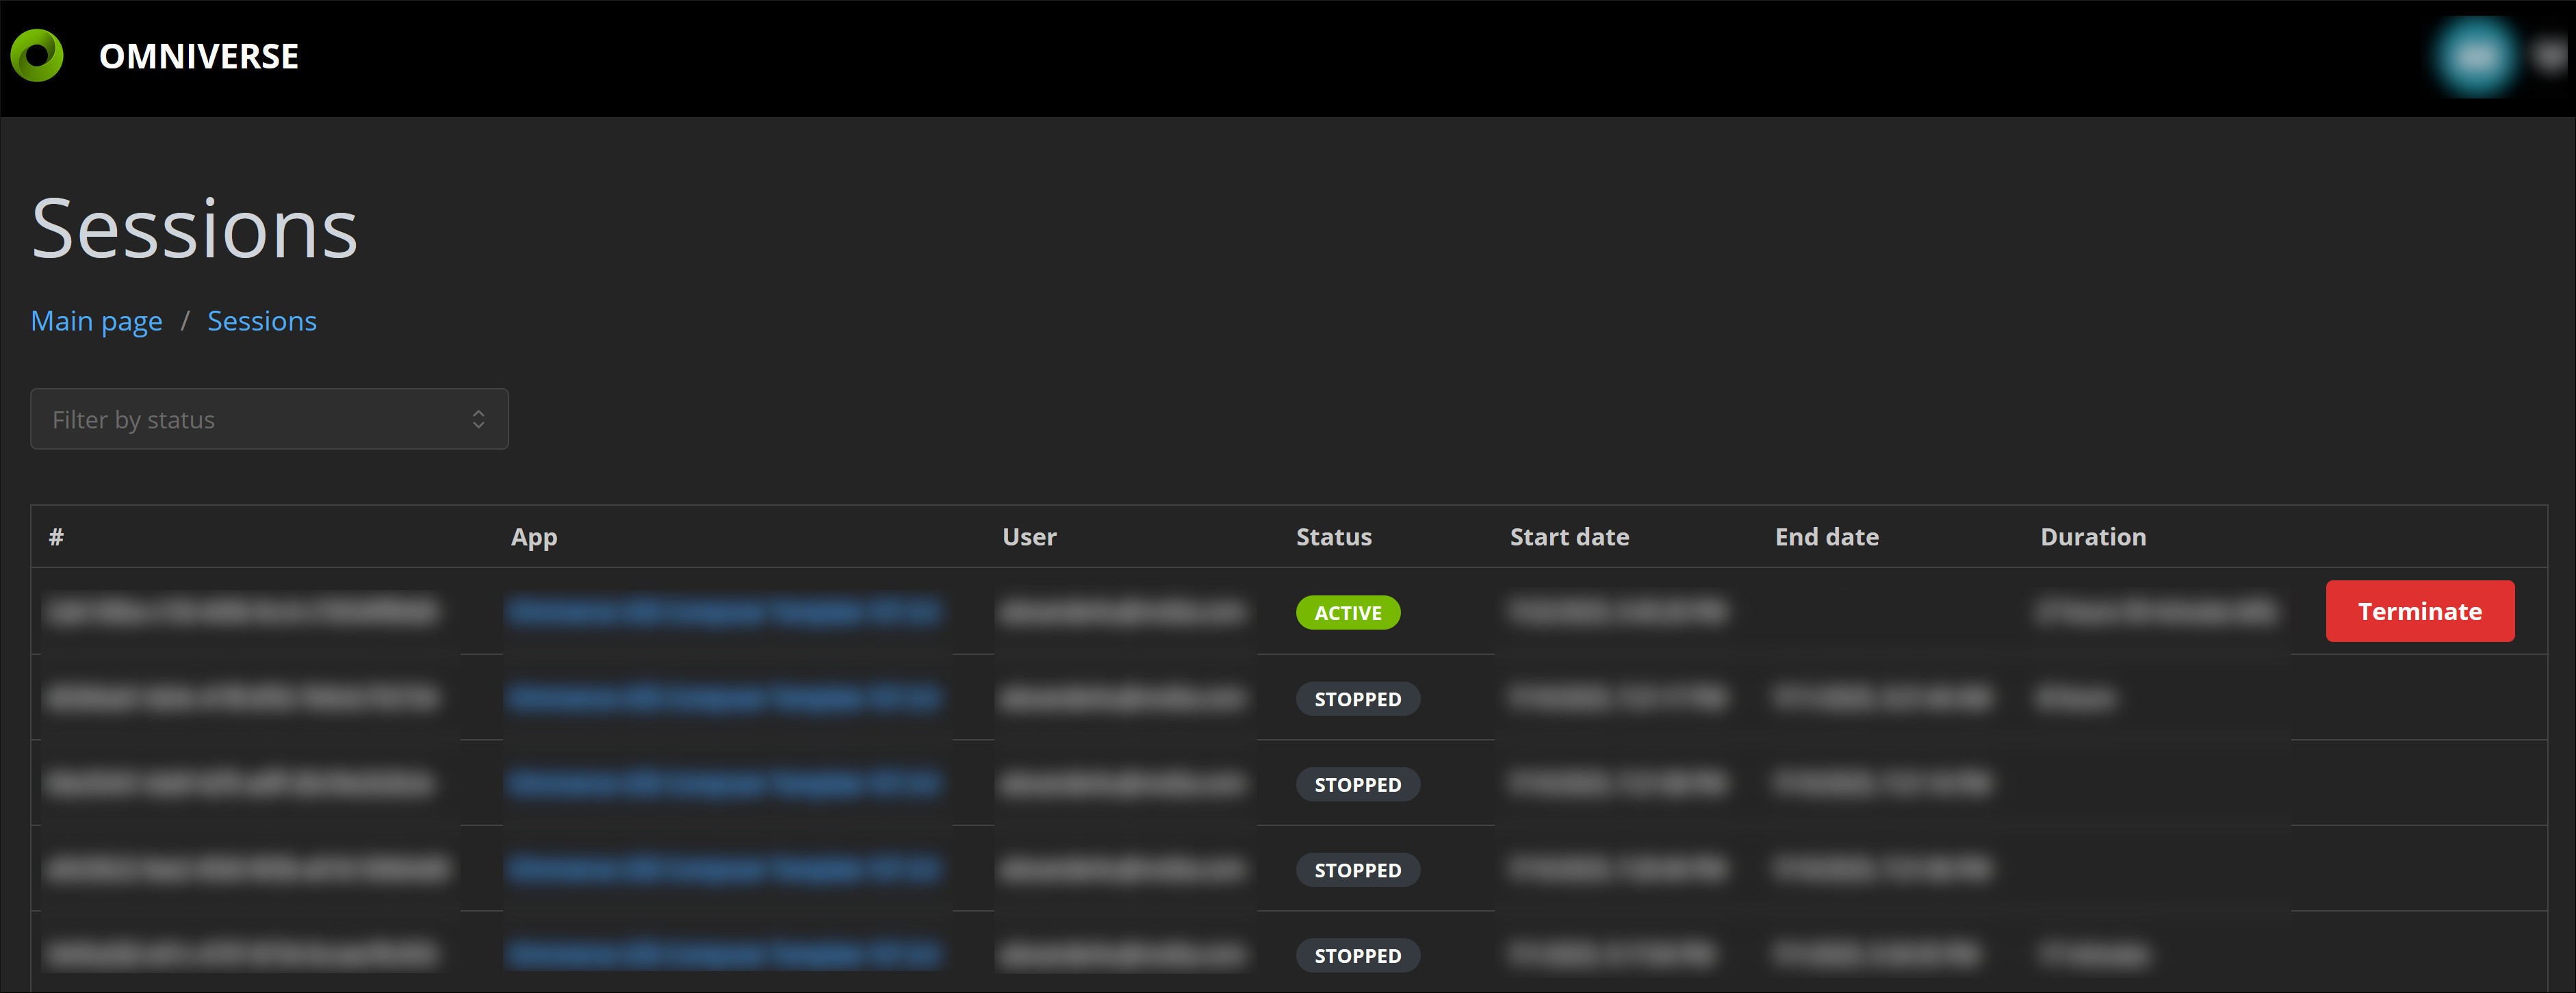
Portal Management Console#
Accessible at https://portal-url/sessions:

Sessions Management User Interface (UI)#
The session management system provides comprehensive lifecycle control for streaming sessions across both admin and user interfaces. Session status tracking includes four primary states: Active (user currently connected), Connecting (establishing connection), Idle (temporarily disconnected but resumable), and Stopped (terminated sessions). Each status is visually represented with color-coded badges and includes descriptive explanations to help users understand session conditions.
Session termination capabilities differ based on user permissions. Regular users can terminate only their own sessions, while administrators can forcefully terminate any session in the system. When terminated, sessions are properly cleaned up: WebSocket connections are closed with specific termination codes, session status is updated to “stopped,” and associated resources are freed.
Automatic session management includes timeout handling (sessions are automatically terminated after the configured TTL period), idle session monitoring (sessions that remain idle beyond the threshold are stopped), and session limit enforcement (preventing users from exceeding per-application instance limits).
Session filtering and navigation allow both admin and regular users to filter sessions by status, navigate through paginated results, and access detailed session information.
Admin User Interface (UI)#
Overview#
System administrators have enhanced privileges and visibility across the entire web streaming portal. In the /sessions interface, administrators can view all user sessions across the platform, providing comprehensive oversight of system usage and resource allocation. The admin view includes complete session details for every user: session IDs, associated applications, usernames, status indicators, timestamps, and duration tracking. Administrators can terminate any user’s active sessions through the terminate button, which is crucial for system maintenance, troubleshooting problematic sessions, or enforcing usage policies.
Non-Admin User Interface (UI)#
Regular users have a restricted but focused session management experience designed for personal productivity. In the /sessions interface, users can only view their own sessions, ensuring privacy and preventing information leakage between users. The interface displays the same comprehensive session information (session ID, application details, status, timestamps, duration) but filtered to show only sessions belonging to the authenticated user. Non-admin users can terminate their own active sessions, reconnect to idle sessions, and navigate through their session history using the same pagination and filtering controls available to administrators.