Portal Deployment#

Deployment Approaches#
There are two available approaches for deploying the portal sample:
Standalone Deployment: A self-contained execution of the solution’s core components, offering a fully operational portal example with minimal reliance on external infrastructure. This setup can be hosted on a single virtual machine or workstation.
Kubernetes Deployment: A modern, opinionated example using Helm charts, tailored for advanced infrastructure environments on Kubernetes. This setup assumes a fully provisioned Kubernetes infrastructure is already in place.
Note
The documentation below focuses on standalone deployments.
Components to Install#
This document describes three essential components required to set up the sample front end, each accompanied by a detailed, step-by-step walkthrough.
Reverse Proxy
Front End
Back End
Sample Repository with Scripts#
NVIDIA offers scripts that simplify the setup of both the front end and back end. These scripts are available by cloning the corresponding repository:
Example: To clone with HTTPS, run this command:
git clone https://github.com/NVIDIA-Omniverse/ov-dgxc-portal-sample.git
This repository contains two primary folders that are referenced throughout all the tasks outlined in this page:
./web: This folder contains all the scripts and configuration files necessary to build the web front end../backend: This folder contains all the scripts and configuration files needed to build the back end, which communicates with NVCF and initiates the streaming process.
Reverse Proxy#
Overview#
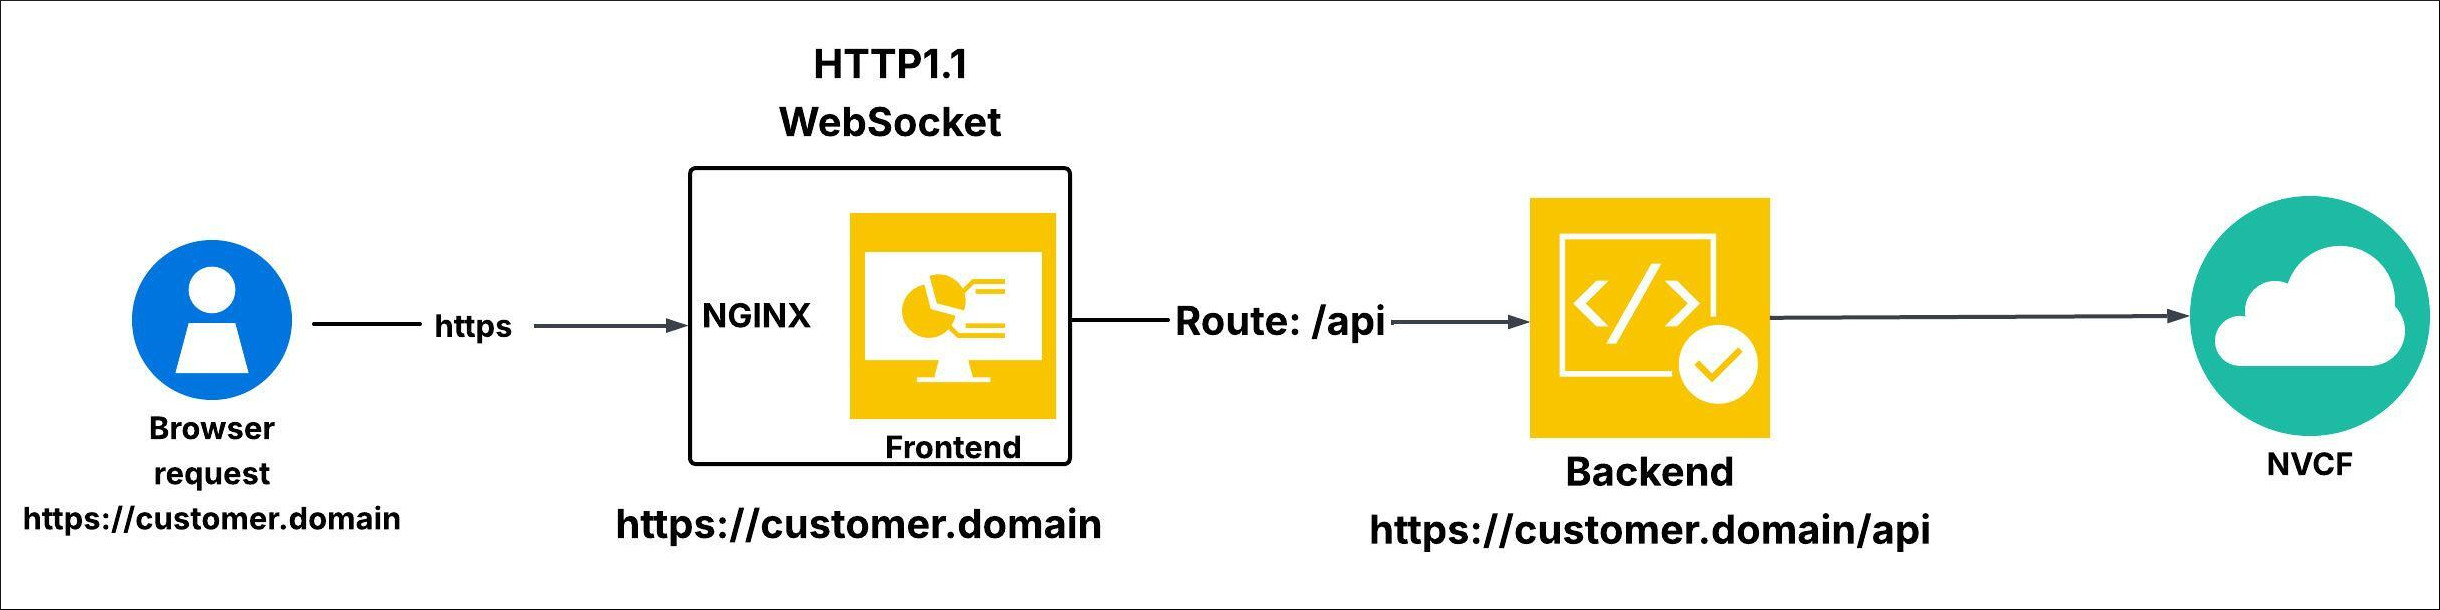
The target handles the connection on the customer’s side:
The browser establishes a connection to the portal URL using HTTPS version 1.1
In a basic deployment, the URL is served by a Reverse Proxy server. For Kubernetes environments, it is managed through Ingress, while in public cloud deployments, it is typically handled by an Application Load Balancer (ALB) or an Application Layer Gateway.
Regardless of the deployment method, the
/route should direct to the frontend application, while the/apiroute should direct to the backend application.The Ingress, Application Load Balancer (ALB), Application Layer Gateway (ALG), or Reverse Proxy must support WebSocket upgrade requests.
Set Up Reverse Proxy#
The reverse proxy serves as a single entry point for all client connections, consolidating traffic directed to the various services within the DGXC solution.
In this guide for a standalone deployment, we are using NGINX as the Reverse Proxy.
Install NGINX#
This reverse proxy is built on NGINX and should be installed using the official upstream repository:
sudo apt update -y

sudo apt install -y nginx

sudo systemctl stop nginx
Note
This document was validated using nginx 1.18.0-6ubuntu14.6. A newer version can be used if available.
Certificate Management#
To enable secure TLS encryption for the front end, NGINX requires valid certificates. As described in the reverse proxy setup section Apply Configuration to NGINX, the certificate and key files in PEM format must be placed in two specified locations:
ssl_certificate: place in
/etc/nginx/certs/cert.pemssl_certificate_key: place in
/etc/nginx/certs/key.pem
In this example, we are using https://myovc.com as the portal endpoint.
In some cases, NGINX does not automatically create the certificates directory. If this occurs, you will need to manually create the directory to store the certificates:
sudo mkdir -p /etc/nginx/certs
Note
before issuing the two copy commands below, ensure cert.pem and key.pem are in the directory from which you’re issuing the command.You should have created both certificates previously.
Copy the certificate under the cert.pem name:
sudo cp <cert file name>.pem /etc/nginx/certs/cert.pem
Copy the private key under the key.pem name:
sudo cp <private key file name>.pem /etc/nginx/certs/key.pem
Verify that the NGINX directory is assigned to the www-data user and group:
sudo chown -R www-data:www-data /etc/nginx
Validate Certificate Configurations#
Ensure that the certificate files are correctly placed in the designated directory:
ls -al /etc/nginx/certs/
The output should look similar to the following:

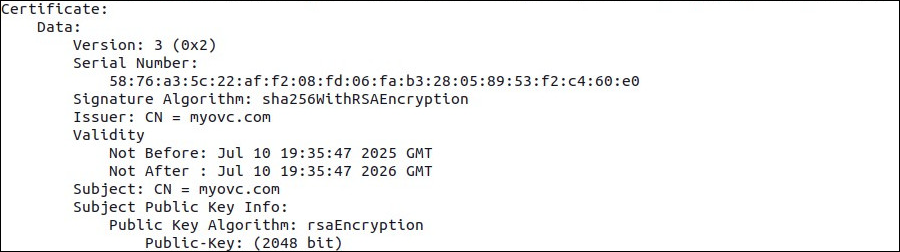
Verify that the complete certificate chain is valid, ensuring both the Common Name (CN) and the full trust chain are properly configured:
while openssl x509 -noout -text; do :; done < /etc/nginx/certs/cert.pem
The output should look similar to the following:
Start NGINX#
After completing all the above configurations, launch the NGINX service:
sudo systemctl start nginx
Validate NGINX#
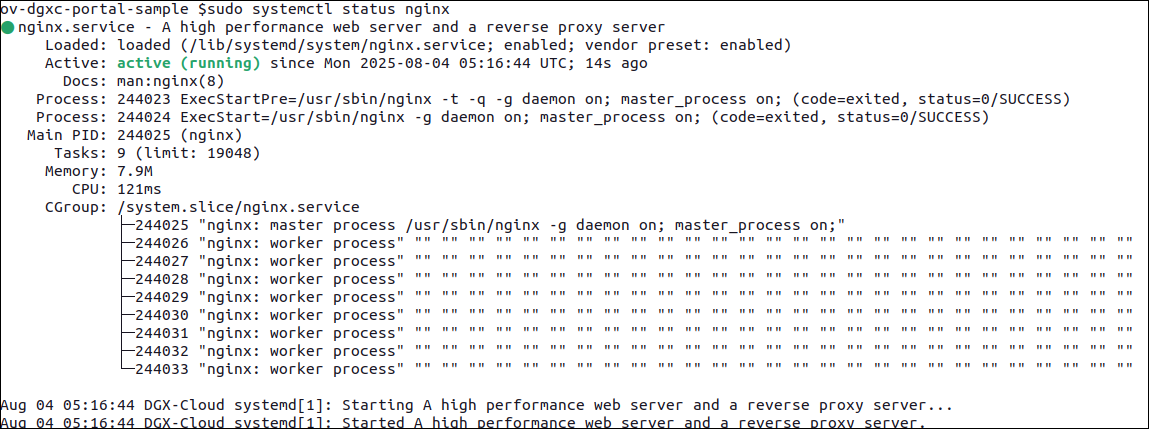
Use systemctl to verify that NGINX is running as expected. Below is a sample output showing an active NGINX instance:
sudo systemctl status nginx
The output should look similar to the following: