Deploying Kit Apps#
Overview#
The information below explains the process of deploying containerized Kit Applications to Omniverse on DGX Cloud.
Prerequisites#
A local instance of a containerized Kit app is available on a Linux machine.
Note
You will need to rebuild the Kit application for Omniverse on DGX Cloud following the Developing and Containerizing Apps documentation. Container images from Omniverse Cloud are incompatible and will fail to deploy as NVIDIA Cloud Functions.
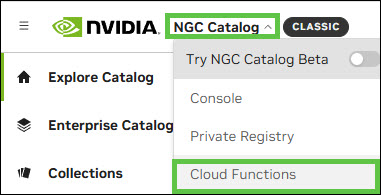
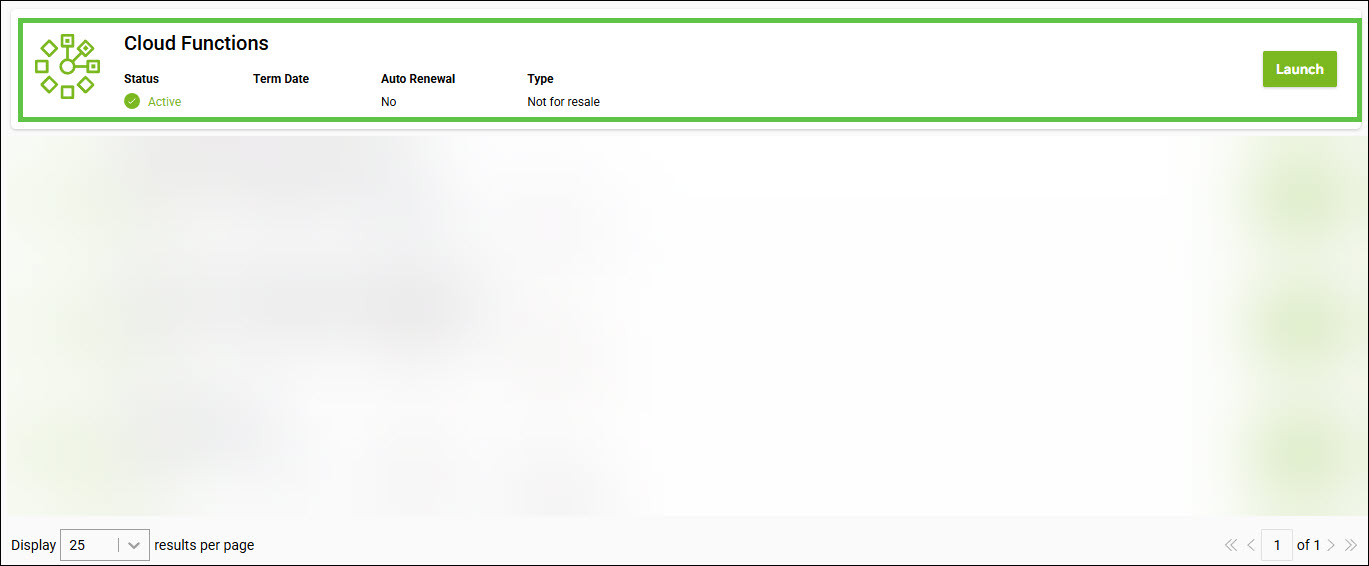
Log in to your NGC Organization Name and select Cloud Functions from the NGC Catalog drop down list:
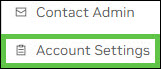
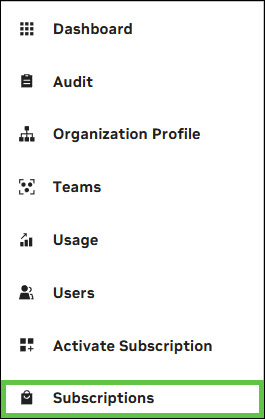
Select Account Settings using the drop-down list in the upper-right hand corner and then confirm Cloud Functions is enabled under Subscriptions:
Validate Local Container#
The Omniverse Kit App must appear in the list of Docker images. If you do not have a docker container, you can build one by following the Developing and Containerizing Apps documentation.
This step must be verified before proceeding further:

Identify NGC Organization Name#
Identify Your NGC Organization Name as an Organization Member
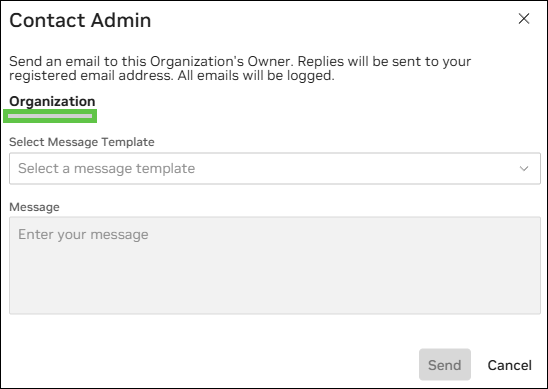
Log in to your NGC Organization and select Contact Admin from the drop down list under your username in the upper right-hand corner:
Your NGC Organization Name can be found under the Organization heading.
Identify Your NGC Organization Name as an Organization Owner
Log in to your NGC Organization and select Account Settings from the drop down list under your username in the upper right-hand corner:
Select Organization Profile from the left hand side:

Capture the value under Name. This will later be referred to as the
<NCA_ID>in the upload script: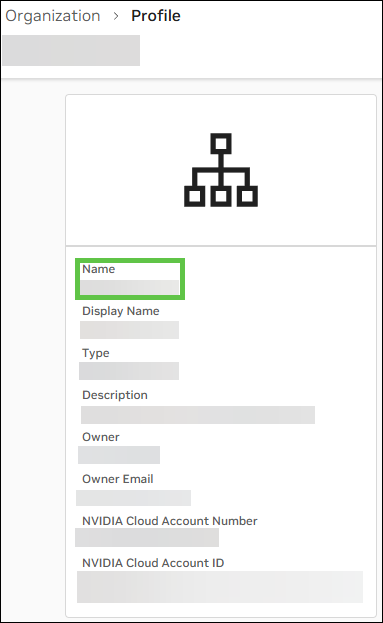
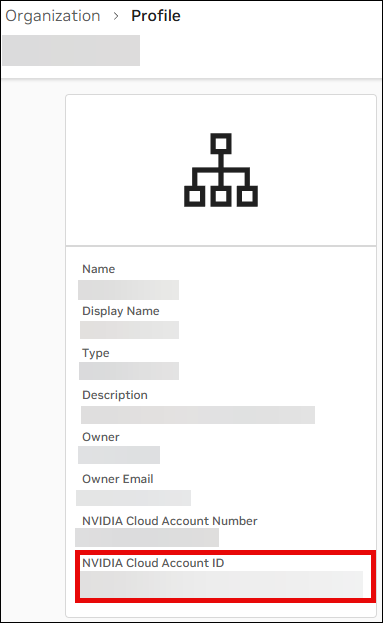
Note
Although the variable is named <NCA_ID>, the value should be set to the Name of the NGC subscription—not the NVIDIA Cloud Account ID shown on the same page.
DO NOT USE the outlined value below:
Create a Personal API Key#
Navigate to the NGC Portal to generate your personal API key, which is required for accessing the NGC Private Registry and NVCF. Be sure to include both the Cloud Functions and Private Registry scopes when configuring your key. Then, click Generate Personal Key and copy the key for later use.
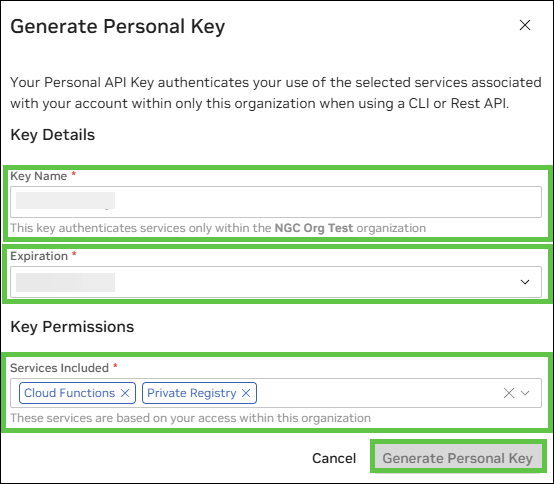
Click + Generate Personal Key to create an API key that will be used to interact with NGC Private Registry and NVCF:

Provide a name for the key name, set your preferred expiration, and include Cloud Functions and Private Registry scopes for your key. Click the Generate Personal Key button, followed by Copy Personal Key:
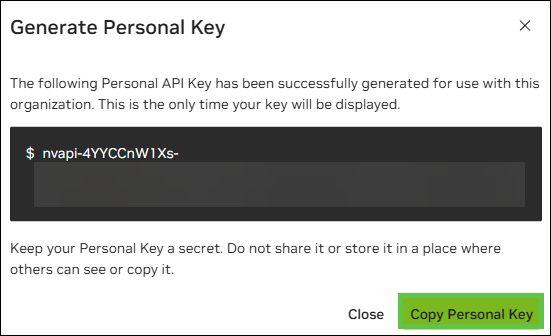
Note
Record the API Key and store it in a secure location. It is later referred to as the <NVCF_TOKEN> in the upload script.
Upload the Container#
In your Linux terminal, run the following commands including the quotation marks to export the required environment variables:
export NCA_ID="paste your <NCA_ID> here"

export NVCF_TOKEN="paste your <NVCF_TOKEN> here"
Log in to NGC Container Registry#
Use the command below to authenticate:
docker login -u \$oauthtoken -p $NVCF_TOKEN nvcr.io
After a successful login, you should see an output similar to the example below:

Tag Container#
By default, most containers in the local Docker will have the tag latest. This should be tagged with a specific version that adheres to semantic versioning:
export STREAMING_CONTAINER_IMAGE=nvcr.io/$NCA_ID/usd-composer:latest

export LOCAL_CONTAINER_IMAGE=kit_app_template:latest

docker tag $LOCAL_CONTAINER_IMAGE $STREAMING_CONTAINER_IMAGE
Note
The $LOCAL_CONTAINER_IMAGE variable is kit_app_template:latest by default. The actual actual name will be presented in the output of docker ls.
Verify Tag#
Run the docker image ls command to confirm that the tag has been properly allocated:

Push the Container#
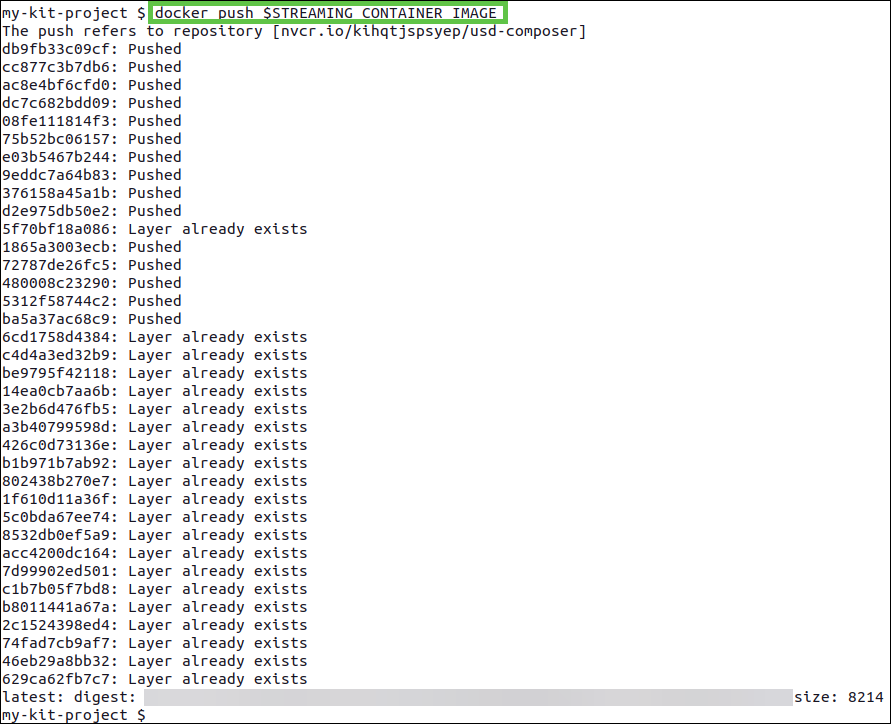
Once the image has been tagged, it can be pushed to the NGC Container Registry. Use the docker push command to upload the container to the remote registry:
docker push $STREAMING_CONTAINER_IMAGE
Important
When pushing containers to the NGC Container Registry, keep in mind the following limits:
Maximum of 10GB per container layer
Maximum 1TB total overall container size
Pushing to a Team inside an Organization (OPTIONAL)#
In some scenarios, you may need to push to a specific team within an organization. To do this, you will need to slightly modify the variable accordingly.
Include the team name in the STREAMING_CONTAINER_IMAGE variable. See the example below for reference:
export
STREAMING_CONTAINER_IMAGE=nvcr.io/$NCA_ID/<TEAM_NAME>/usd-composer:latest
All other settings should remain unchanged.
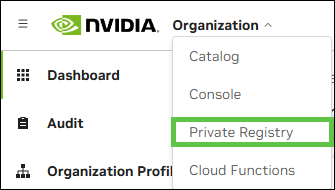
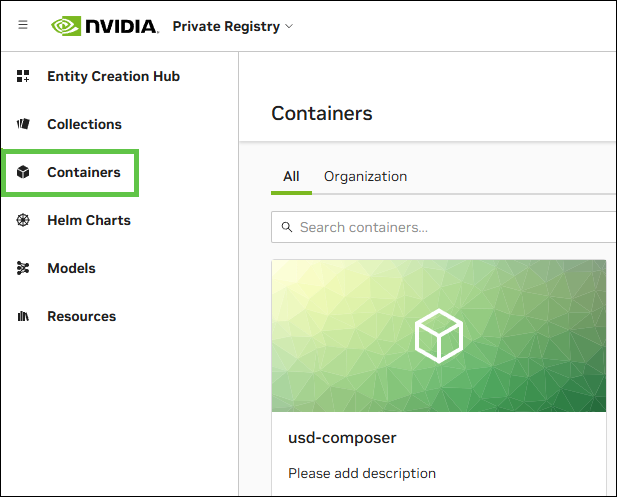
Check the Container in NGC#
Go to the Private Registry to verify your container was uploaded with the correct tag:
NVCF Function Creation#
In the Ubuntu terminal, run the following commands including the quotation marks to export the required environment variables:
Note
The name can only include uppercase letters (A-Z), lowercase letters (a-z), numbers (0-9), hyphen (-), and underscores (_).
export STREAMING_FUNCTION_NAME="name your function here" (e.g., my-usd-composer_v106_5)
Note
The streaming function name must exactly match the name displayed on the NVCF home page within the NGC portal and must start with an alphabetic or numeric character.
export NUCLEUS_SERVER="specify the Nucleus server address" (e.g., nucleus.mycompany.com)
Note
The Enterprise Nucleus Server specified here must match the one configured in the web portal front end. This alignment ensures that the NVCF function correctly passes the Nucleus token.
Clone the Sample Repository#
Invoke the following commands in a Linux terminal:
git clone https://github.com/NVIDIA-Omniverse/ov-dgxc-portal-sample.git
cd ov-dgxc-portal-sample
Create the NVCF Function#
The following variables must be defined before creating the function. Enter the exact Linux commands including quotation marks below directly into your terminal:
Note
If following the document step-by-step to this point, the above variables will already be set.
export NVCF_TOKEN=“<NVCF_API_KEY>”

export STREAMING_CONTAINER_IMAGE=“<CONTAINER_IMAGE_FROM_CR>”

export NUCLEUS_SERVER=“<NUCLEUS_SERVER_URL>”
Note
The NUCLEUS_SERVER field in this step is responsible for mapping the Nucleus Server onto the Omniverse Kit Application that was turned into a container. The containerized Omniverse Kit Application can not add Nucleus Servers reactively after the application is launched because there is no native web browser that can be launched for login. This configuration is used to mount that Nucleus server during the launch of the Omniverse Kit Application.
The following are optional configurations that define the ports used for streaming:
$STREAMING_START_ENDPOINT
$STREAMING_SERVER_PORT
$CONTROL_SERVER_PORT
Note
The $CONTROL_SERVER_PORT must match the underlying application template setting.
If the CONTROL_SERVER_PORT does not match the port of the application used, the NVCF function will not successfully deploy.
Note
Session Timeout Configuration
The Kit App function and the portal backend for streaming the application must be configured with consistent session timeout values to ensure stable reconnect behavior.
The streaming backend (OV on DGXC streaming sample) has a default session idle timeout set to 300 seconds.
For reliable session timeout support, the Kit app’s sessionTimeoutSeconds needs to match this value. (i.e., 300 seconds.)
The script has the timeout setting configured. You can set –/app/livestream/nvcf/sessionResumeTimeoutSeconds = 300 as a kit argument as well.
Note
Enable Content and Derived Data Caching
./scripts/create_function.sh is not configured to use Derived Data Caching (DDCS) and Universal Content Caching(UCC), two caching services usually deployed in an OV on DGX-Cloud cluster. In order to create a cache enabled function use ./scripts/create_function_with_caches.sh instead of ./scripts/create_function.sh throughout the rest of the document.
We advise you to contact your NVIDIA Solutions Architect to verify the in-cluster DDCS and UCC addresses.
Invoke this command:
./scripts/create_function.sh
If the script runs successfully, you will see an output similar to the example below:

If the script fails, you will see an output similar to the example below:

Note
The above script uses environmental variables and will login to nvcr.io.
Most script failures are likely due to authorization issues. Make sure the NGC API key is correctly passed—this will be visible in the logs.
> authorization: Bearer <API>
Make sure this key has the necessary Cloud Function permissions and is created under the correct organization and team.
Creating NVCF Functions in a Team inside an Organization (OPTIONAL)#
If you’re collaborating within a team, you will need to modify the create_function.sh script.
Edit the first line as follows:
nvcf_creation_response=$(curl -s -v --location --request POST
'https://api.ngc.nvidia.com/v2/orgs/<NCAID_NAME>/teams/<TEAM_NAME
>/nvcf/functions' \
If no modifications are made, the function creation script might fail due to an authorization error—typically caused by an incorrect API URL target.
Verify NVCF Function#
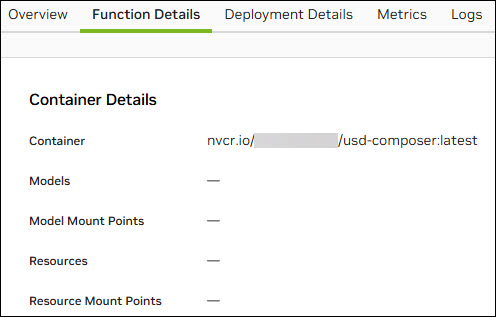
After the function is created, go to its location and confirm that it was successfully deployed:
NVCF Function Deployment Options#
Note
NVCF Deployment Parameters
For Reliable and predictable portal streaming, autoscaling must be configured explicitly.
The NVCF autoscaler does not react instantaneously to demand spikes. To guarantee capacity for all expected concurrent user sessions and avoid cold-start latency, set both Min_instance and Max_instances to the same value:
Min_instances: N
Max_instance: N
Where N is the maximum number of simultaneous streaming sessions you intend to support.
This approach ensures that all function instances are pre-warmed and ready to serve connections from the start.
For NVCF LLS (low-latency streaming) it is also recommended to set maximum concurrency equal to 1
Via the GUI (Option 1)#
Open the function you created on the NGC Portal. Look for the one named according to the STREAMING_FUNCTION_NAME variable.
Select the function, then click the Deploy Version button (highlighted below):

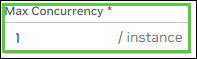
Define the backend to be used for your function, along with the minimum and maximum number of instances. Set the Max Concurrency to 1, then click Deploy Version:
Note
Select the backends that apply to your environment
Note
The Deploy Function button might be greyed out if the selected GPU type is not available. In that case, select another GPU for deployment.
The minimum and maximum capacity should be defined by the customer based on the number of rented GPUs and the expected number of concurrent users for this specific NVCF function.
This concludes the steps required using the GUI method.
Via API Call (Option 2)#
To view all available NVCF backends, run the following command:
curl -s --location 'https://api.ngc.nvidia.com/v2/nvcf/clusterGroups'  \
--header 'Accept: application/json'  \
--header "Authorization: Bearer $NVCF_TOKEN" | jq
After selecting the appropriate backend, proceed to deploy the function.
Copy Function ID and Function Version ID into the respective environment variables. This output is from the create_function.sh script from the previous steps:
Note
The Function ID and Function Version ID can also be obtained from the NGC Catalog (Web GUI). The example below is an example.
export FUNCTION_ID="enter your function id here"

export FUNCTION_VERSION_ID="enter your function version id here"
Run the curl command below to view your deployment details:
curl -s --location "https://api.ngc.nvidia.com/v2/nvcf/deployments/functions/$FUNCTION_ID/versions/$FUNCTION_VERSION_ID" \
--header 'Content-Type: application/json' \
--header 'Accept: application/json' \
--header "Authorization: Bearer $NVCF_TOKEN" | jq
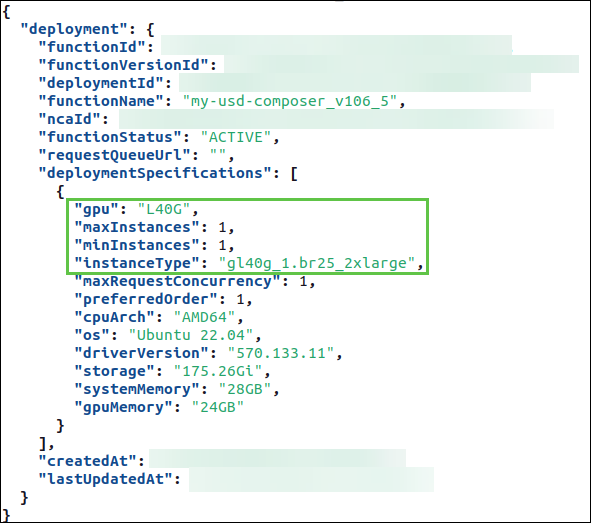
Capture data inside the deploymentSpecifications block. You will need values for the following keys inside the default deployment specification: gpu, maxInstances, minInstances, and instanceType.
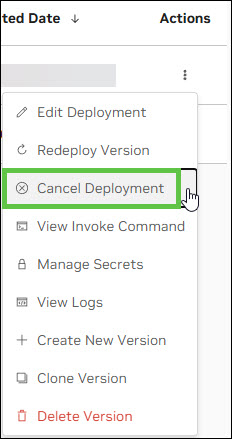
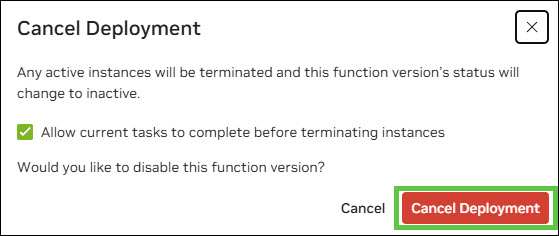
Next, cancel the function/version deployment in the NGC GUI by clicking Cancel Deployment under Actions:
Confirm the function and version have been disabled (see the example below):
curl -s --location "https://api.ngc.nvidia.com/v2/nvcf/deployments/functions/$FUNCTION_ID/versions/$FUNCTION_VERSION_ID" \
--header 'Content-Type: application/json' \
--header 'Accept: application/json' \
--header "Authorization: Bearer $NVCF_TOKEN" | jq

Deploy the function and version:
curl -s --location "https://api.ngc.nvidia.com/v2/nvcf/deployments/functions/$FUNCTION_ID/versions/$FUNCTION_VERSION_ID" \
--header 'Content-Type: application/json' \
--header 'Accept: application/json' \
--header 'Content-Type: application/json' \
--header "Authorization: Bearer $NVCF_TOKEN" \
--data '{
    "deploymentSpecifications": [{
            "gpu": "<insert your GPU type here>",
            "instanceType": "<insert your instance type here>",
            "backend": "<insert your backend here>",
            "maxInstances": <insert your max number of instances here>,
            "minInstances": <insert your min number of instances here>,
            "maxRequestConcurrency": 1
    }]
}' | jq
Example invocation with the output:
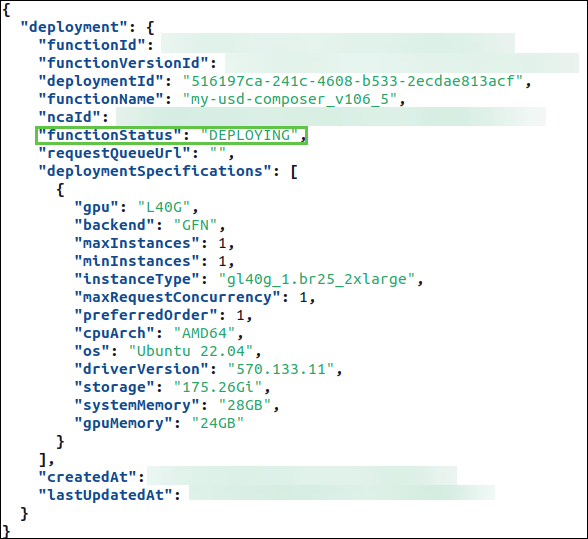
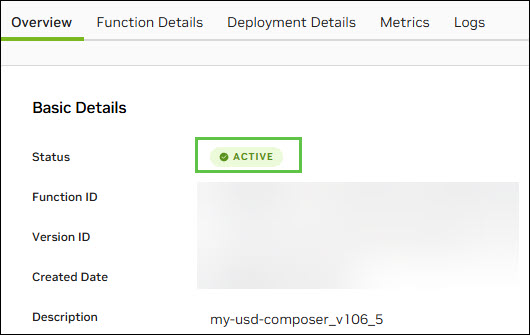
You can confirm the status through the NGC graphical interface:
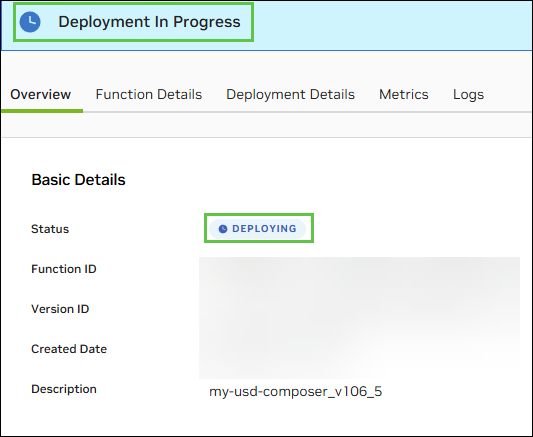
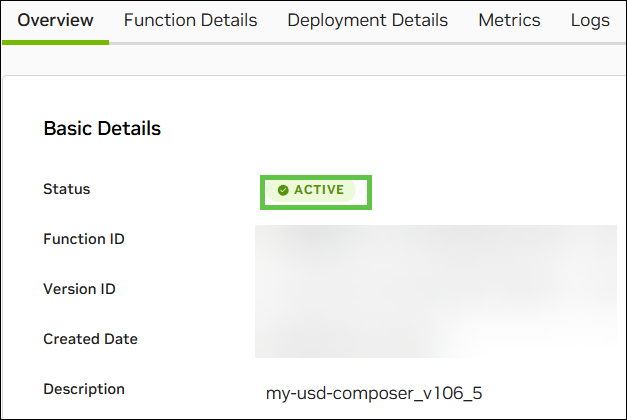
After a short while, you should see that the functionStatus has updated from Deploying to ACTIVE:
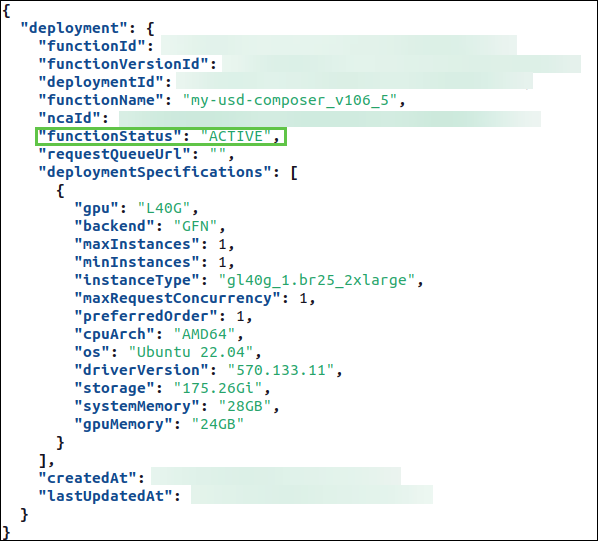
This status is also shown as Active in the user interface:
This concludes the workflow to push a containerized Kit Application to NGC, and deploying a function for streaming.