In-Depth Render Settings#
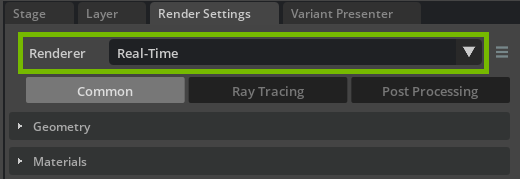
The following describes in more detail the parameters to optimize real-time render settings under the Render Settings tab. To access these settings, make sure the Renderer selection is set to Real-Time.
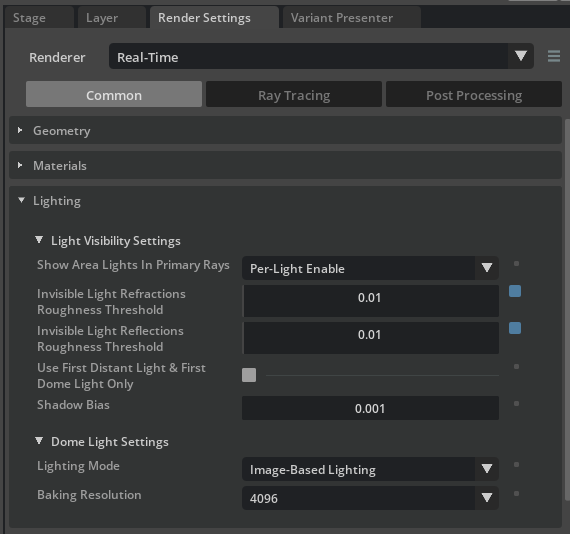
Under the Common tab, you can make adjustments to the way lights affect reflective and refractive materials.
Lighting Section
Invisible Light Refractions Roughness Threshold set to 0.01.
This value controls the point at which translucent and refractive materials (specifically, their roughness values) makes the light source invisible when seen through them.
Invisible Light Reflections Roughness Threshold set to 0.01.
This value controls the point at which reflective materials (specifically, their roughness values) makes the light source invisible.
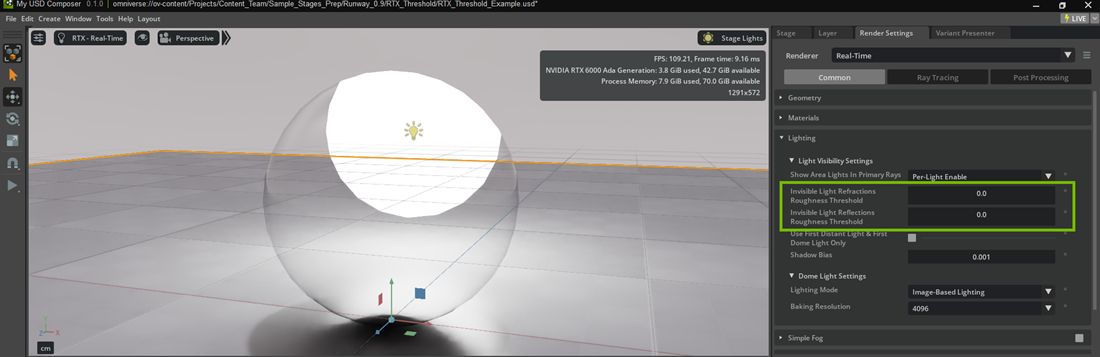
When a light appears behind a translucent material, such as glass, the light is visible in its refraction when the Invisible Light Refractions Roughness Threshold is set to 0.0.
When a light is visible in a reflective material, the light source will be observed, which may be undesirable depending on the art direction. Changing the Invisible Light Reflections Roughness Threshold to 0.01 removes the light’s visibility.
The roughness of the glass material must be less than the values of these settings for the settings to have effect. In other words, if these values are 0.01, roughness must be 0.0.
The following images illustrate the effect of leaving these values at 0.0 for a scene with a light behind a translucent, reflective object, as opposed to setting these values to 0.01.

In this section we cover NVIDIA DLSS, Direct Lighting, Reflections and Translucency settings. In most instances, the Subsurface Scattering, Caustics, and Global Volumetric Effects settings can be left at their defaults.
NVIDIA DLSS Section
DLSS boosts performance through different AI processes including Super Resolution, Frame Generation and Ray Reconstruction.
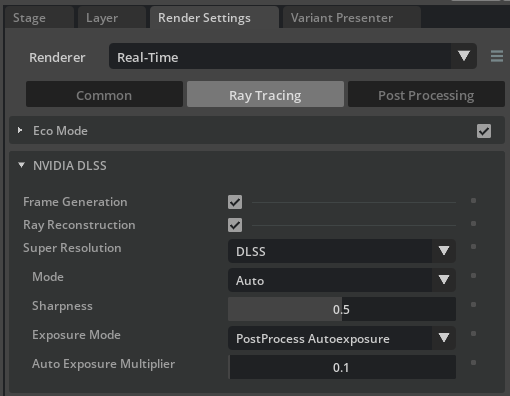
Ray Reconstruction set to Enabled.
The latest addition to DLSS, Ray Reconstruction provides higher quality pixels in between samples rays.
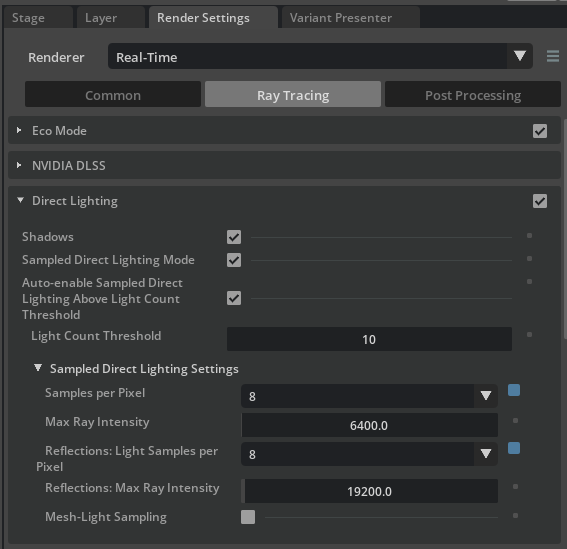
Direct Lighting Section
Sampled Direct Lighting Mode set to Enabled.
Sampled Direct Lighting Mode scales better for many lights.
Samples per Pixel set to 8.
Samples per Pixel set to 8.
Reflections: Light Samples per Pixel set to 8.
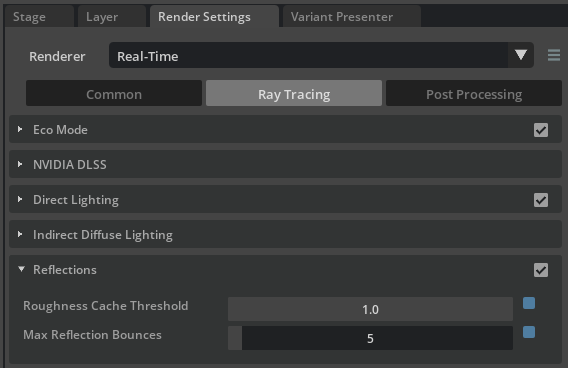
Reflections Section
Max Reflection Bounces set to 2 at a minimum.
We want this set to at least 2 in order to have enough bounces to get a representative render for reflective materials.
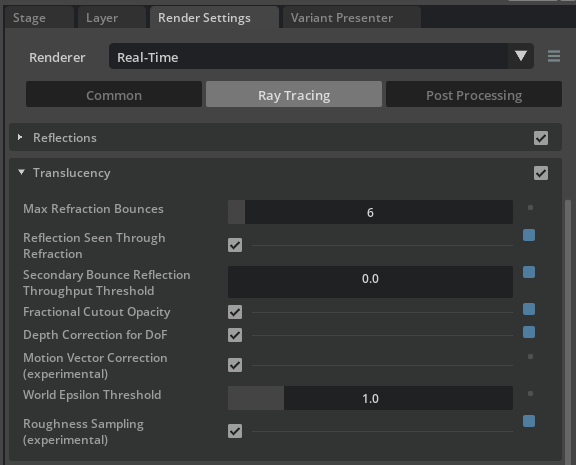
Translucency Section
Reflection Seen Through Refraction set to Enabled.
This allows reflection to be seen through refraction (important for realism with glass).
Secondary Bounce Reflection Throughput Threshold set to 0.
Reflection paths due to Fresnel are no longer traced when below this threshold. Lower values give a higher quality output.
Fractional Cutout Opacity set to Enabled.
Enables fractional cutout opacity values resulting in a translucency-like effect similar to alpha blending.
Depth Correction for DoF set to Enabled.
Improved DoF for translucent objects, at the cost of slower performance.
Roughness Sampling set to Enabled.
Enables sampling roughness, such as for simulating frosted glass.
Optimization
To optimize performance, consider reducing the values of these ray-tracing settings:
Samples per Pixel
Reflections: Light Samples per Pixel
Roughness Cache Threshold
Max Reflection Bounces
Max Refraction Bounces
Mode - Change from Auto to Performance
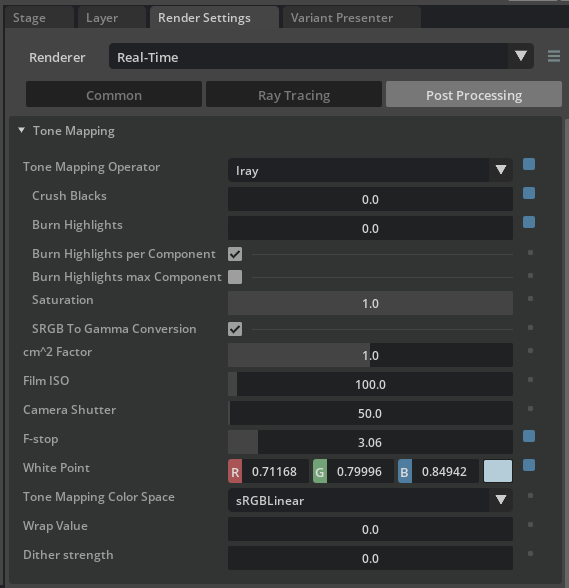
The settings under the Post Processing tab are applied to the image after it’s rendered. These settings are designed to mimic real-world photography processes to make an image look more polished and cinematic.
Tone Mapping Section
We highly recommend using this tone mapper for Real-Time mode, since it makes it possible to control the high dynamic range (HDR) and tone map it into a lower dynamic range, much like a photographer would. This helps prevent areas of the composition from clipping either too bright or too dark.
Tone Mapping Operator set to Iray.
Crush Blacks are set relative to scene.
Burn Highlights are set relative to scene.
Leverage to bring the image into an aesthetically pleasing LDR.
Saturation is set relative to scene.
Leverage to control saturation generally. Commonly, values between 1.0 and 1.25 are appealing.
F-stop is set relative to scene.
Leverage to control exposure. While named the same as the f-stop value on a camera prim, this has no effect on the camera’s setting. The camera f-stop is used only to calculate depth of field, and does not affect exposure of the final image.
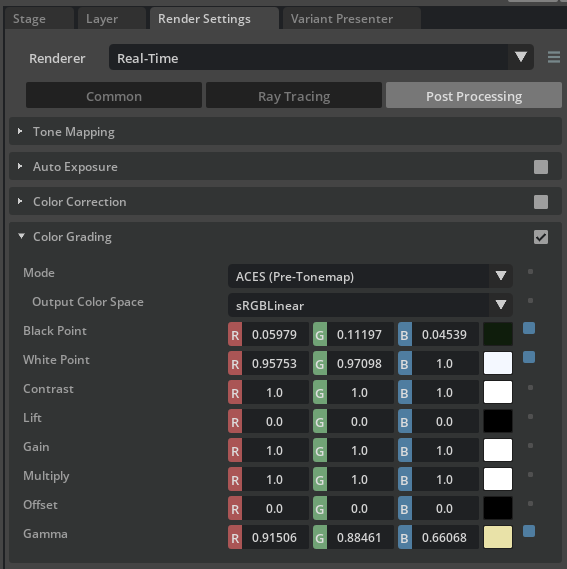
Color Grading Section (Optional)
When the Iray Tone Mapper is used, changing Contrast by a very small factor can improve the look.
Color Grading set to Enabled.
Contract is set relative to scene.
For example, a value such as 0.01 RGB may be sufficient; however, this is relative to the scene and art direction.
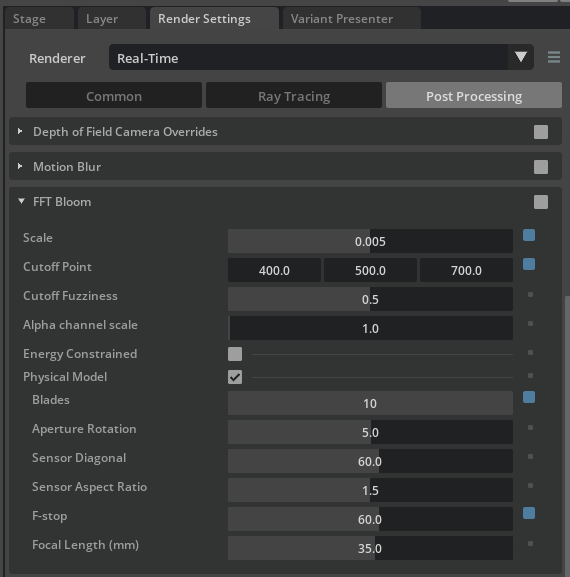
FFT Bloom Section
FFT Bloom provides a soft diffusion or “glow” of bright pixels to produce a common imaging artifact of real-world lenses.
FFT Bloom set to Enabled.
Scale set to a low value, such as 0.005.
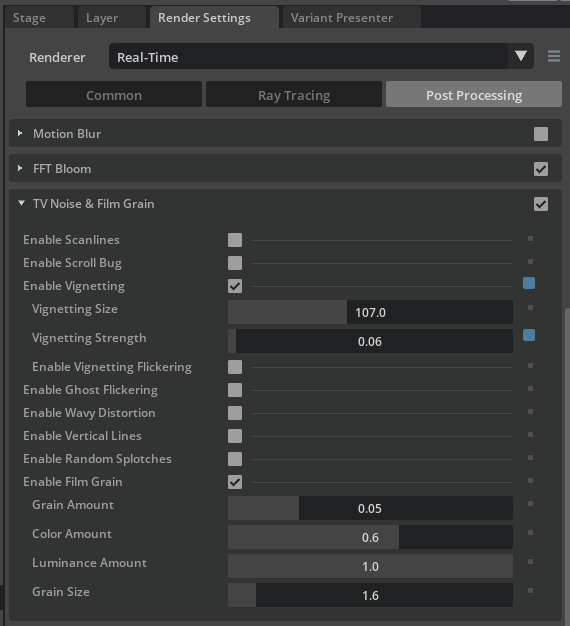
TV Noise and Film Grain Section
This section provides access to Vignetting, which creates a subtle focus on the point of interest by brightening the center of the composition and darkening the edges.
TV Noise and Film Grain set to Enabled.
Enable Vignetting set to Enabled.
Vignetting Strength set to a low value, such as 0.06.
➤ Next: Explore More Resources