Environment Material Settings#
All templates include a material called OmniProject_Environment that holds many of the settings required to customize projection. To find this material in the currently loaded template, do a search on the material name in the Stage window. The exact file path for this material will depend on the template.

Note
If you prefer to add the OmniProject_Environment material to the scene manually, export the material after loading the template and load the material as needed. See the USD Material MDL Export documentation for information on material export.
Select the OmniProject_Environment material to access its properties under the Property tab. The following sections highlight the key settings for environment setup.
Learn more about each setting for environment setup:
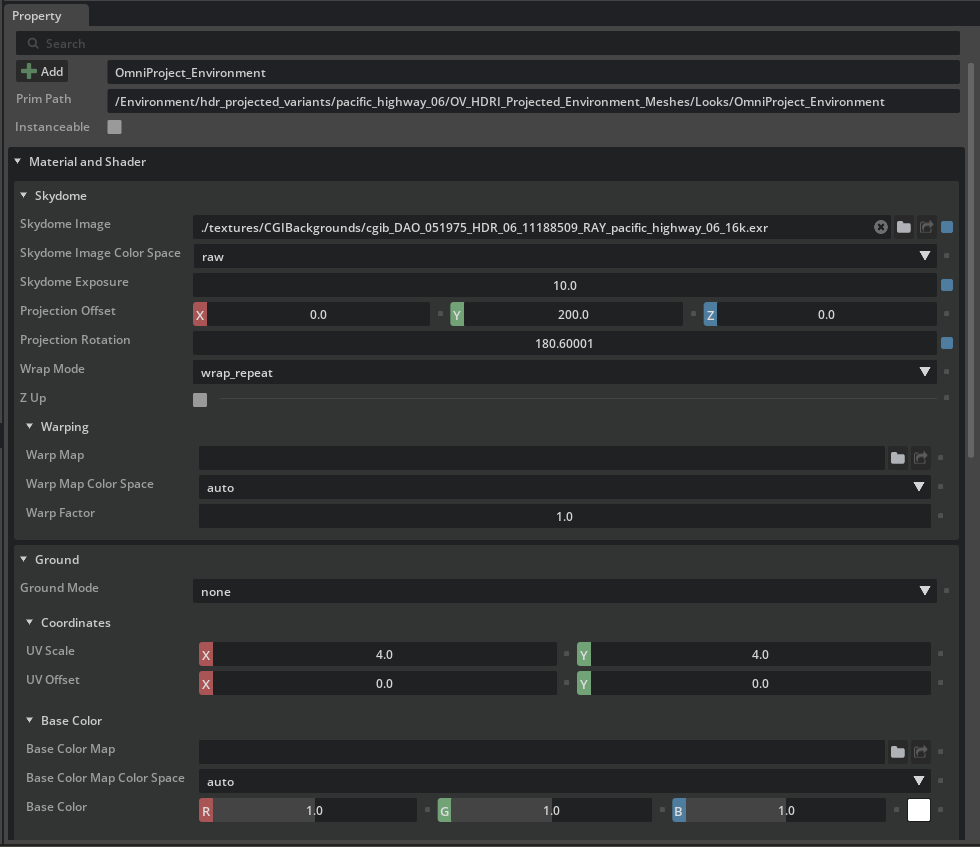
Skydome Section
The OmniProject_Environment material uses an HDRI texture to provide both a background and reflections at the same time.
Setting |
Description |
|---|---|
Skydome Image |
A reference path to the HDRI |
Skydome Exposure |
Match the value of Dome Lights Exposure/Intensity |
Projection Offset |
Typically, leave this set at default. Projection Offset tells the projection shader how many centimeters off the ground, or to the sides to project from. |
Projection Rotation |
Rotation should match dome light’s rotation |
Z Up |
Enable if using a Z-Up Stage |
Warping |
Leave at default value |
Ground Section
The following subsections are optional:
Coordinates, Base Color, Roughness, Metallic, and Normal
These subsections allow placement of a PBR tiling material under the product, directly on the projected mesh.
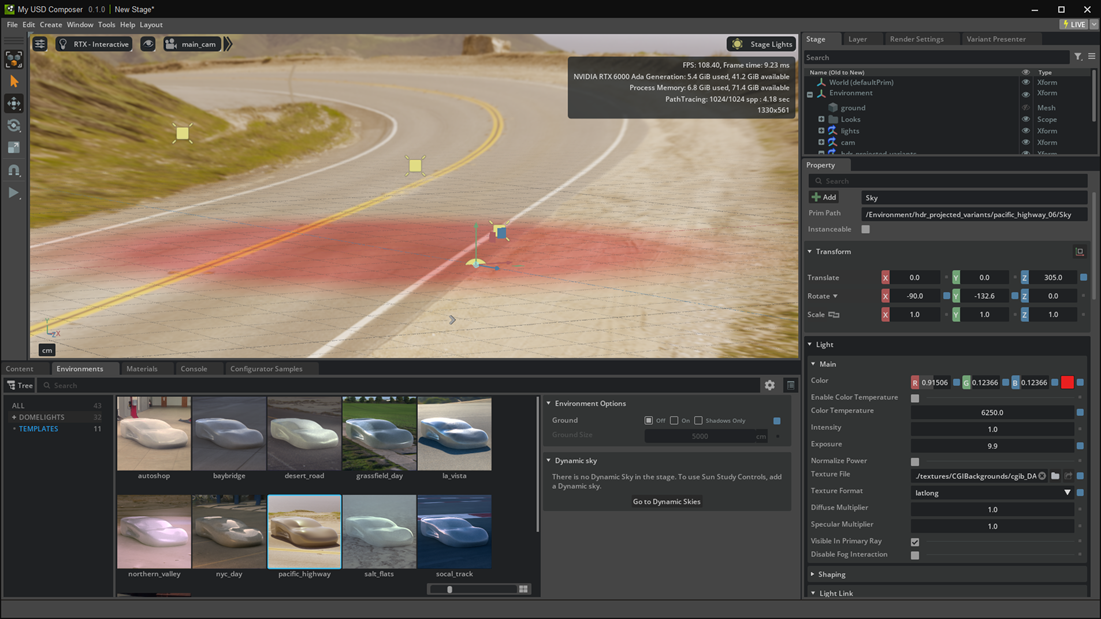
Opacity Subsection
This subsection has controls for blending between “lit” and “unlit” parts of the material. In the scene, the dome light affects only a small portion of the HDRI, where it provides shadow-casting and reflections for the focal geometry (such as a car). The rest of the HDRI behaves as emissive with no shadows.
Because it would be undesirable to have the dome light “re-light” the entire HDRI background, the light’s scope is limited to a small area of the scene where it’s needed for realism of shadows and reflections. This also means there needs to be a smooth blend between the lit and unlit areas of the scene.
Ideally, the blend between the lit and unlit portions is so smooth that a viewer can’t tell where it is. For testing purposes, it’s possible to identify the area of the scene that is “lit” by temporarily changing the color of the dome light to red. The red patch that appears in the scenery is the lit area, while everything else is the unlit area.
Setting |
Description |
|---|---|
Blend Opacity |
Typically, leave at 1.0. Lower values blend away the lit area. |
Blend Start |
Relative to scene |
Blend End |
Relative to scene |
Blend Start determines the distance from the light at which the lit area begins to transition to the unlit area. Blend End determines the distance at which the lit area is fully transitioned to the unlit area.
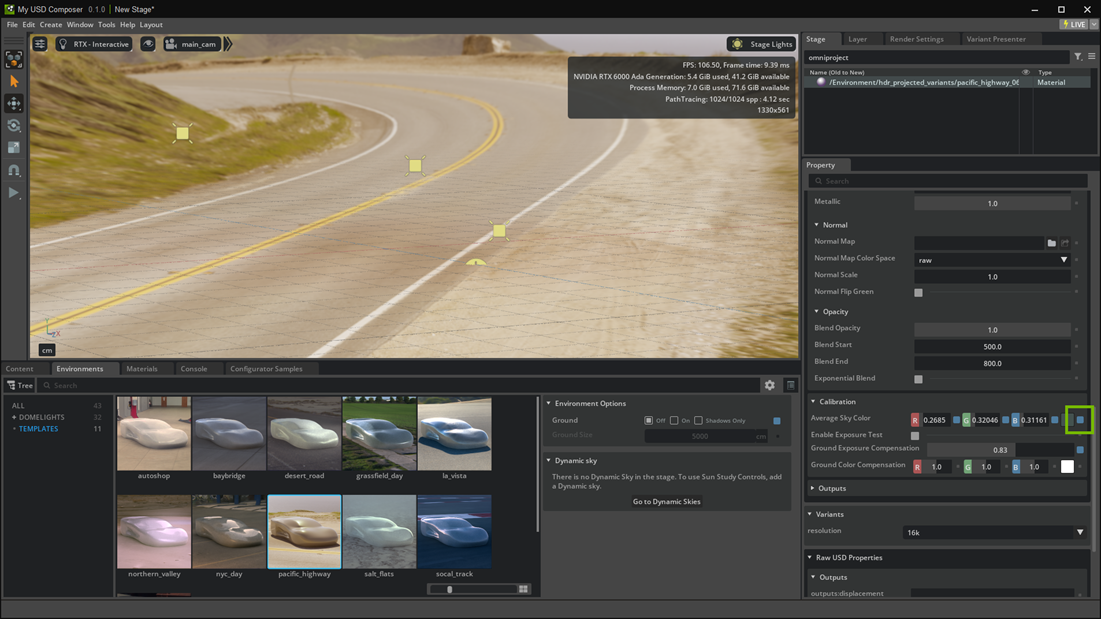
Calibration Section
Because this material has an area that is lit, we need to neutralize the effects of the dome light on the lit portion.
Calibration can be likened to white balancing, where the shader is instructed to remove certain unwanted colors from the sky. Because this is a real HDRI, the sky’s color is already present in the image upon the ground. Any more color will make it look odd, which is why we need to remove some of the color.
The Average Sky Color setting determines how much color to subtract from the diffuse color of the lit area. This color can be changed with the color picker at the far right end of the Average Sky Color line.
For example, if the sky has a lot of blue, select a shade of blue, and the shader removes some of the blue from the lit area of the ground, turning the ground slightly red in that area.