Case #2: Use USD Code API for Replicator Domain Scene Randomization#
Scenario#
A machine learning (ML) engineer has observed reduced performance of a robot perception system in low lighting conditions. To resolve the issue, the ML engineer is tasked with generating a dataset that captures a broader spectrum of lighting conditions that will ensure improved model performance in the real-world environment.
To enrich the dataset and further improve model performance, the ML engineer can also add random objects as distractors in the virtual warehouse environment.
Steps#
Install and Enable Replicator Extension#
Launch the application.
If you have not already done so, add the Chat USD and Sample Browser extensions (see steps here) and rebuild the application.
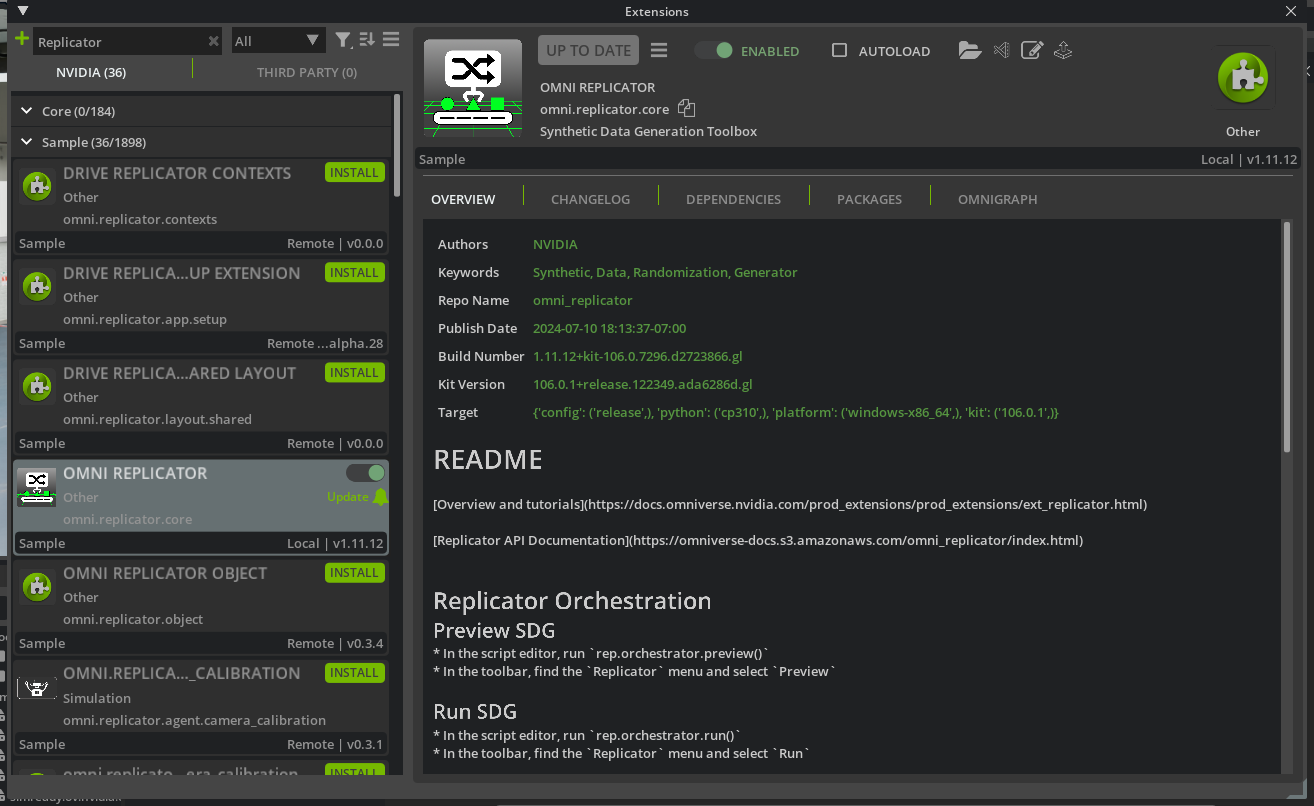
Add the Replicator extension.
Click
Developer>Extensions.Search for “Omni Replicator”. You can add the extension name to the kit file or select install to enable the extension.
Note
If you’ve added the extension to the .kit file, you will need to close, rebuild, and launch the application.
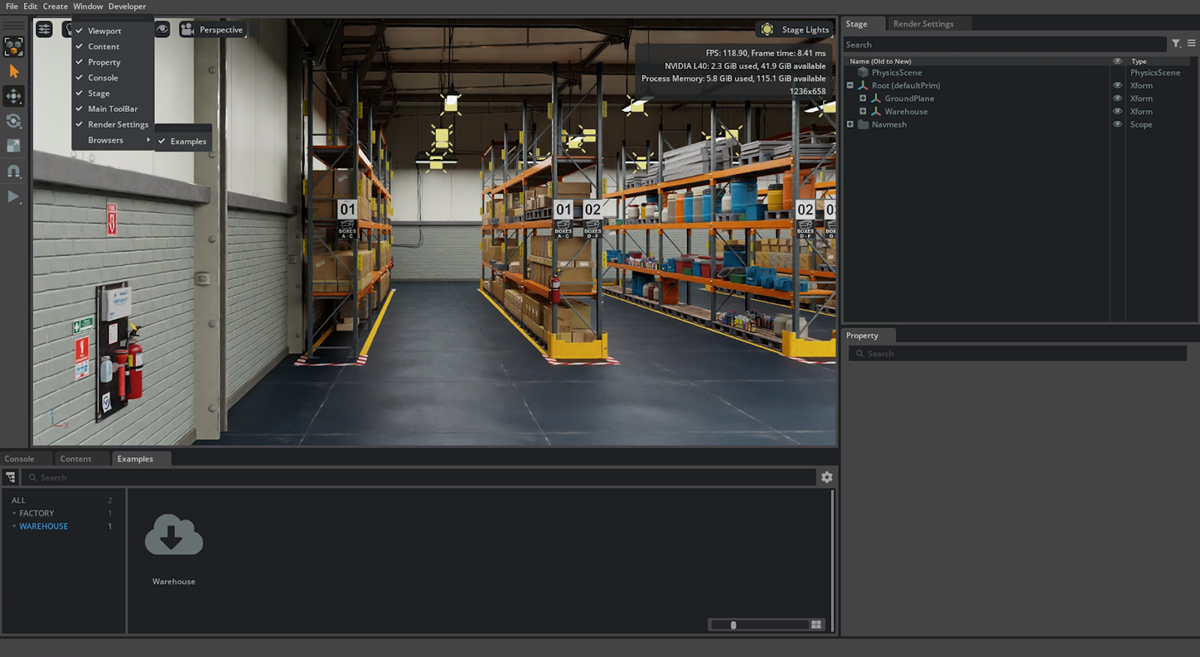
Enable the Sample Browser by navigating to Window>Browsers>Examples.
In the Examples folder, double-click
Warehouseto open it.
Note
Opening the stage will download assets and shaders. It may take a moment to load.
Vary Lighting Conditions and Location#
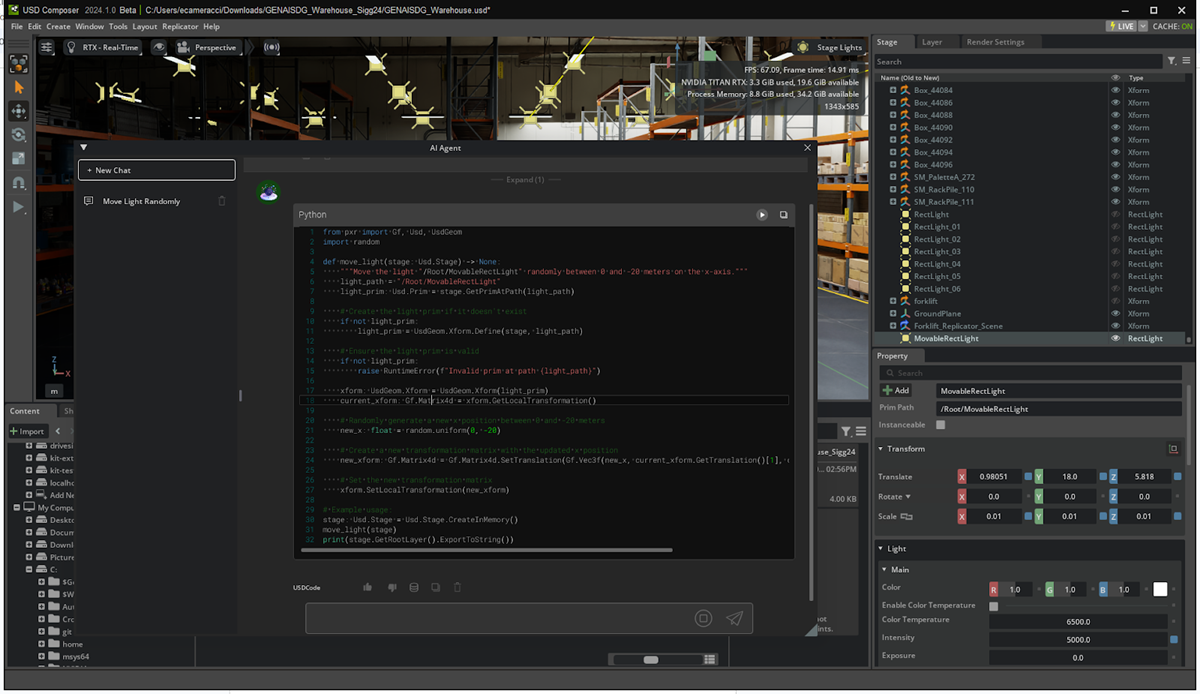
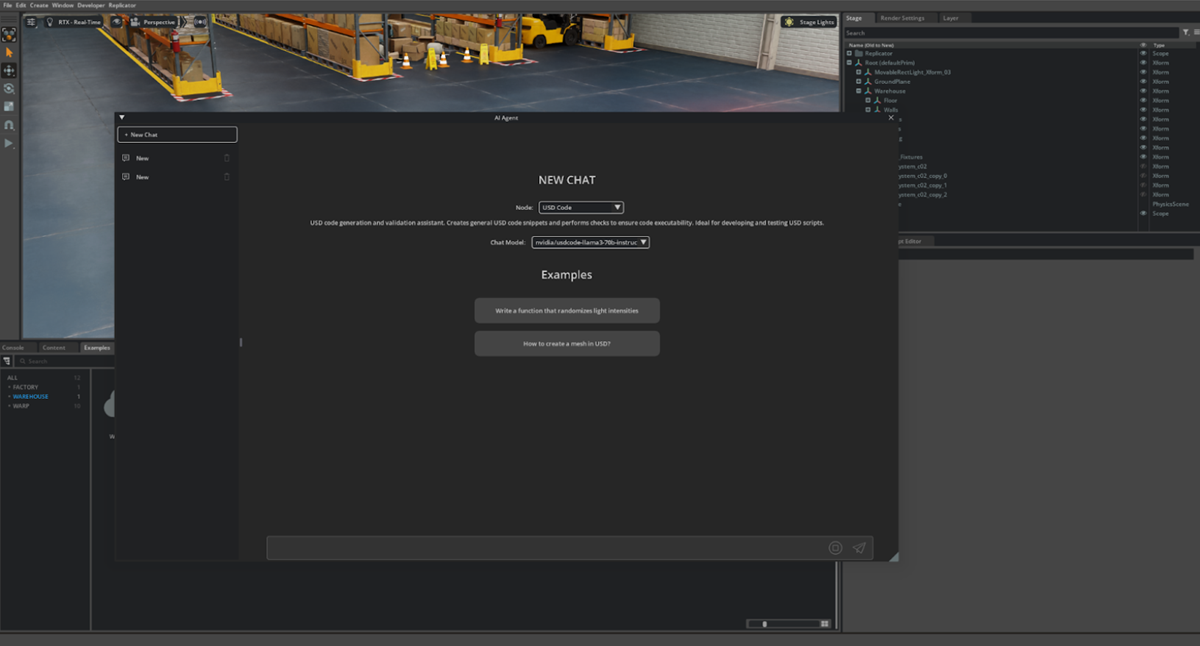
From the AI Agent inside your Kit Application, open a new USD Code API chat window.
One method to improve the robot perception system in low-lighting conditions is through domain randomization; in this case we will randomize the lighting in order to make the robot less sensitive to any specific lighting conditions. Omniverse replicator is a domain randomization tool that can help with just that. Given an OpenUSD scene and a script, replicator can randomize elements of a scene, render images, and write custom annotations of the rendered images.
Below is a sample replicator script that is complete except for the move_light function. Copy this script into the script editor in your custom application and in the next section we will leverage the USD Code API to help us write the move_light function.
import asyncio
import omni.replicator.core as rep
from pxr import Gf, Usd, UsdGeom, Sdf
import random


stage = omni.usd.get_context().get_stage()
with rep.new_layer():
    moveable_light = rep.create.light(
        light_type="rect",
        name="MovableRectLight",
        parent="/Root",
        color=(1.0, 0, 0),
        intensity=100000,
        position=(0, 0, 2),
    )


# Replace this function
def move_light() -> None:
    pass


camera = rep.create.camera(position=(-25,-15,6), look_at=(-11, 0, 0))
render_product = rep.create.render_product(camera, (1024, 768))
# Initialize and attach writer
writer = rep.writers.get("BasicWriter")
writer.initialize(
    output_dir="Replicator_Agent",
    rgb=True,
    normals=True,
    distance_to_image_plane=True,
    semantic_segmentation=True,
    colorize_depth=True,
)
writer.attach([render_product])

async def go(num_frames=10):
    await asyncio.sleep(2)
    for _ in range(num_frames):
        move_light(stage)
        await rep.orchestrator.step_async()
        await asyncio.sleep(0.5)


asyncio.ensure_future(go())
Type in a text prompt.
Example: I have an open stage, ignore missing prim errors. I'd like to have a function to randomly move the light "/Root/MovableRectLight_Xform" between 0 and -20 meters on only the x axis, leaving the y and z axis at their original values. Name the function 'move_light'
This allows the USD Code API to create a Python snippet.
Note
You may need to conduct additional prompting to the agent to achieve the desired outcome. Large language models have a random, “creative” element by design and so the same prompt will generate different results each time you run it.
The agent might need multiple attempts to correct code errors
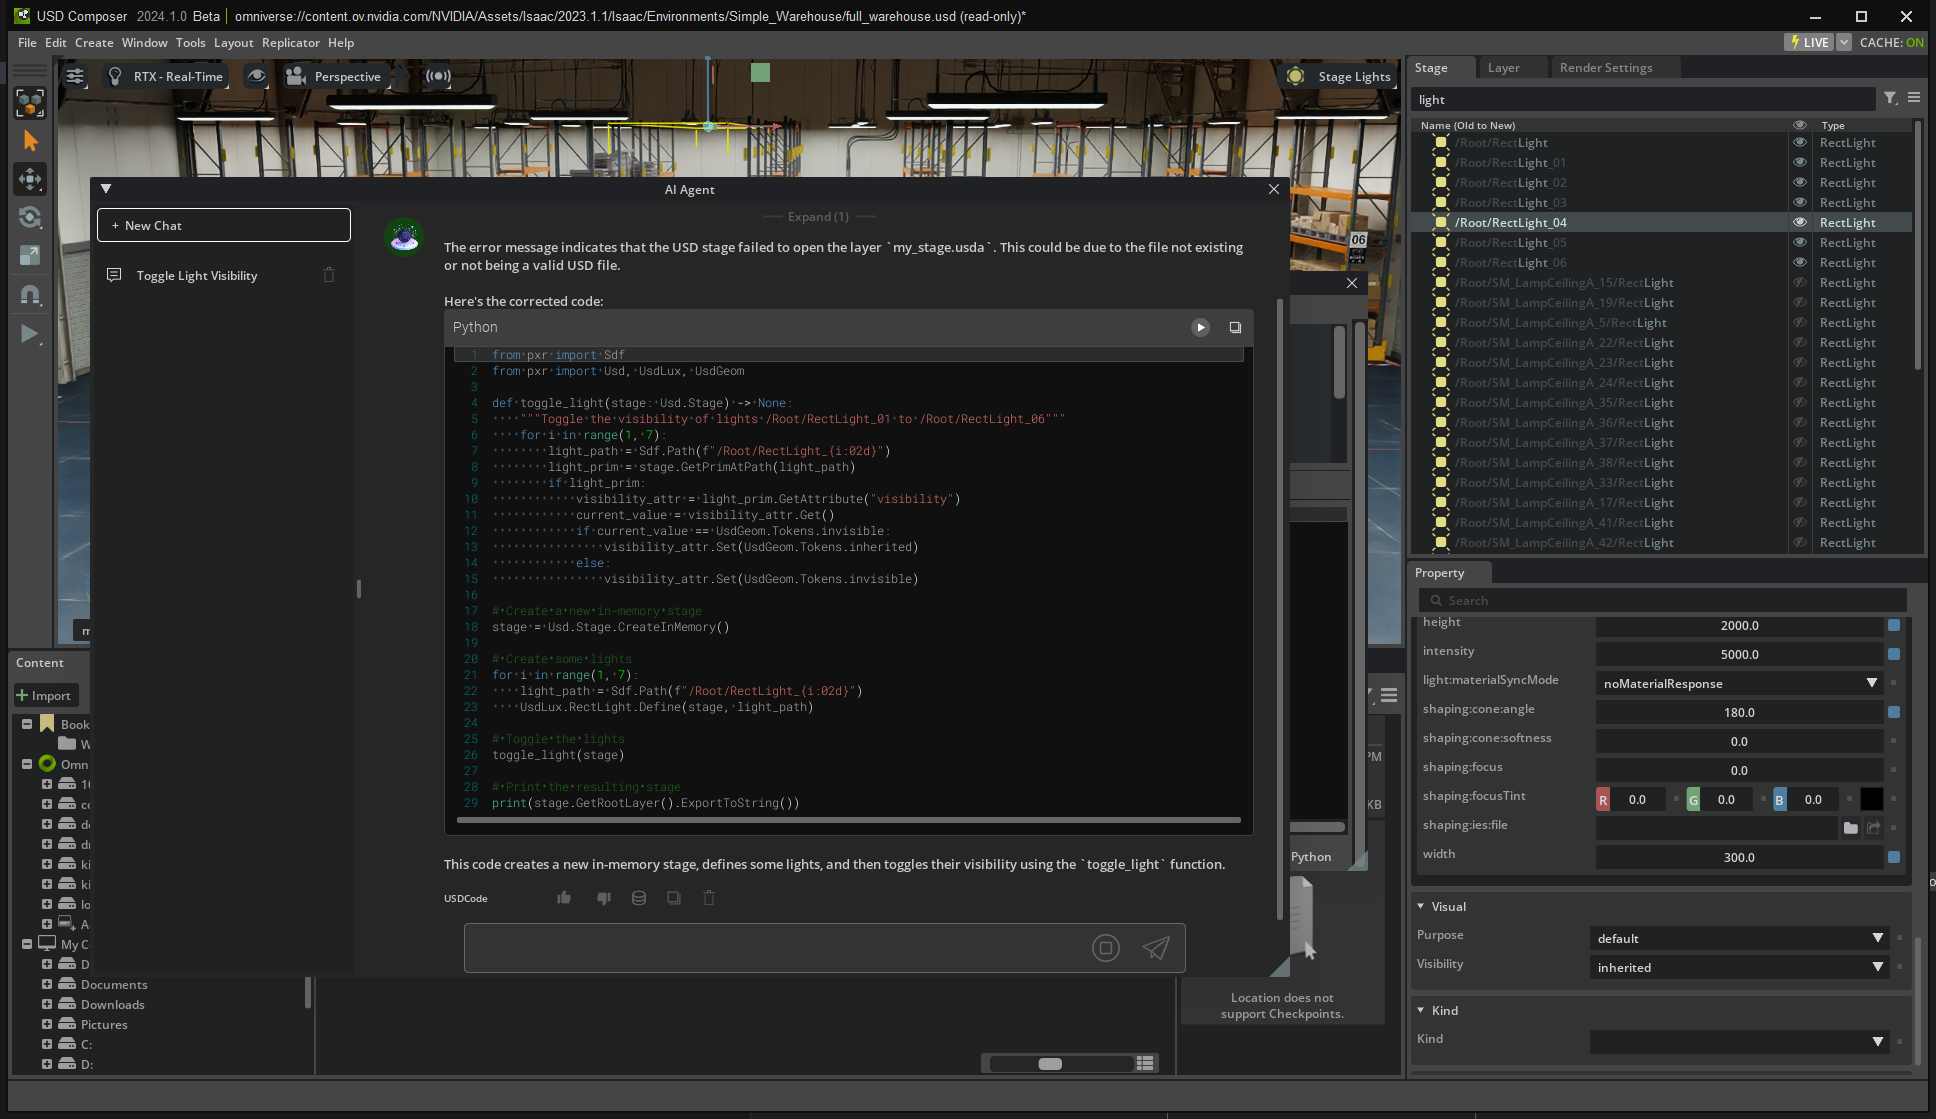
This will generate a function to randomize the light position once when run, and should be incorporated with a Replicator script to be called over multiple frames and output the generated data.
Paste the function from USD Code API into the script, overwriting the placeholder
move_lightfunction. If somehow it does not work, here’s a working function:
def move_light(stage: Usd.Stage) -> None:

    """Move the light named "/Root/MovableRectLight_Xform" randomly between 0 and -20 meters on the x axis."""

    light_path = Sdf.Path("/Root/MovableRectLight_Xform")

    light_prim: Usd.Prim = stage.GetPrimAtPath(light_path)

    if light_prim:

        xform: UsdGeom.Xform = UsdGeom.Xform(light_prim)
        translate_op = xform.GetPrim().GetAttribute("xformOp:translate")
        current_translation: Gf.Vec3d = translate_op.Get()
        new_x: float = random.uniform(0, -20)
        new_translation: Gf.Vec3d = Gf.Vec3d(new_x, current_translation[1], current_translation[2])
        translate_op.Set(new_translation)
Substitute USD Code NIM content for
Def move_light(stage: USD.stage)-> Noneand...pass. Copy and paste the USD Code NIM over.
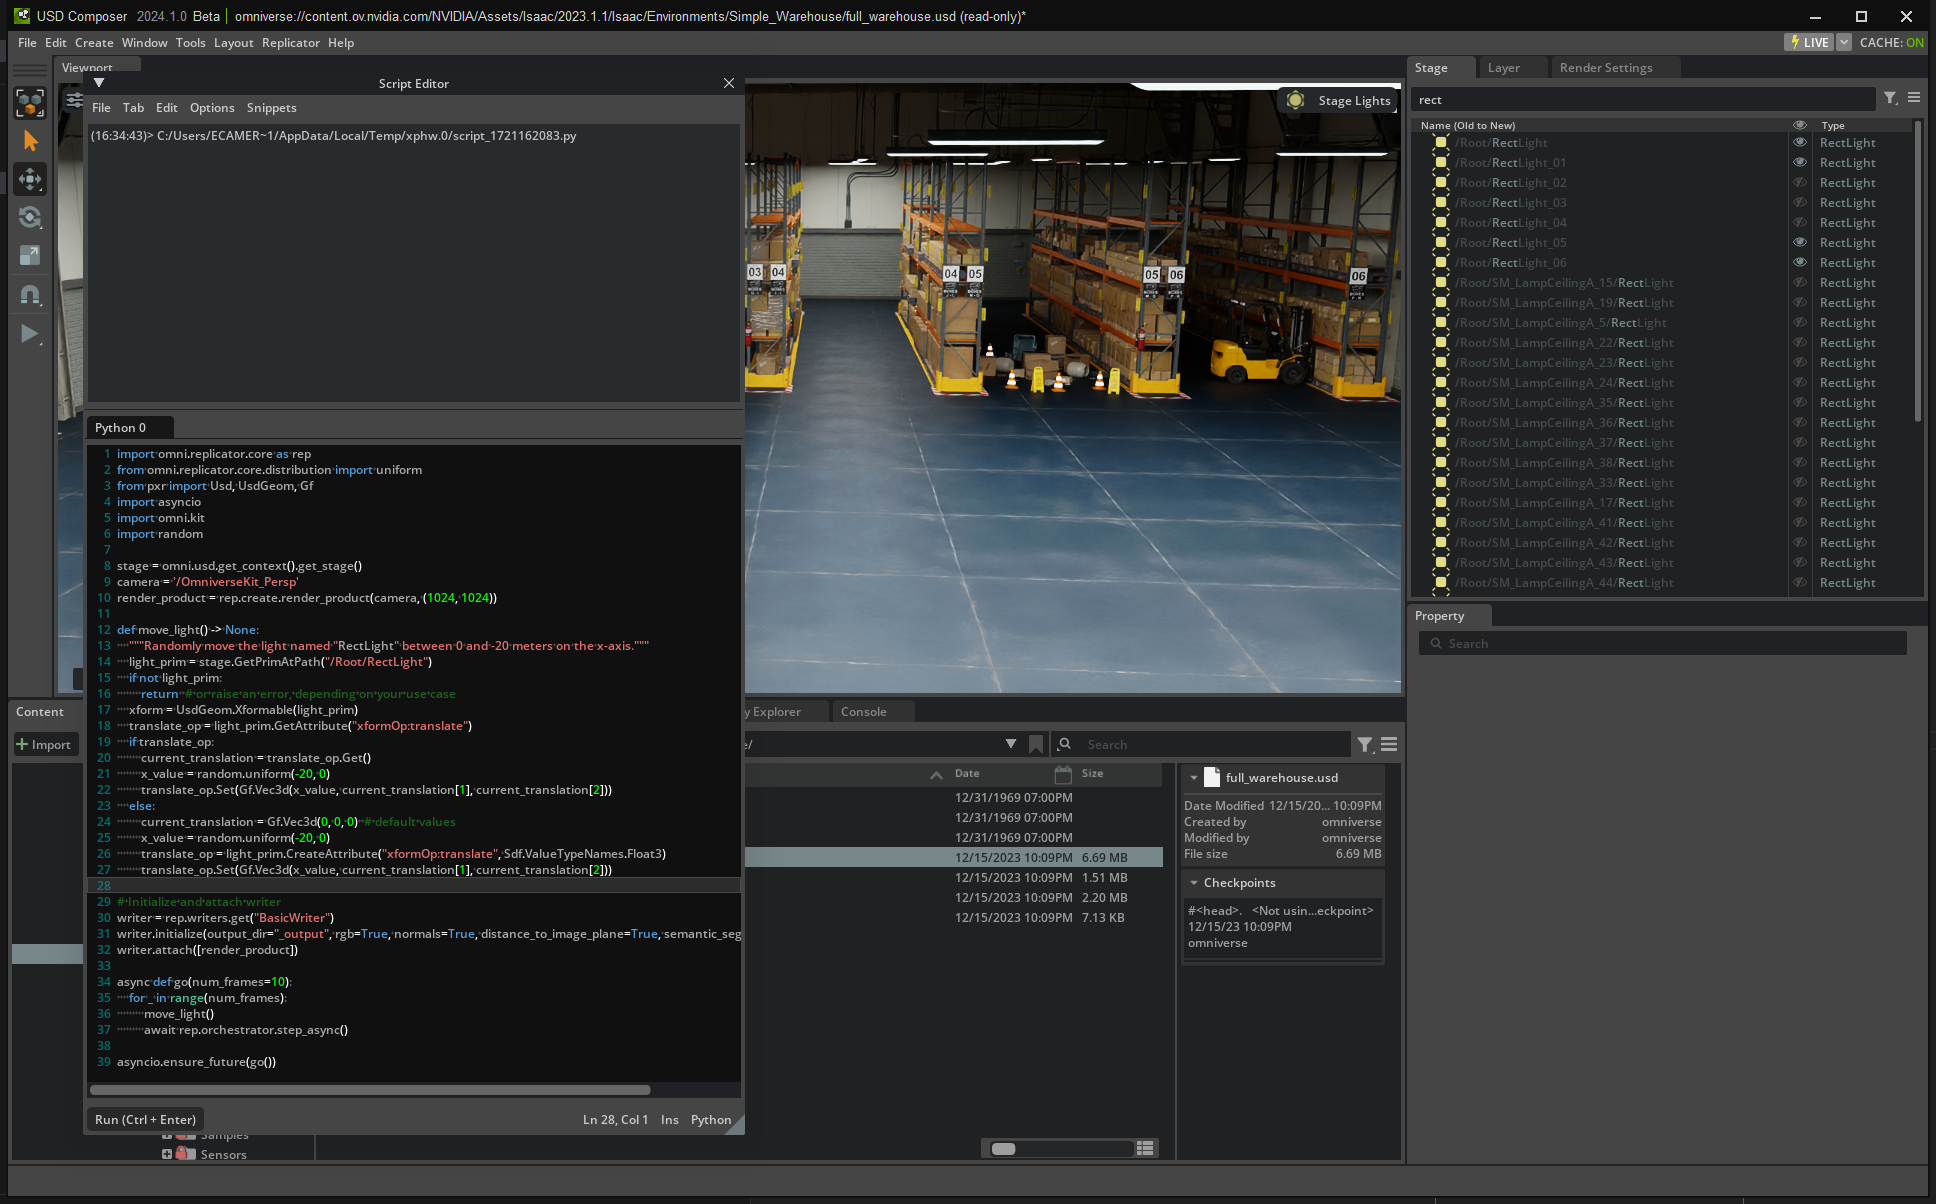
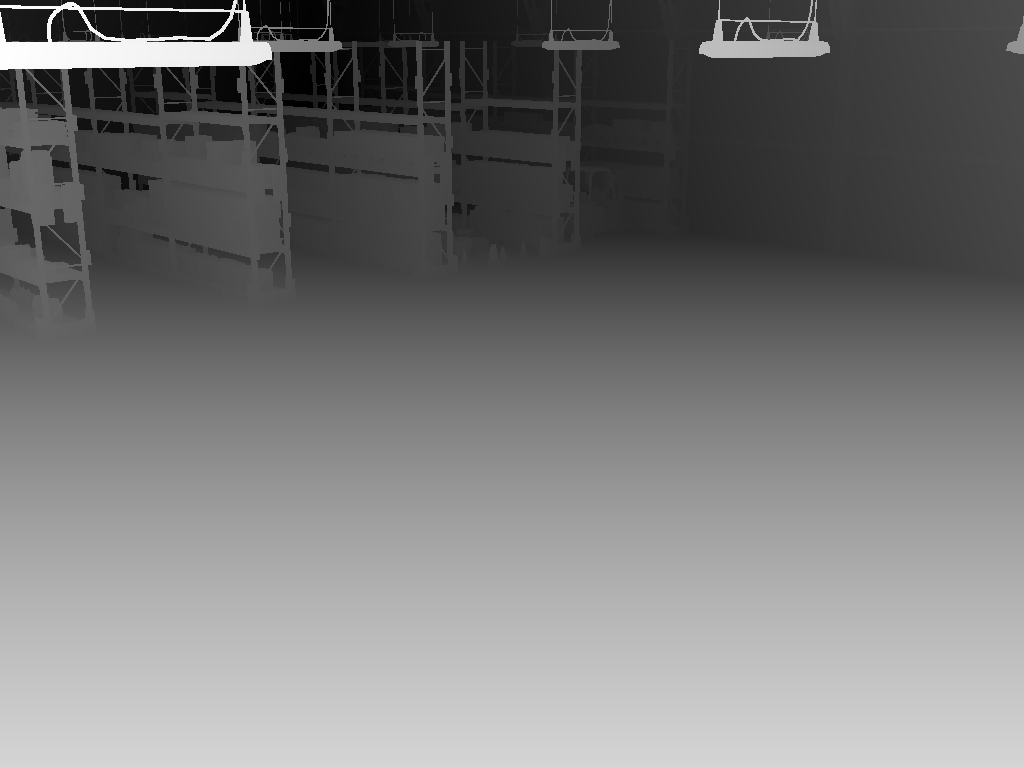
In the Replicator output folder (default is
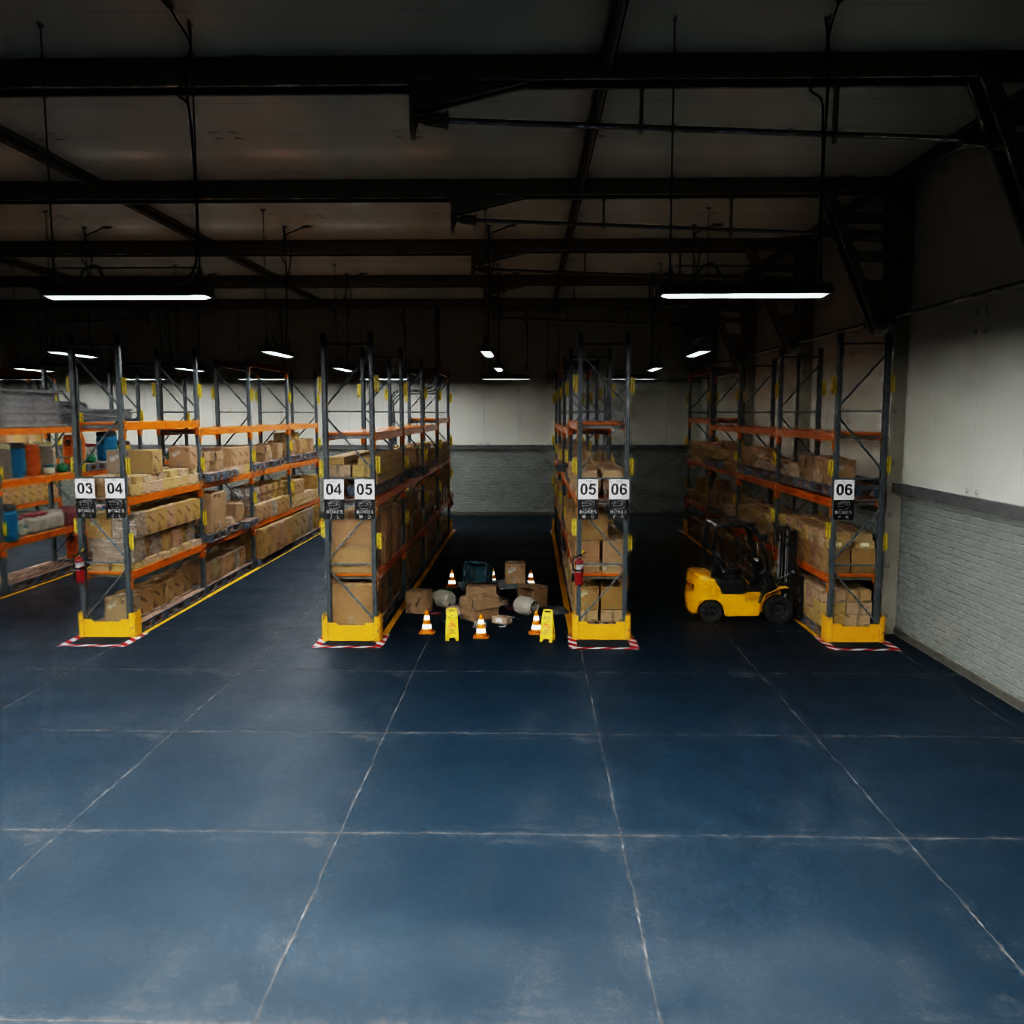
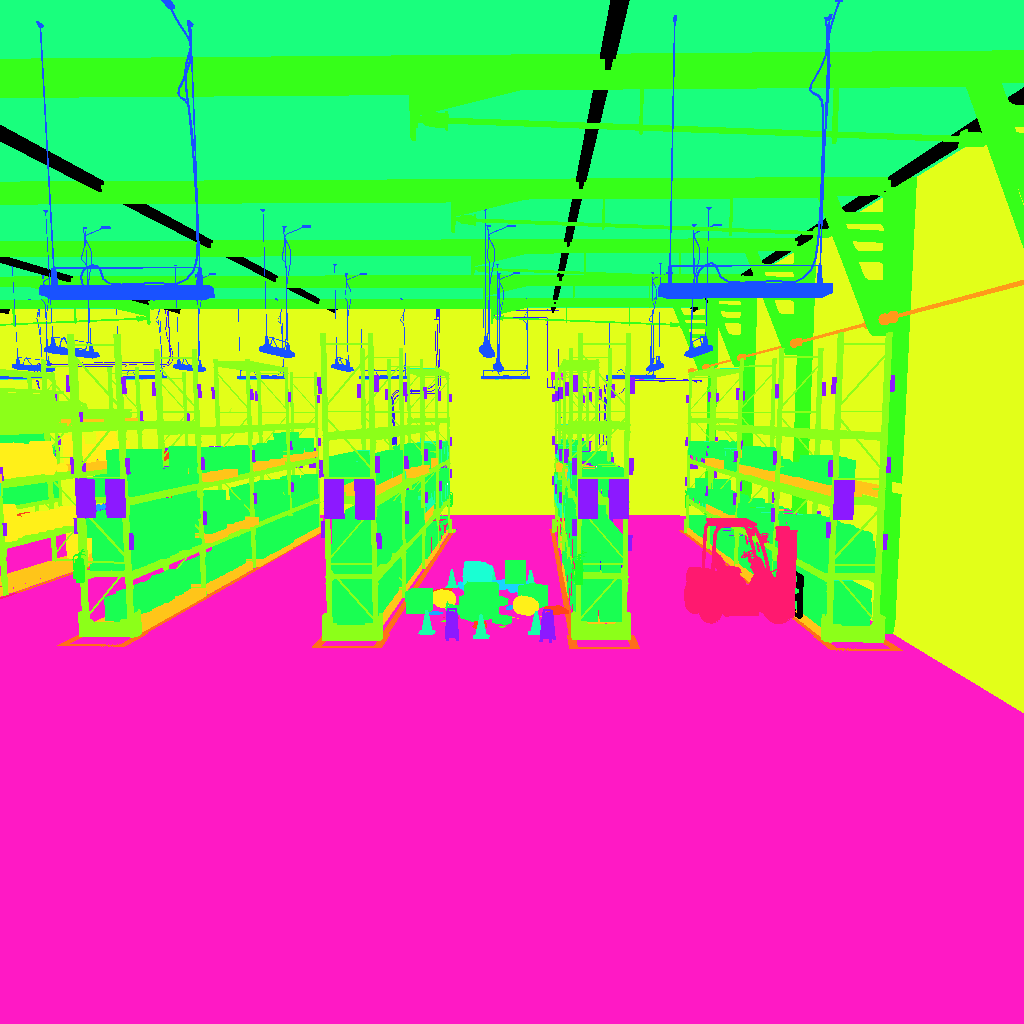
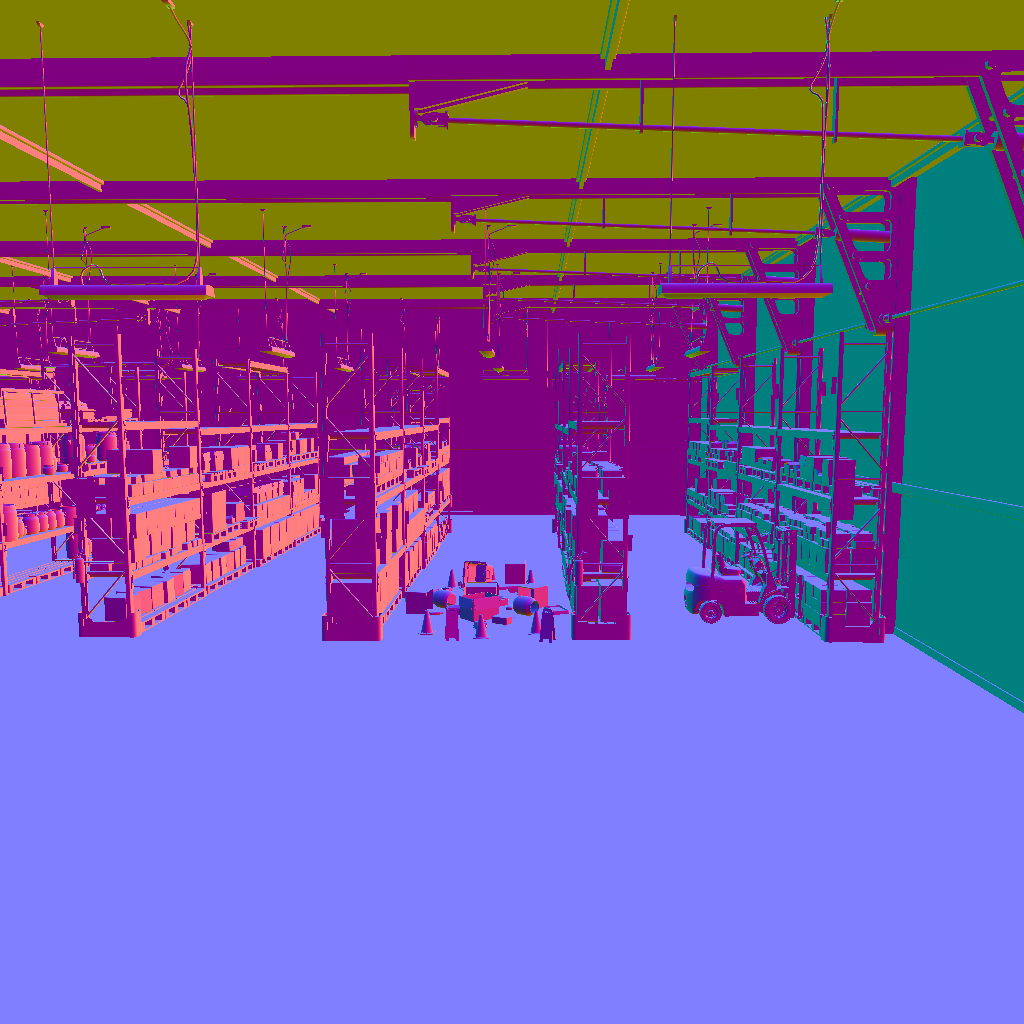
C:\Users\<username>\omni.replicator_outon Windows, and~/omni.replicator_outon Linux), there will be 10 frames of depth, normal, rgb, and segmentation data when running the script. Note, the camera may need to be moved to achieve similar output. Sample:

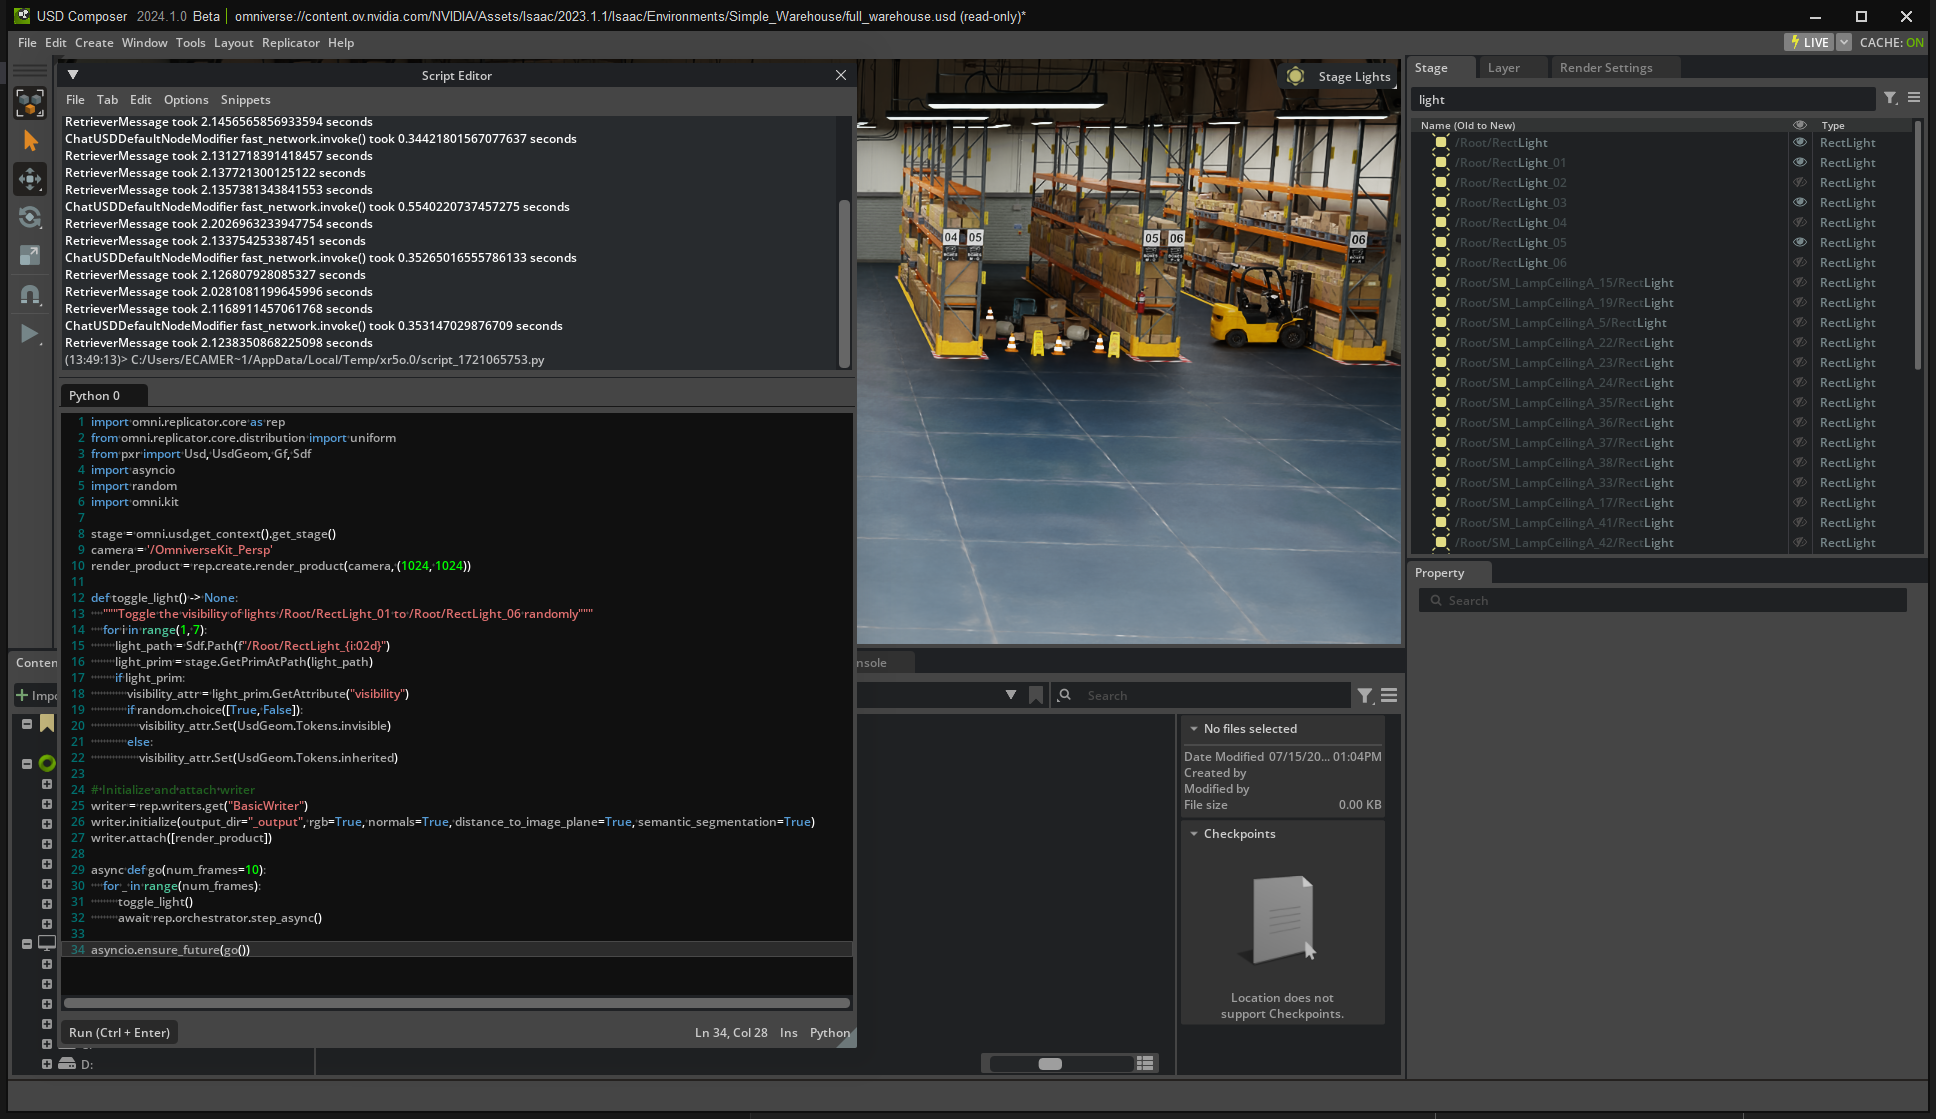
This is the script as it’s running:
Toggle Light(s) Visibility#
From the AI Agent inside your Kit Application, open a new USD Code API chat window.
Copy the Replicator template script below and paste it into the script editor.
import omni.replicator.core as rep
from pxr import Usd, UsdGeom, Gf
import omni.kit
import asyncio
import random

stage = omni.usd.get_context().get_stage()
camera = '/OmniverseKit_Persp'
render_product = rep.create.render_product(camera, (1024, 1024))

def toggle_light() -> None:
    pass

# Initialize and attach writer

writer = rep.writers.get("BasicWriter")
writer.initialize(output_dir="_output", rgb=True, normals=True, distance_to_image_plane=True, semantic_segmentation=True)
writer.attach([render_product])

async def go(num_frames=10):
    for _ in range(num_frames):
        toggle_light()
        await rep.orchestrator.step_async()
asyncio.ensure_future(go())
Type in a text prompt.
Example, - In the open stage, I'd like to have a function to randomly toggle if a light is invisible or not. Name the function toggle_light and toggle the visibility of /Root/Warehouse/Lights/RectLight_01 through /Root/Warehouse/Lights/RectLight_06.
You may need to provide feedback to the agent to get the desired outcome.
Replace the toggle_light function with the generated toggle_light function. Run the script. If somehow it doesn’t work, here’s a working function:
def toggle_light(stage: Usd.Stage) -> None:
    """Randomly toggle the visibility of lights /Root/Warehouse/Lights/RectLight_01 through /Root/Warehouse/Lights/RectLight_06."""
    import random

    for i in range(1, 7):
        light_path = Sdf.Path(f"/Root/Warehouse/Lights/RectLight_{i:02d}")
        light_prim = stage.GetPrimAtPath(light_path)
        if not light_prim:
            continue # ignore missing prim error

        vis_attr = light_prim.GetAttribute('visibility')
        if not vis_attr:
            vis_attr = light_prim.CreateAttribute('visibility', Sdf.ValueTypeNames.Token)

        current_visibility = vis_attr.Get()
        new_visibility = UsdGeom.Tokens.invisible if current_visibility == UsdGeom.Tokens.inherited else UsdGeom.Tokens.inherited
        vis_attr.Set(new_visibility)
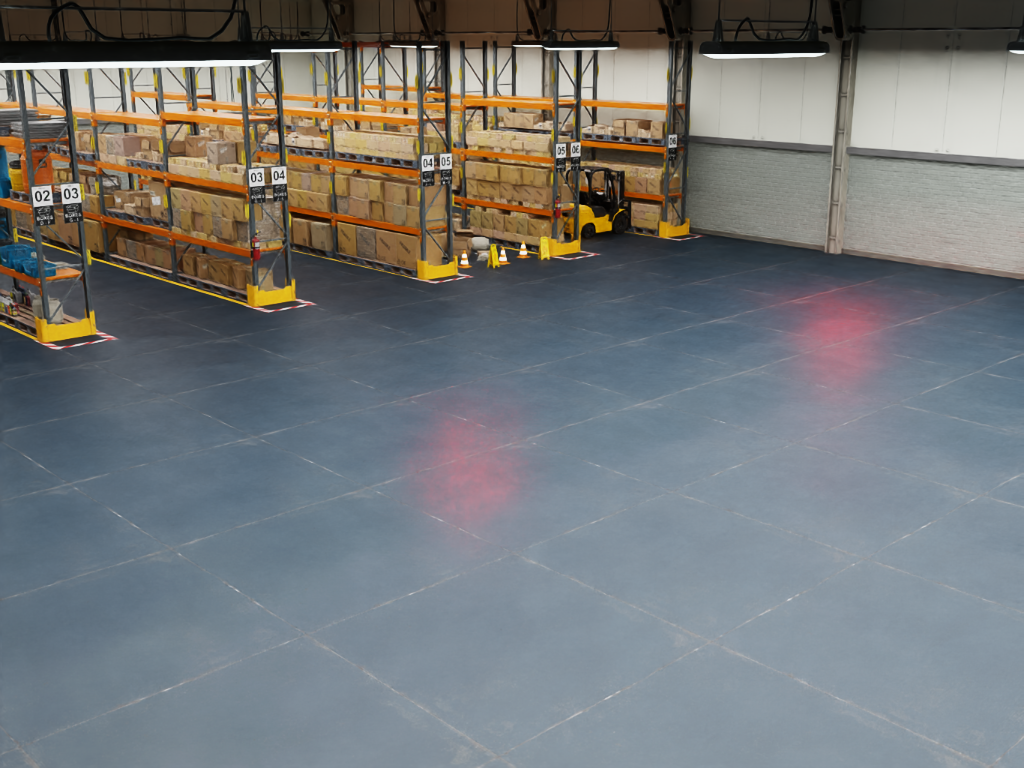
The lights should randomly toggle between visible and invisible and data output generated.
In the Replicator output folder, there will be 10 frames of depth, normal, rgb, and segmentation data when running the script. Note, the camera may need to be moved to achieve similar output.
Sample: