Case #1: Code Generation (Python USD) with USD Code#
Scenario#
In a warehouse, lighting can dramatically impact the ability of robotic vision systems to classify objects and perceive the environment. Therefore, when training autonomous systems in warehouse digital twins, developers rely on the ability to accurately simulate different lighting layouts and conditions. Manually setting up and changing arrays of lights would be tedious.
To simplify their workflows, developers instead write some simple Python code that can streamline placement and be easily changed later to generate alternative layouts. USD Code API simplifies this workflow further by writing the Python code for developers that can be easily edited in their IDE.
Try it live on the NVIDIA API Catalog
Note
As a preview release, USD Code API may not always generate 100% working code.
It is assumed that you have some experience with Python and USD.
Steps#
Get Started with USD Code API#
Relaunch your application from the command line in developer mode.
./repo.sh launch -d
.\repo.bat launch -d
Enable the Sample Browser by navigating to Window > Browsers > Examples.
In the Examples folder, double-click Warehouse to open it.
Note
Opening the stage will download assets and shaders. It may take a moment to load.
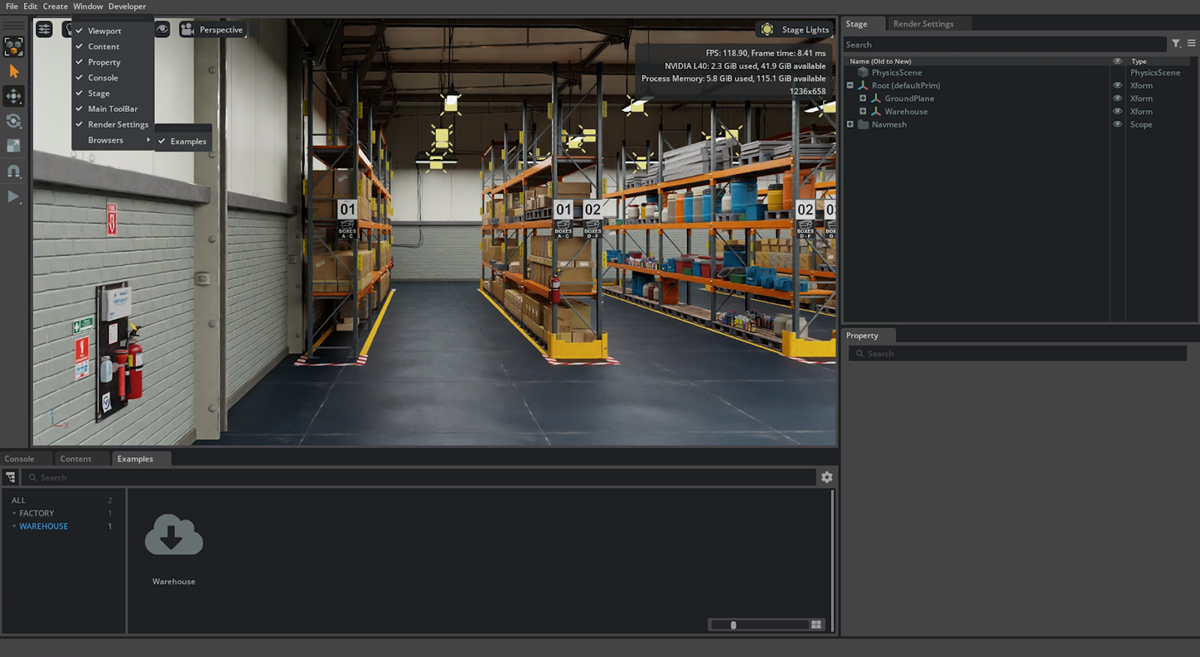
Select Open Original File.
Use USD Code API to Generate Python#
In this section you will use USD Code API to create two pieces of code. One creates the lights and the second arranges them. You can run these together.
In VS Code, use USD Code API to generate Python from an example prompt.
Paste the following prompt into the Chat USD prompt box in VS Code:
add rect lights in a 6x5 grid on the x and y axis with the dimensions of x:5 and y:10,
each rect light should have an intensity of 5000 and exposure of 1 with size of (10,3),
the lights should be aligned on the z axis and be nested under an xform called /Root/Lights

Press Enter. USD Code API will produce the required Python code.
Next let’s ask USD Code API to move the parent xform of the lights
(/Root/Lights)so the light grid is centered in the warehouse.Add the prompt:
Modify the code to move “/Root/Lights” xform to -22 on the x axis and -19
on the y axis and 8.4 on the z axis``
After making that change, the script generated should look something like what is shown below.
Note
Please keep in mind that large language models are non-deterministic and will produce different outputs even from the same prompt, so if you run into errors or the generated code is not working, feel free to use this script. You can also try the same prompt with USD Code inside of your Kit App.
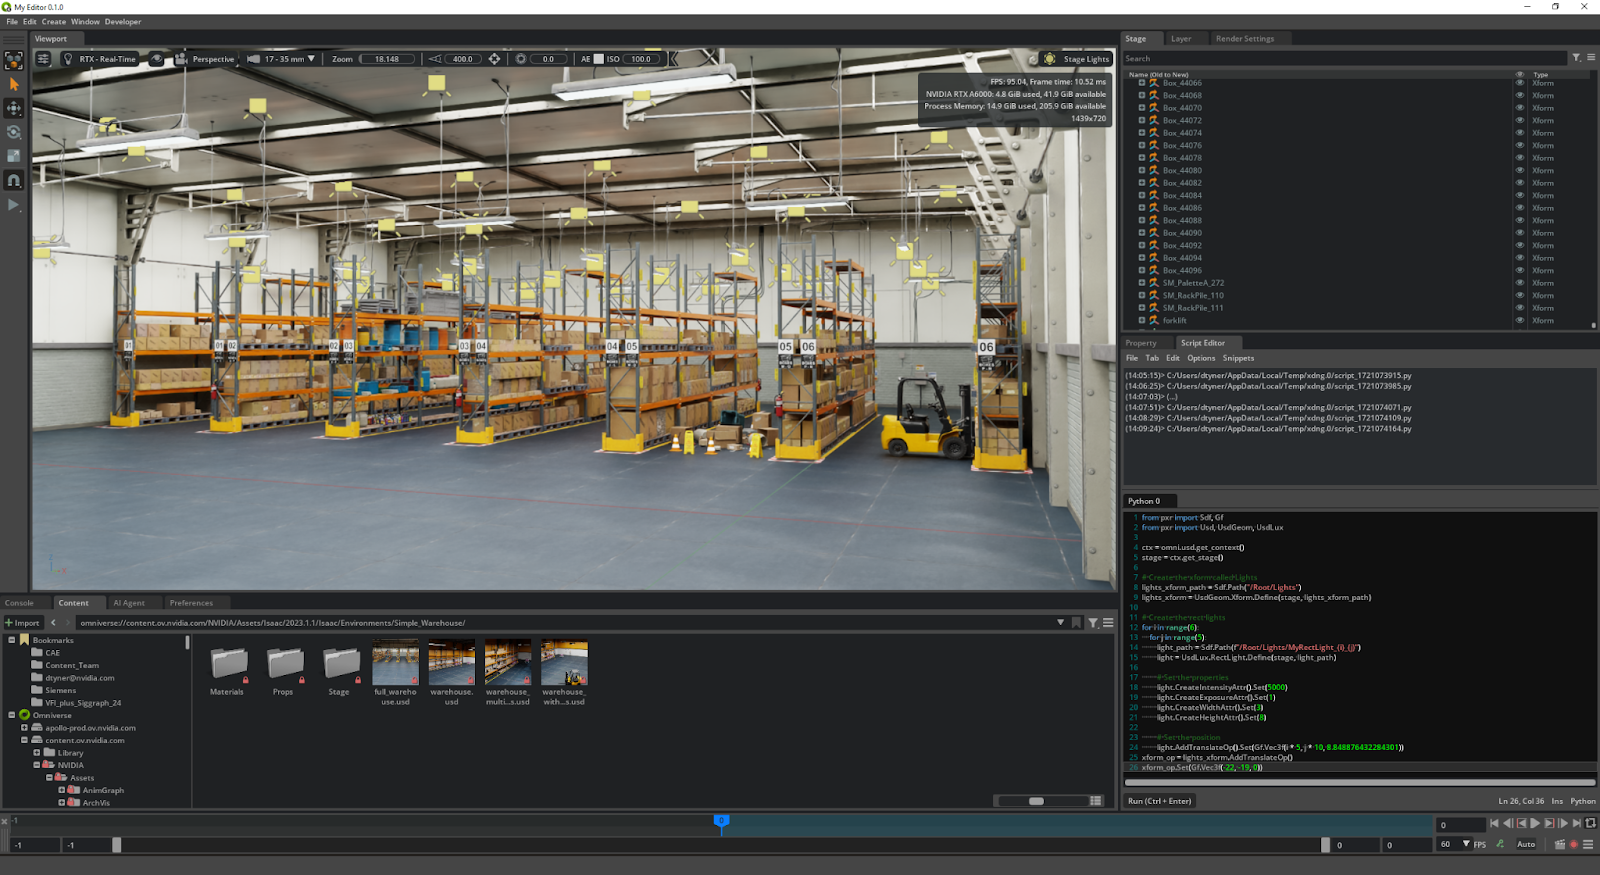
from pxr import Gf
from pxr import Sdf, Usd, UsdGeom, UsdLux

ctx = omni.usd.get_context()
stage = ctx.get_stage()

# Create a prim named /World (type Xform) and make it the default prim.
prim_path = "/Root"
xform: UsdGeom.Xform = UsdGeom.Xform.Define(stage, prim_path)
prim: Usd.Prim = xform.GetPrim()
stage.SetDefaultPrim(prim)


# Create a Lights Xform
lights_xform_path = "/Root/Lights"
lights_xform: UsdGeom.Xform = UsdGeom.Xform.Define(stage, lights_xform_path)


# Set the translation of the Lights Xform
translate_matrix = Gf.Matrix4d().SetTranslate(Gf.Vec3d(-22, -19, 8.4))
lights_xform.AddTransformOp().Set(translate_matrix)


# Create a 6x5 grid of rectangular lights
for i in range(6):
      for j in range(5):
         light_path = f"/Root/Lights/Light_{i}_{j}"
         light: UsdLux.RectLight = UsdLux.RectLight.Define(stage, light_path)
         light.CreateIntensityAttr().Set(5000)
         light.CreateExposureAttr().Set(1)
         light.CreateWidthAttr().Set(10)
         light.CreateHeightAttr().Set(3)

         # Create a translation matrix
         translate_matrix = Gf.Matrix4d().SetTranslate(Gf.Vec3d(i * 5, j * 10, 0))

         # Add a transformation operation
         light.AddTransformOp().Set(translate_matrix)
Copy the resulting code using the Copy Code button.

Back in the Application, paste the code into the Kit Script Editor found in Developer > Script Editor. Do not run the script yet. We have to make a couple of modifications.
If you see the following lines of code at the bottom of script, remove them:
usda = stage.GetRootLayer().ExportToString()
print(usda)
Since in this scenario you already have a stage open in Kit, you need to point your script to use the Kit open in stage instead of creating a new one in memory. USD Code API is aware of OpenUSD, but not of Omniverse. You can correct this by changing:
stage = Usd.Stage.CreateInMemory()
to
ctx = omni.usd.get_context()
stage = ctx.get_stage()
Your final script should look like this:

Hide the existing stage lights by toggling the eyeball icon on
/Root/Warehouse/Lights.Run the script and observe the results on the stage. Feel free to modify the light values in the prompt or in the generated code.