Installing VMware vCenter Server#
This section covers installing VMware vCenter Server, including:
Installing VCenter Server Appliance
Adding Licenses to Your vCenter Server
Adding a Host
Setting the NTP Service on a Host
Setting a vCenter Appliance to Auto-Start
Mounting an NFS ISO Data Store
Note
This deployment guide assumes you are building an environment for a proof of concept. Refer to VMware best practice guides before building your production environment.
Installing VCenter Server Appliance (VCSA)#
The VCSA is a preconfigured virtual appliance built on Project Photon OS that allows you to manage multiple ESXi hosts and perform configuration changes from a single pane of glass. Since the OS was developed by VMware and accelerated by NVIDIA vGPUs, it offers better performance and boot times than the previous Linux-based appliance. Furthermore, it uses an embedded vPostgres database, giving VMware complete control of the software stack in tandem with the performance of NVIDIA-certified Systems. This results in significant optimization for vSphere environments and quicker release of security patches and bug fixes, enabling IT admins to focus on organizational goals and strategic initiatives.
The VCSA scales up to 2500 hosts and 45,000 virtual machines. Features such as Update Manager are bundled into the VCSA, file-based backup and restore, and vCenter High Availability. The appliance also saves operating system license costs and is quicker and easier to deploy and patch.
Note
A couple of releases ago, the VCSA reached feature parity with its Microsoft Windows counterpart and is now the preferred deployment method for vCenter Server.
Software Considerations:#
As of vSphere 7.0, deploying a new vCenter Server or upgrading to vCenter Server 7.0 requires using the vCenter Server Appliance (VCSA). The new vCenter contains all Platform Controller services. Review the vCenter Server Components and Services guide for more details about the VCSA authentication services and other installed services with the new vCenter appliance.
VCSA must be deployed to an ESXi host running version 6.5 or above. In addition, all the hosts you intend to connect to VCSA should be running ESXi 6.5 or above. Hosts running v6.0 and earlier cannot be managed by the version 7 vCenter Server Appliance, and there is no direct upgrade path
You must check the compatibility of any third-party products and plugins that might be used for backups, anti-virus, monitoring, etc., as these may need upgrading for ESXi compatibility.
To check version compatibility with other VMware products Product Interoperability Matrix.
For more information, please refer to vSphere Software Requirements
Architectural Considerations:#
When implementing a new ESXi environment, you must plan its topology following the VMware vCenter Server and Platform Services Controller Deployment Types.
Most deployments will include the vCenter Server and PSC in one appliance, following the embedded deployment model used in this guide.
Note
All Platform Services Controller services are consolidated into vCenter Server, simplifying deployment and administration.
Hardware and Storage Requirements:#
See the document Hardware Requirements for specifications. The corresponding size you select during installation will determine the number of CPUs and the amount of memory (disk can be thin provisioned).
See the document Storage Requirements for further details. Storage requirements for the smallest environments start at 250 GB and increase depending on your specific database.
The ESXi host on which you deploy the VCSA must not be in lockdown or Maintenance Mode.
All vSphere components must be configured to use an NTP server. The installation may fail, or the vCenter Server Appliance VPXD service may not start if the clocks are not synchronized.
FQDN resolution must be enabled when you deploy the vCenter Server.
vSphere VMware Configuration Maximums Tool.
vCenter Server Appliance (VCSA) Installation#
Download the latest VMware vCenter Server Appliance ISO from VMware downloads.
Mount the ISO on your computer. The VCSA installer is compatible with Mac, Linux, and Windows.
Browse to the corresponding directory for your operating system, e.g.,
\vcsa-ui-installer\win32: right-click Installer and select Run as administrator.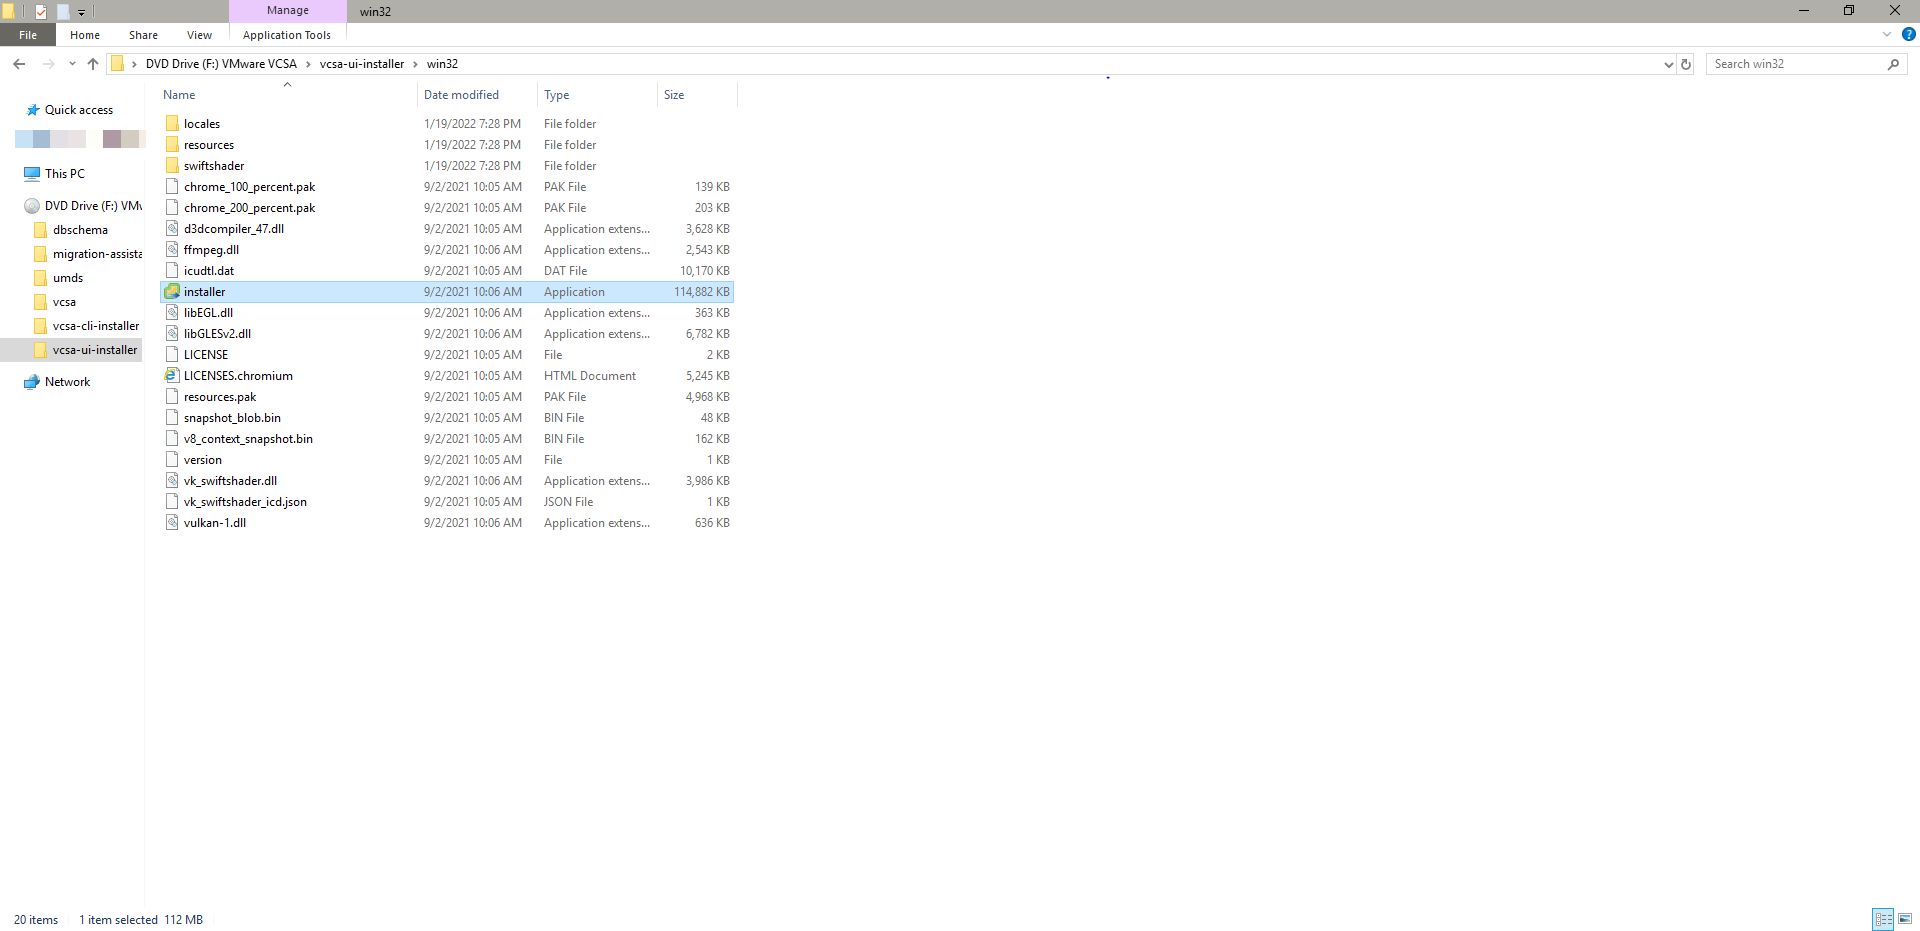
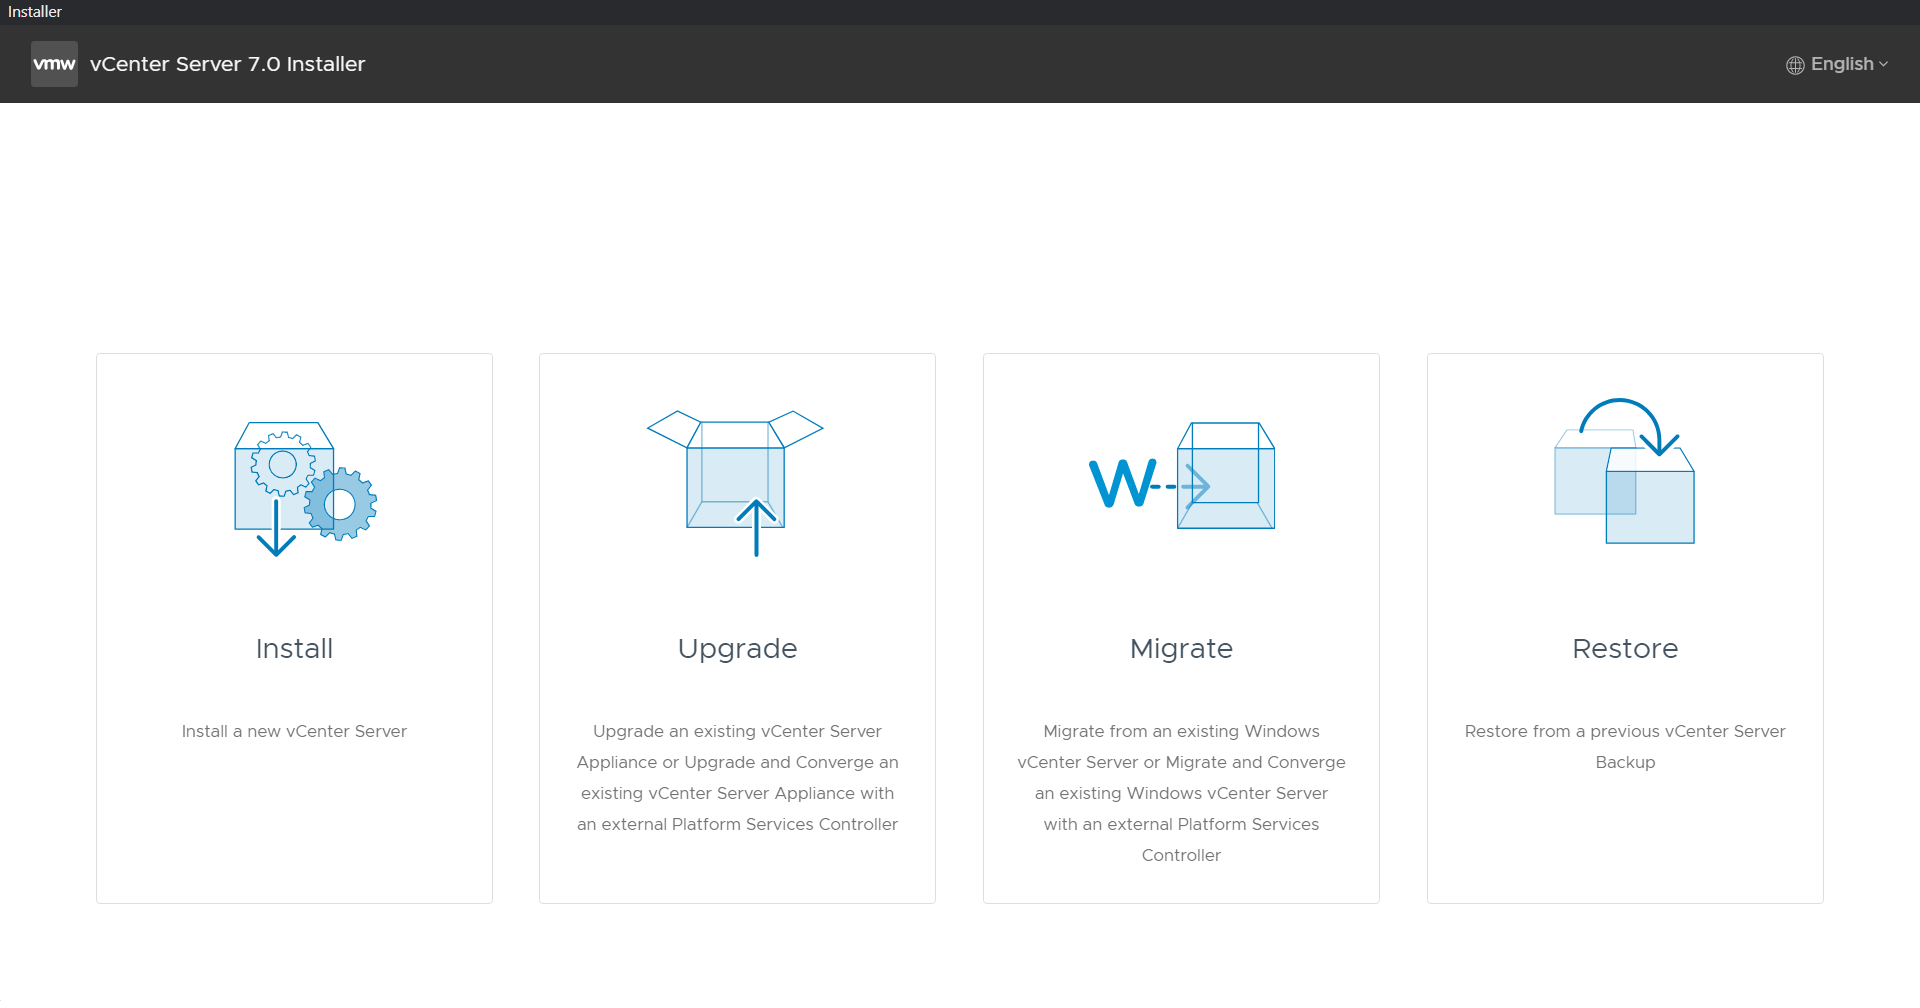
As we are installing a new instance, click Install.
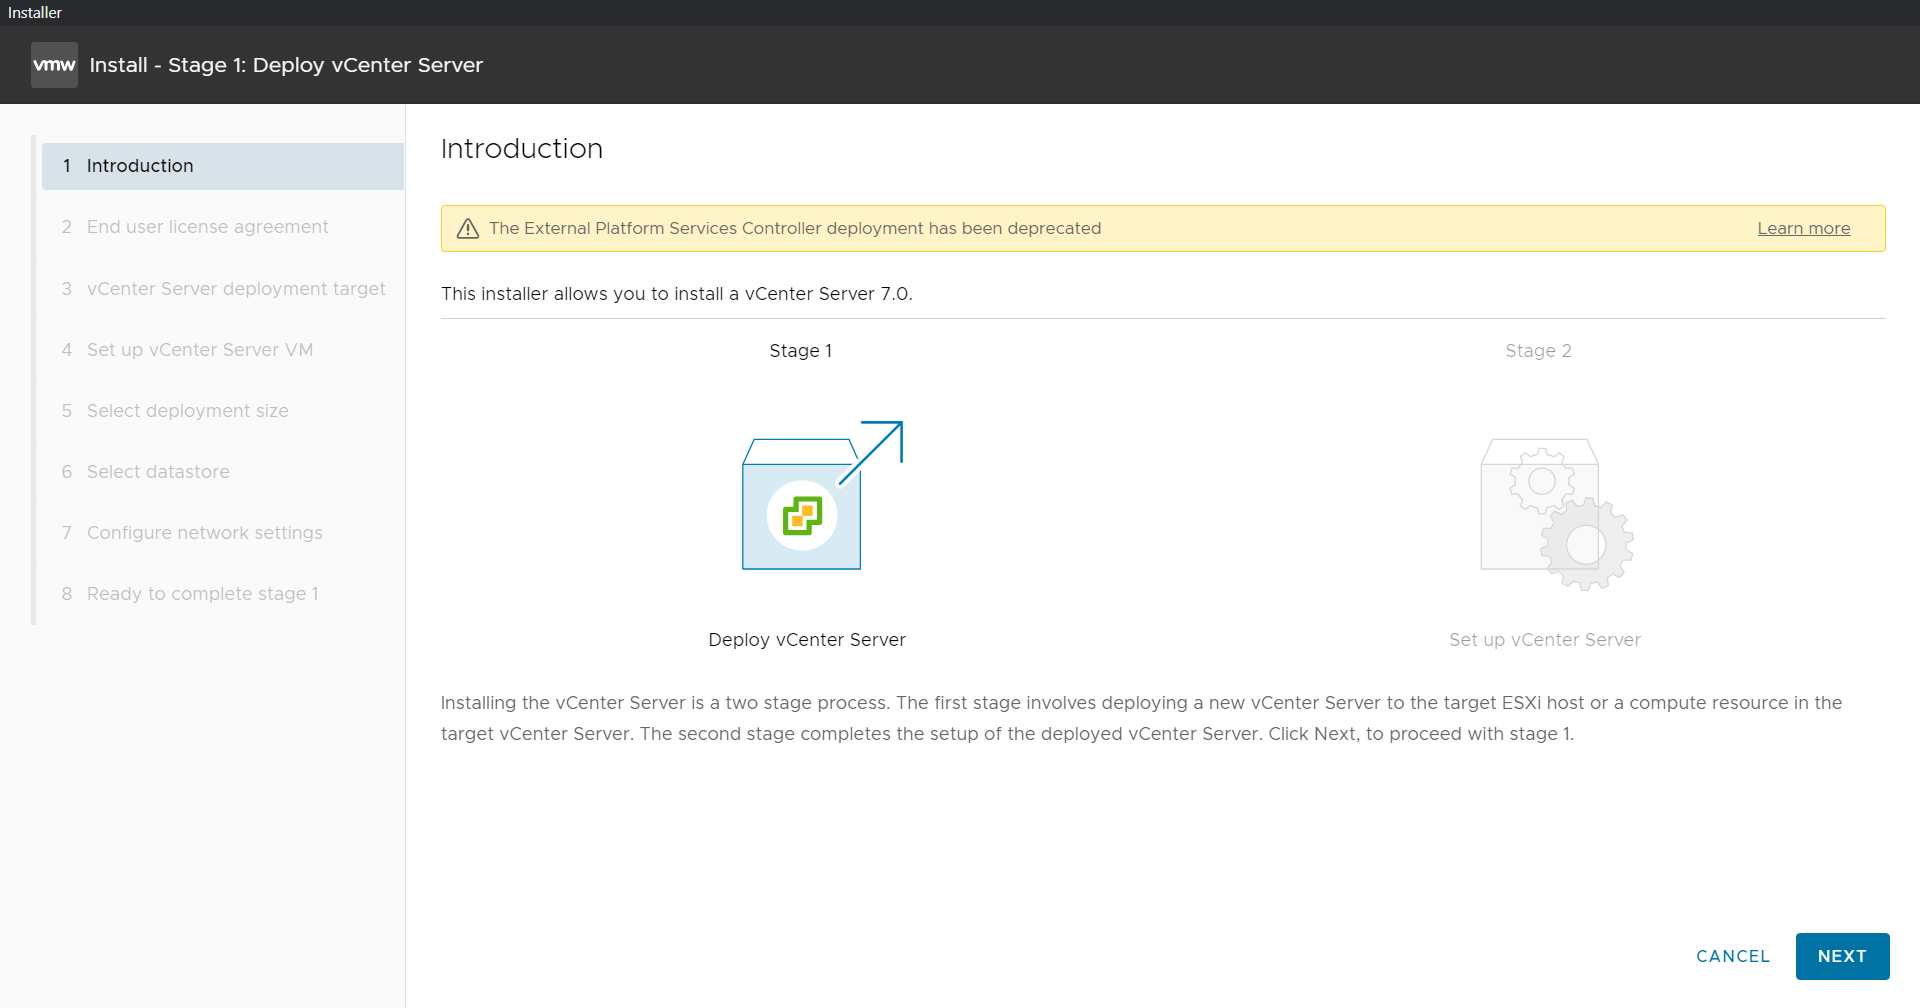
The installation is split into two stages, and we will begin with deploying the appliance. Click Next to start.
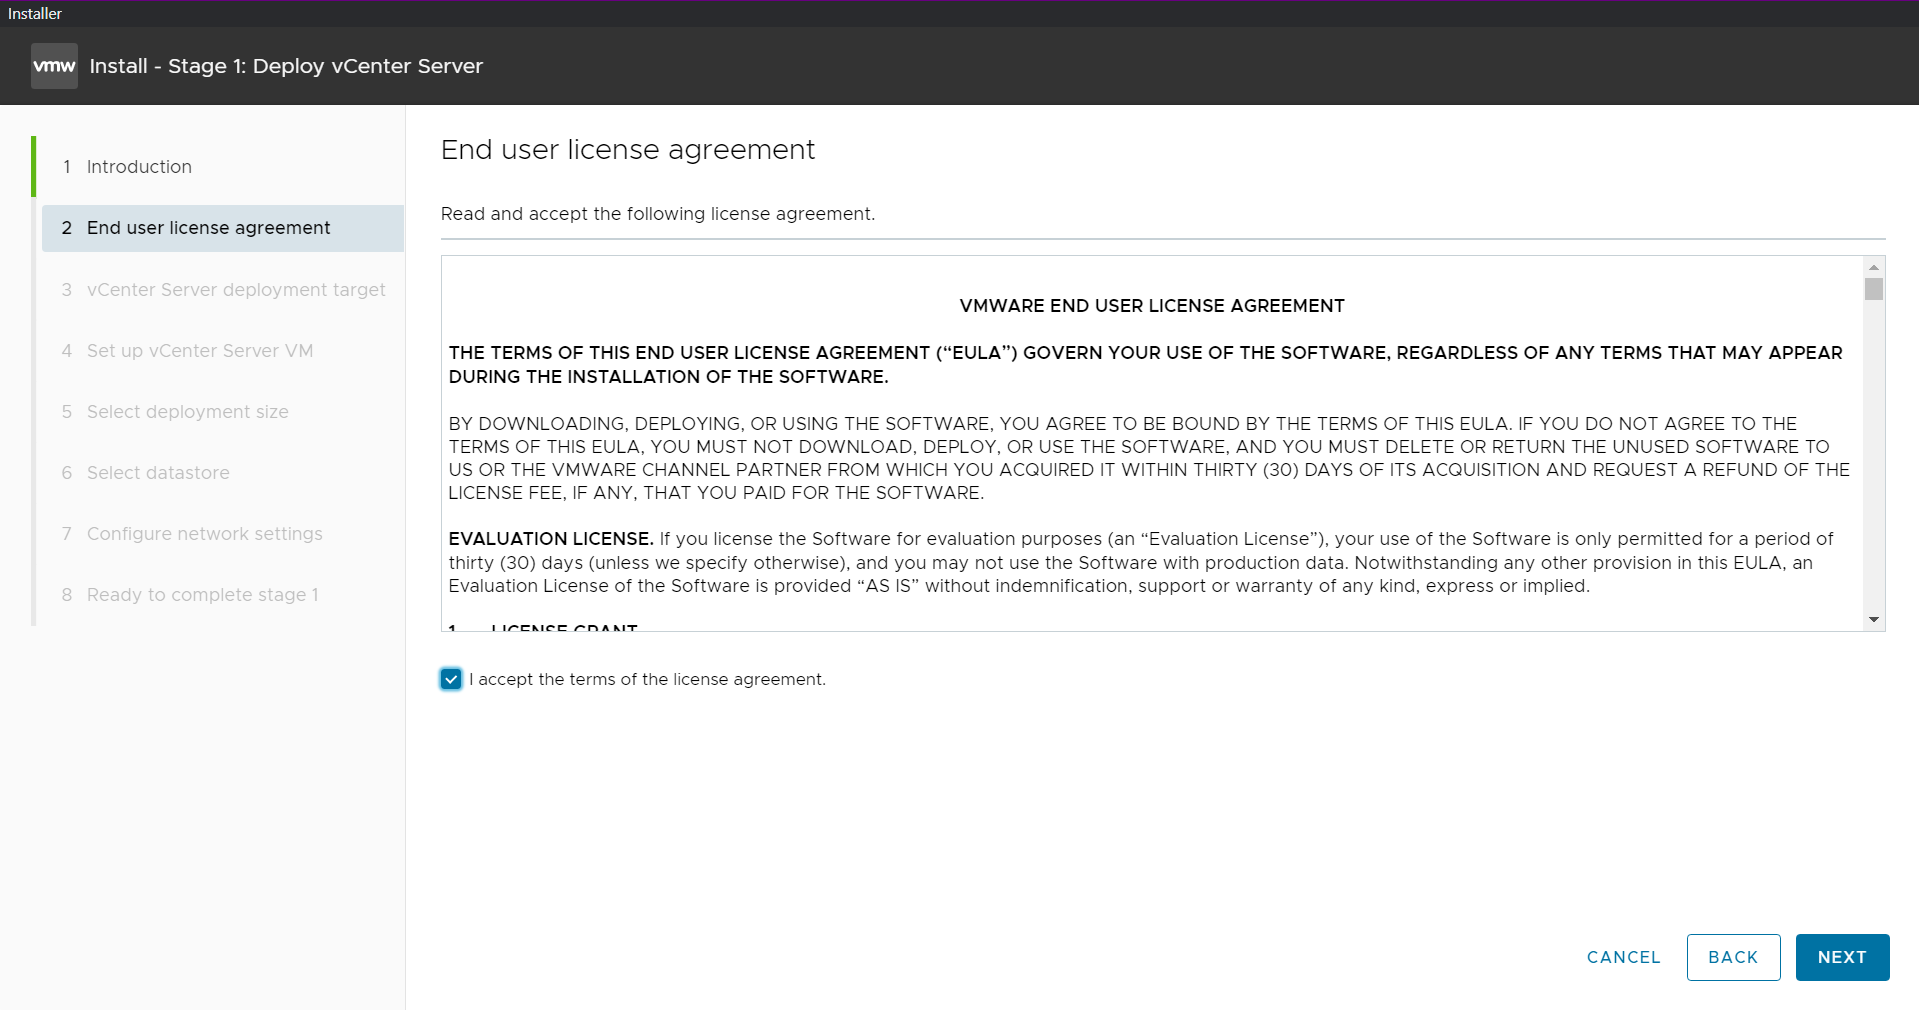
Read and accept the EULA, and then click Next to continue.
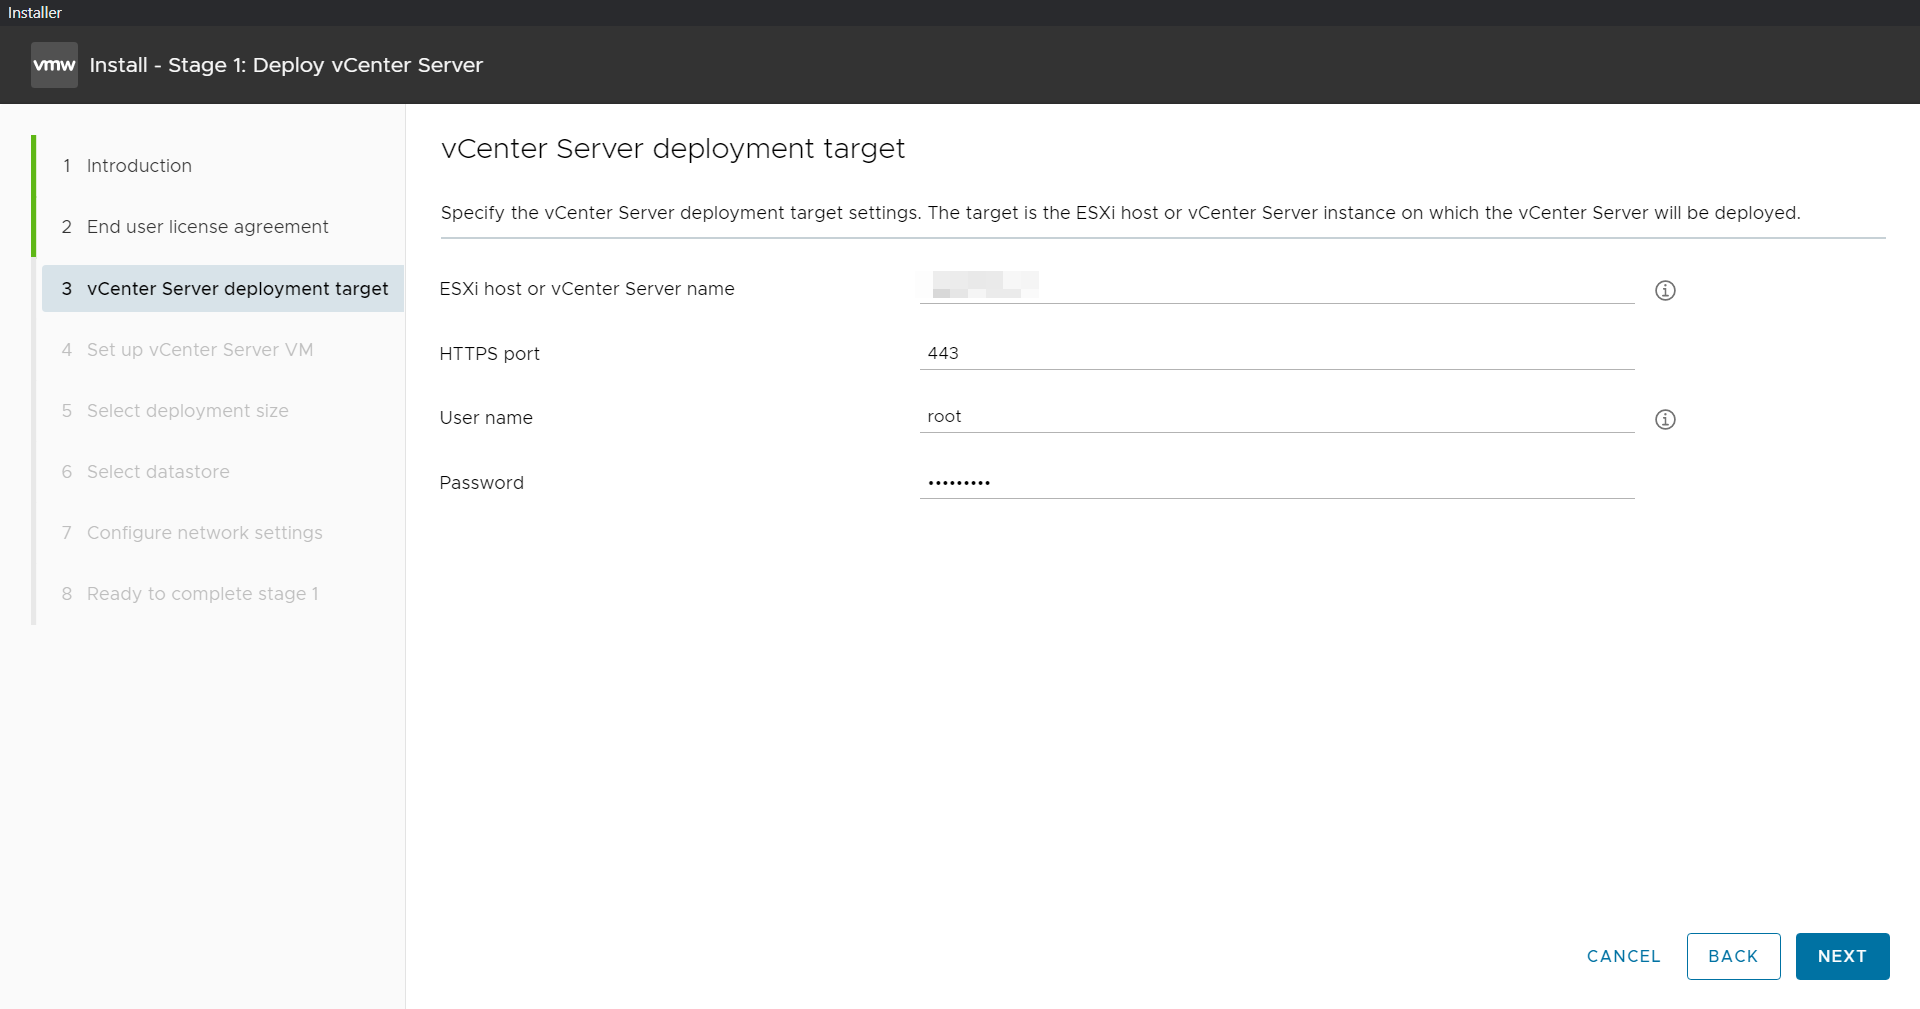
Select the ESXi host on which to install the VCSA as a guest. This must be a host that runs ESXi 6.5 or later. NVIDIA recommends that the vCenter server (Windows or appliance-based) run on a separate management cluster from the one designated for VDI workloads. Enter the IP address or fully qualified domain name (FQDN) of the chosen host, its root username, and password; then click Next.
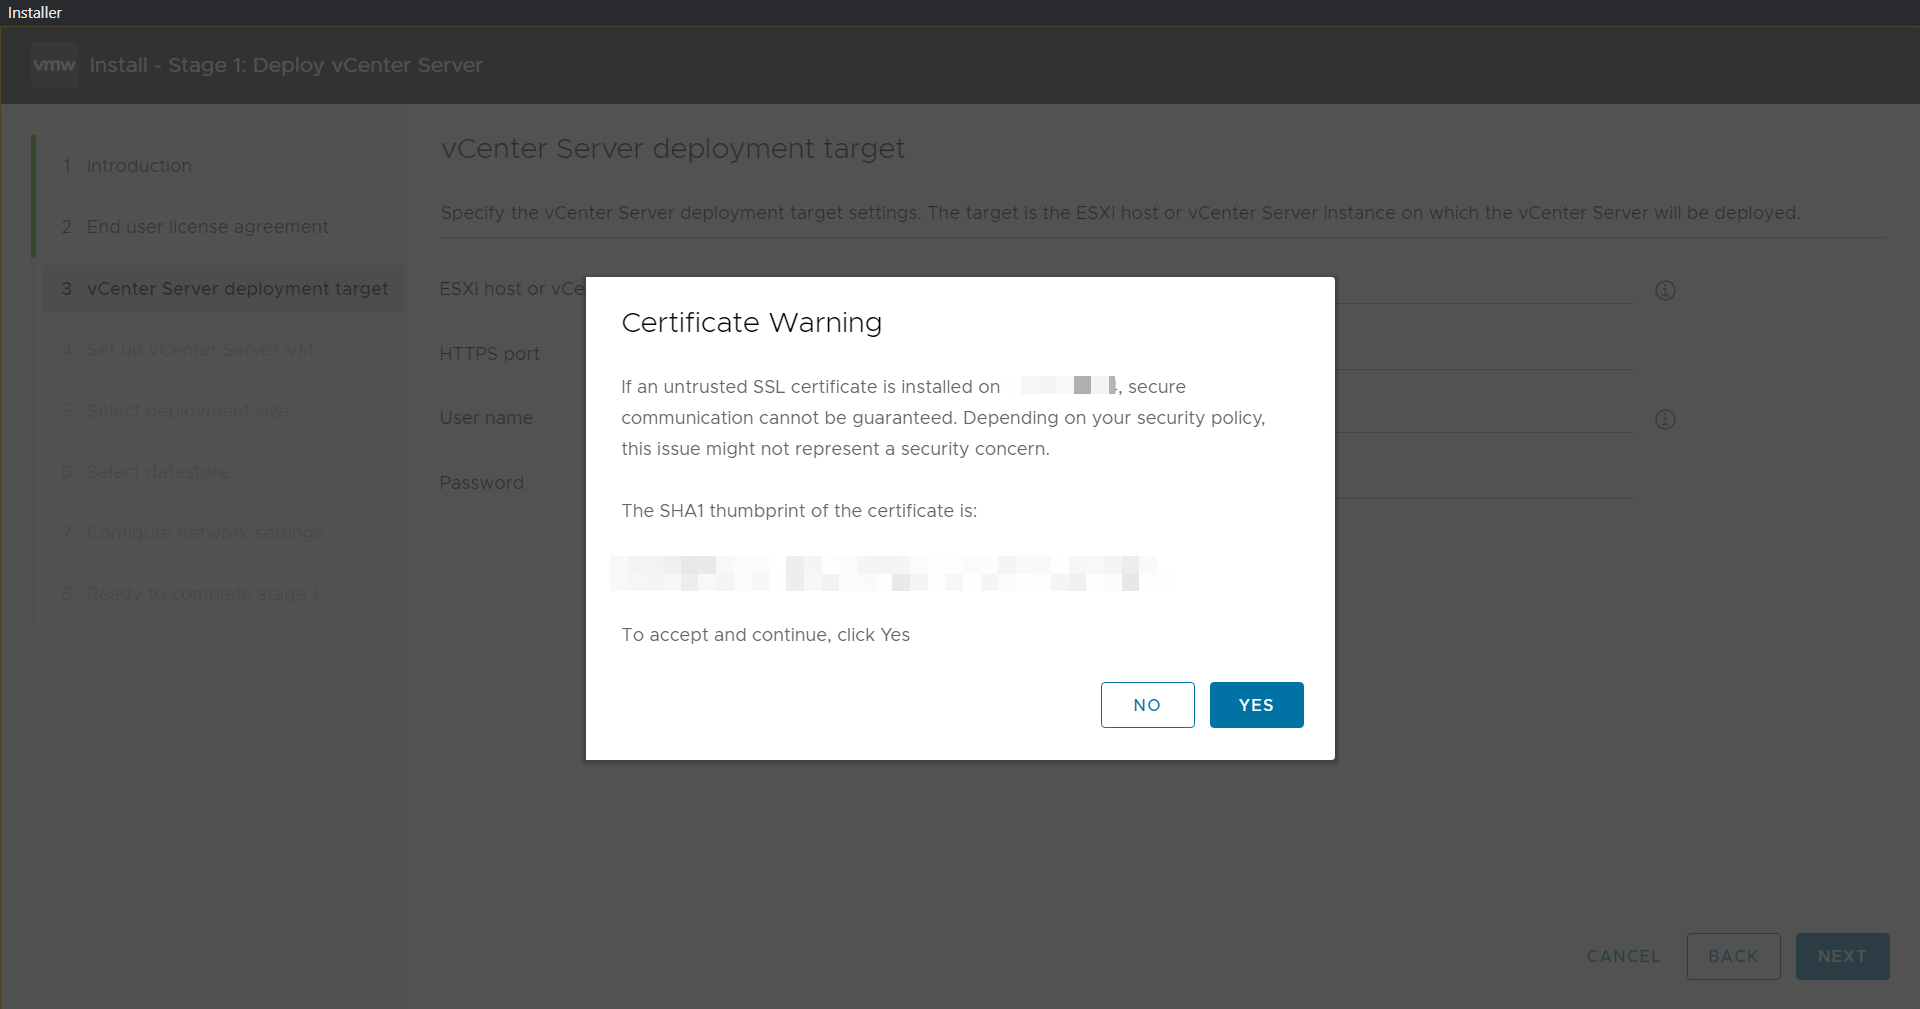
If your desktop can reach the host, you should see a certificate warning as it connects. This warning is due to the use of a self-signed certificate. If you are using a signed certificate, you will not see this warning. Click Yes to continue.
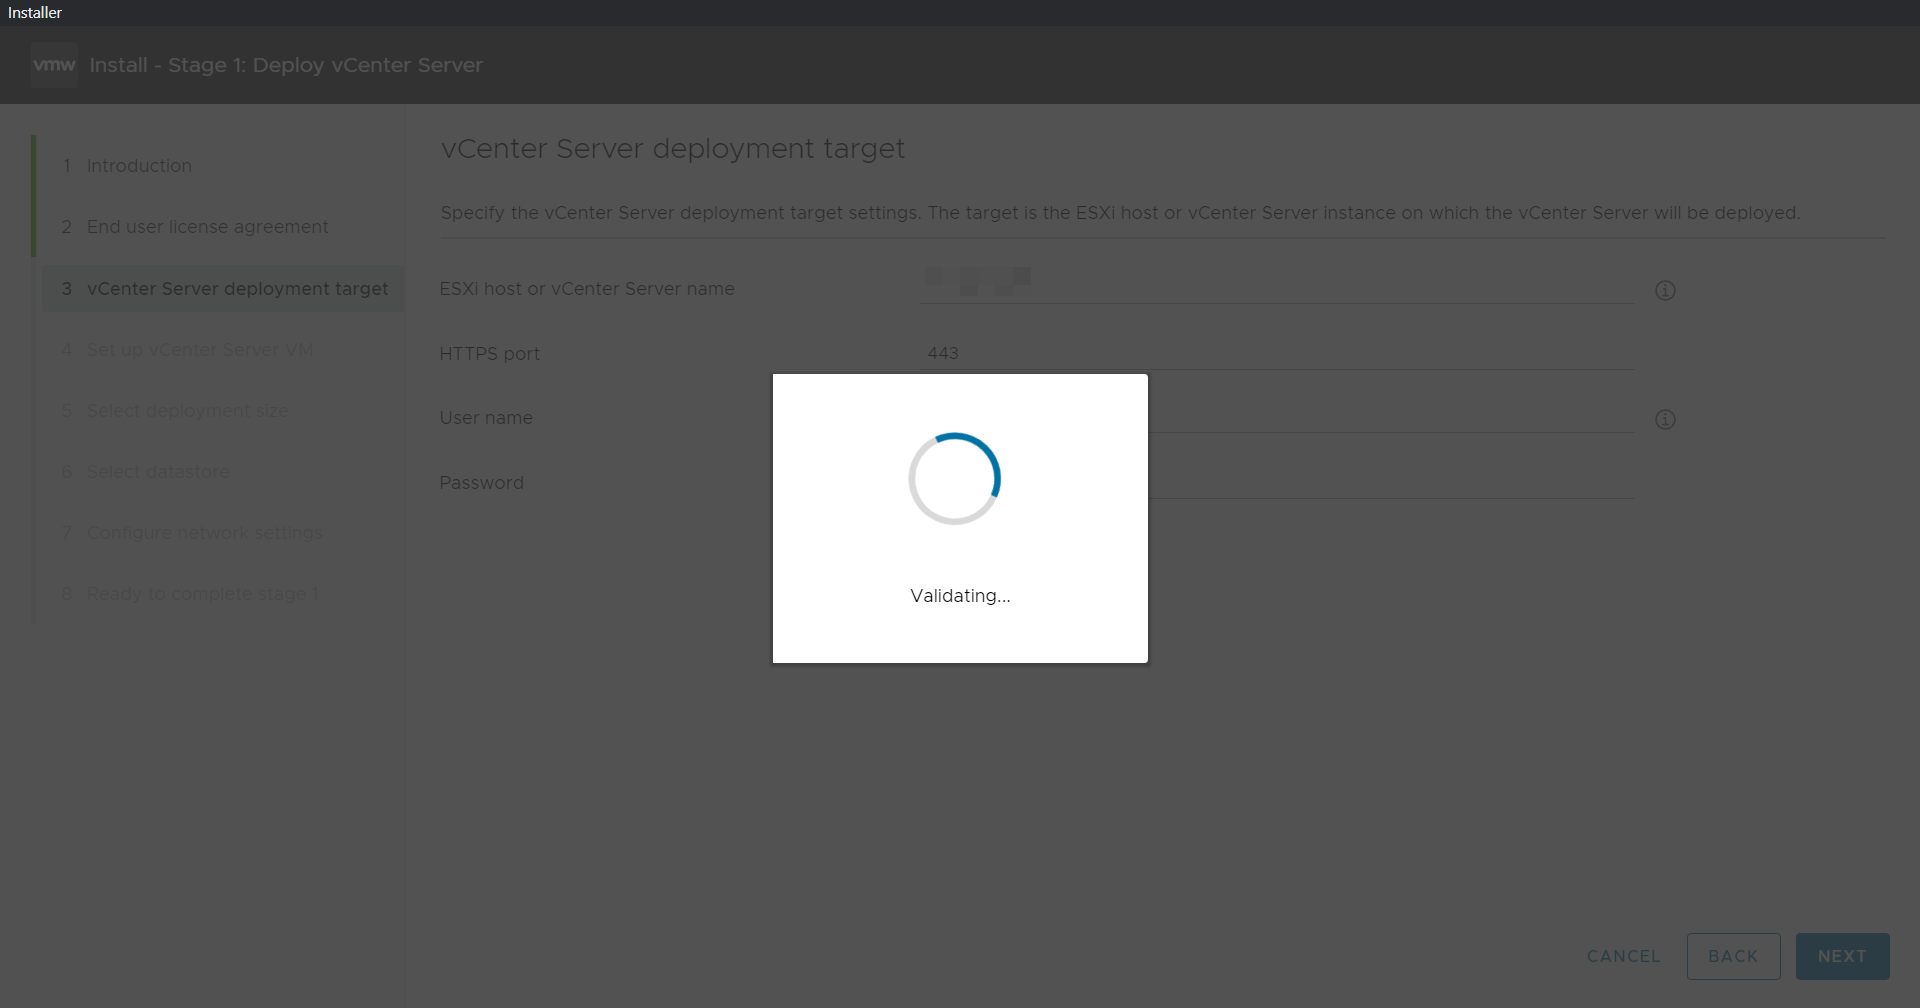
The credentials are validated.
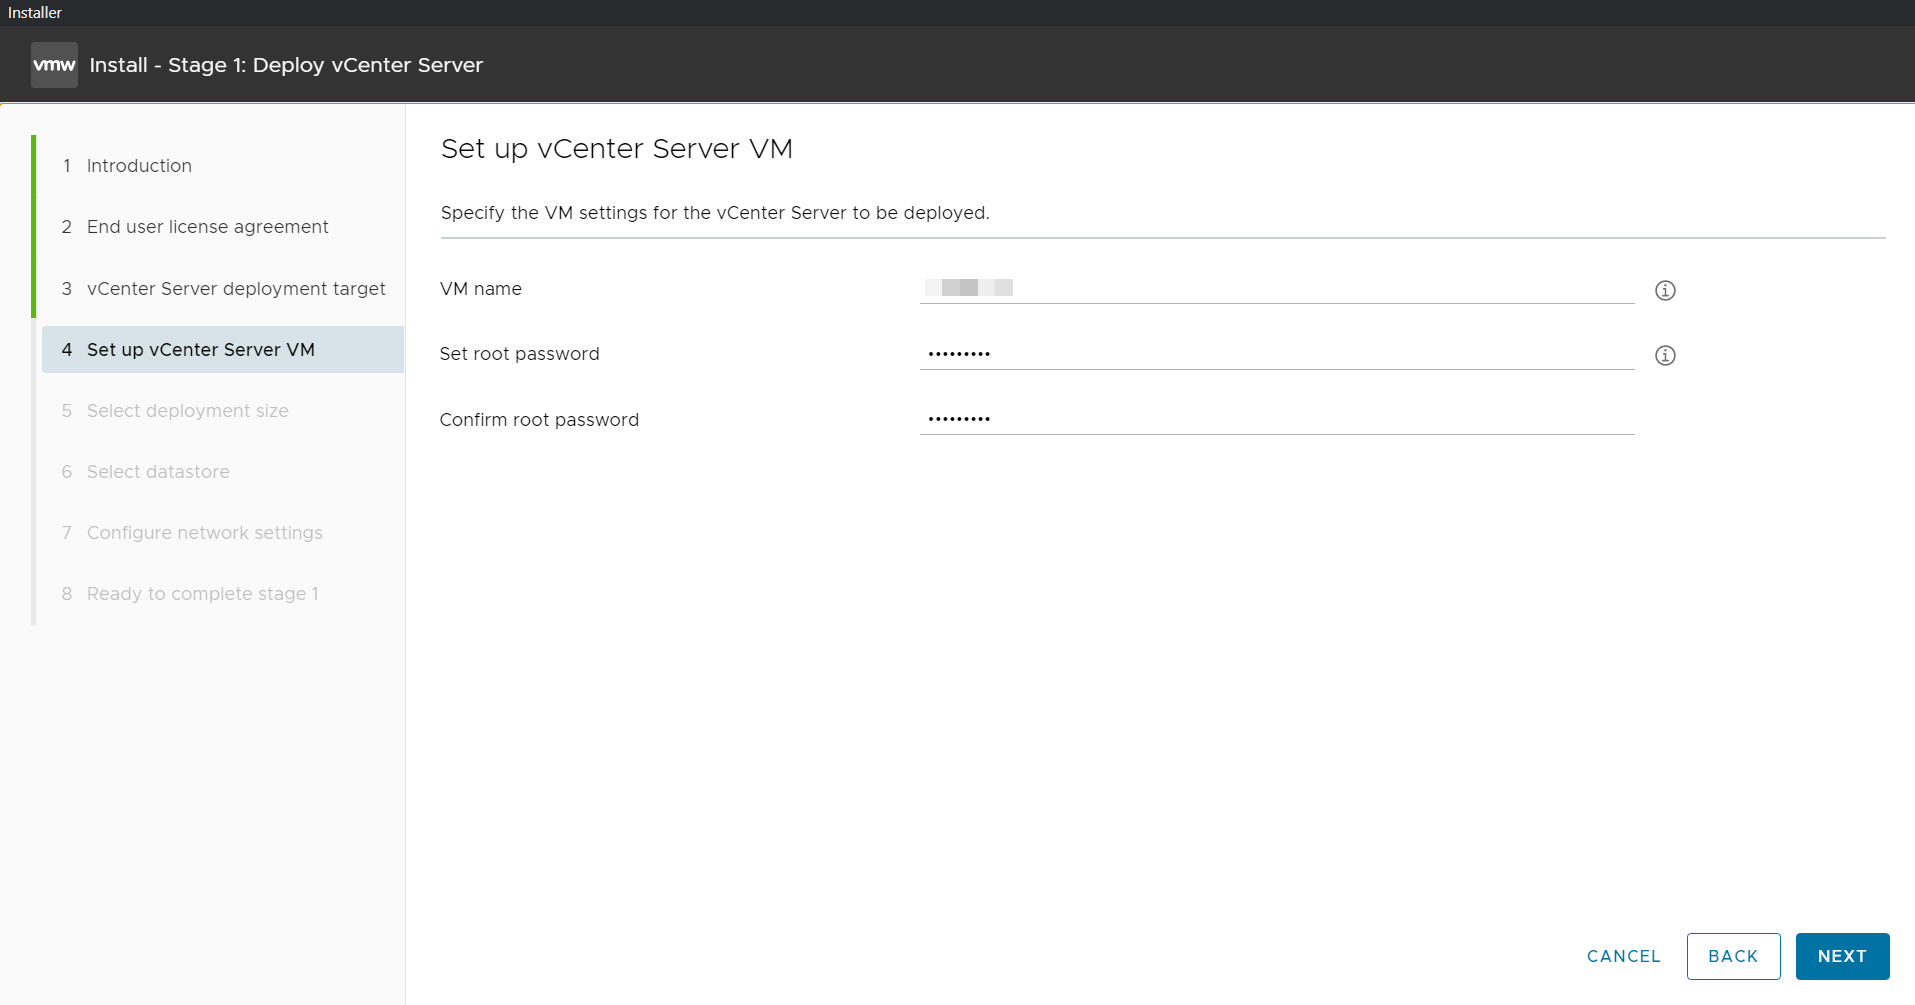
When prompted after a successful connection, provide a VM name for the vCenter Server 7, type the passwords in the Set Root password field, and enter the root password again, and click Next.
Select a deployment size appropriate to the number of hosts and virtual machines that vCenter Server will manage, then click Next.
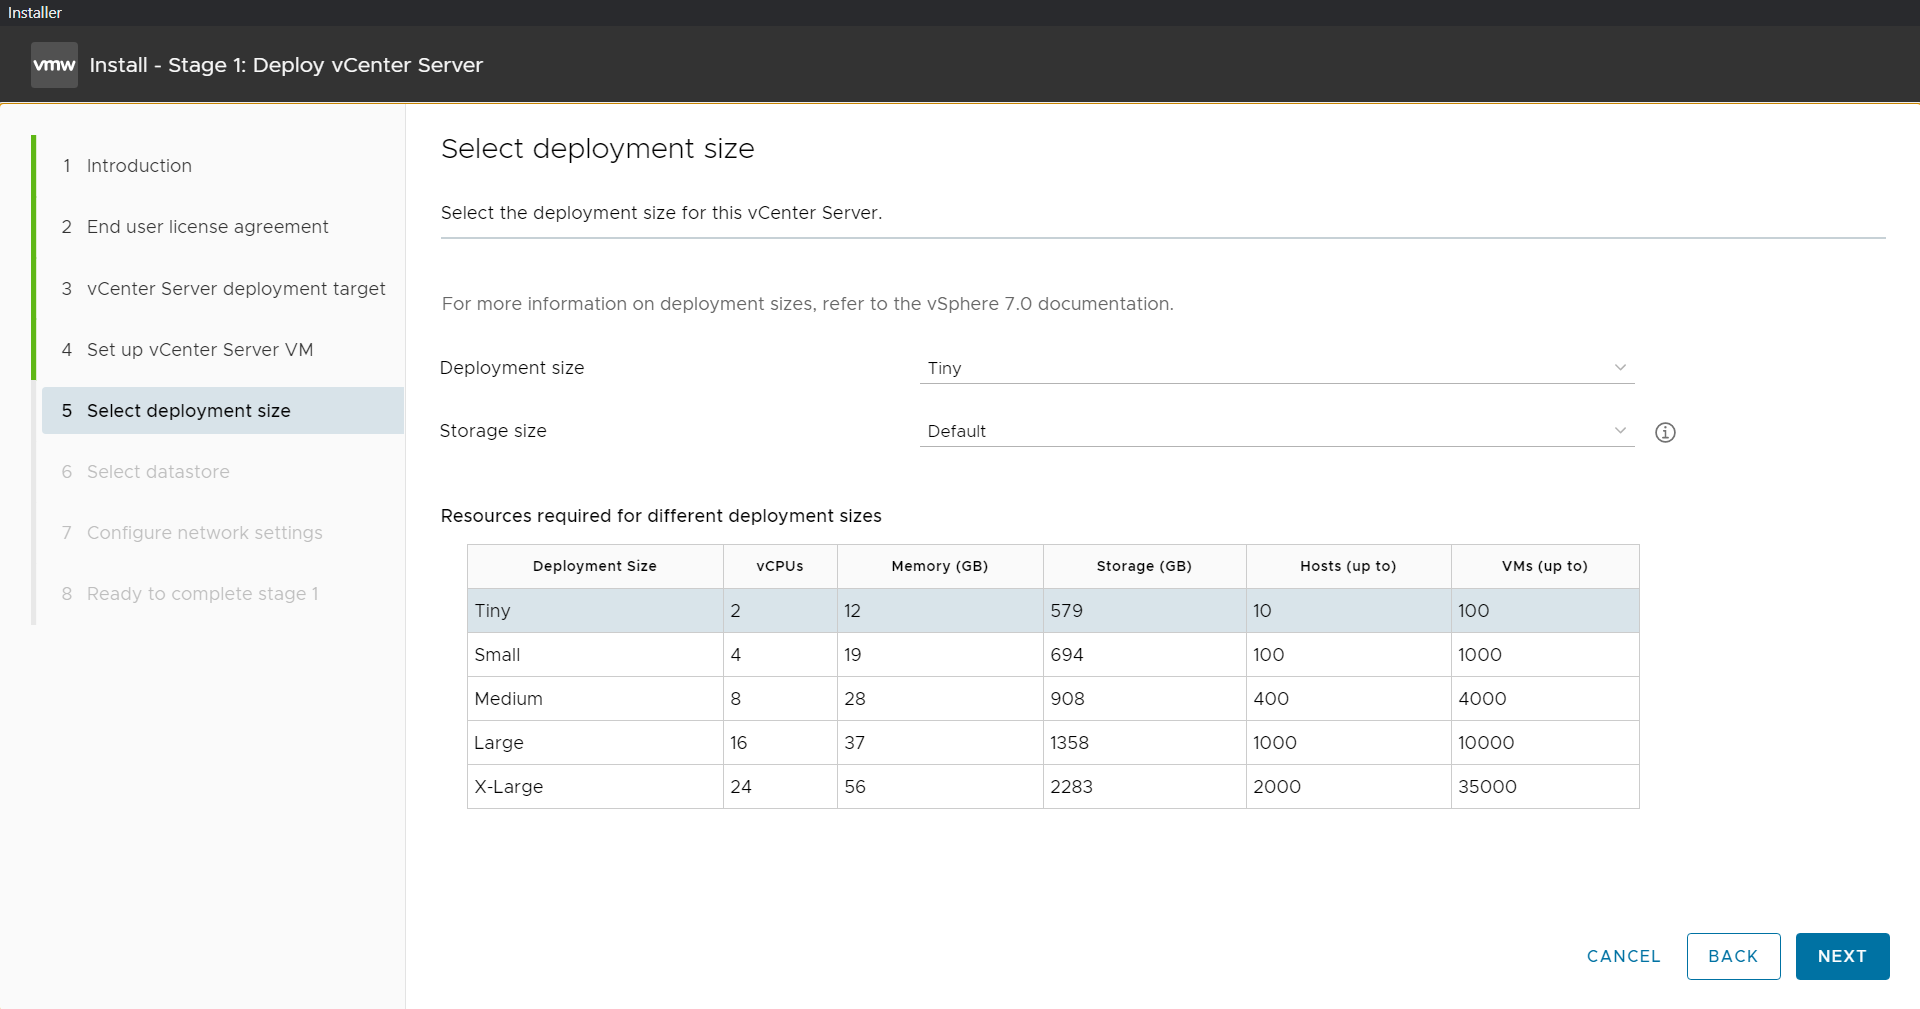
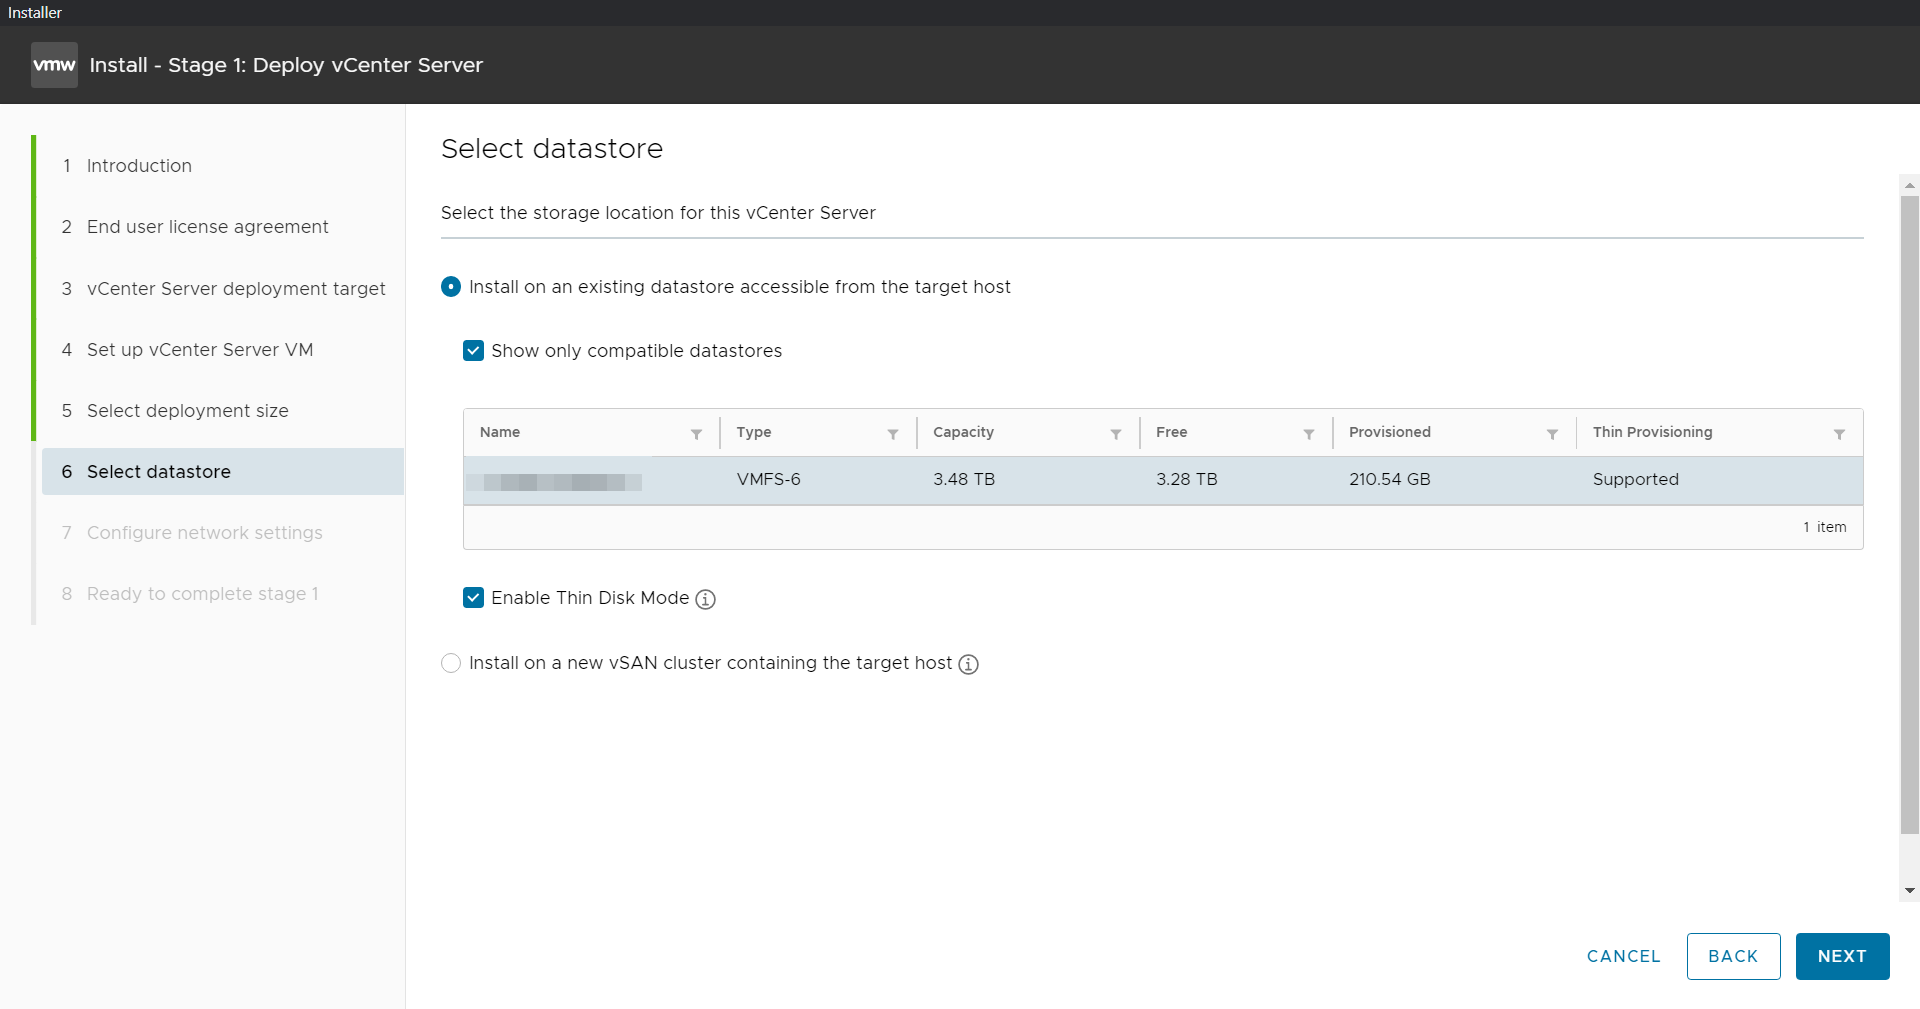
Select the datastore where the VCSA will be deployed, select thin provisioning if required, and click Next.
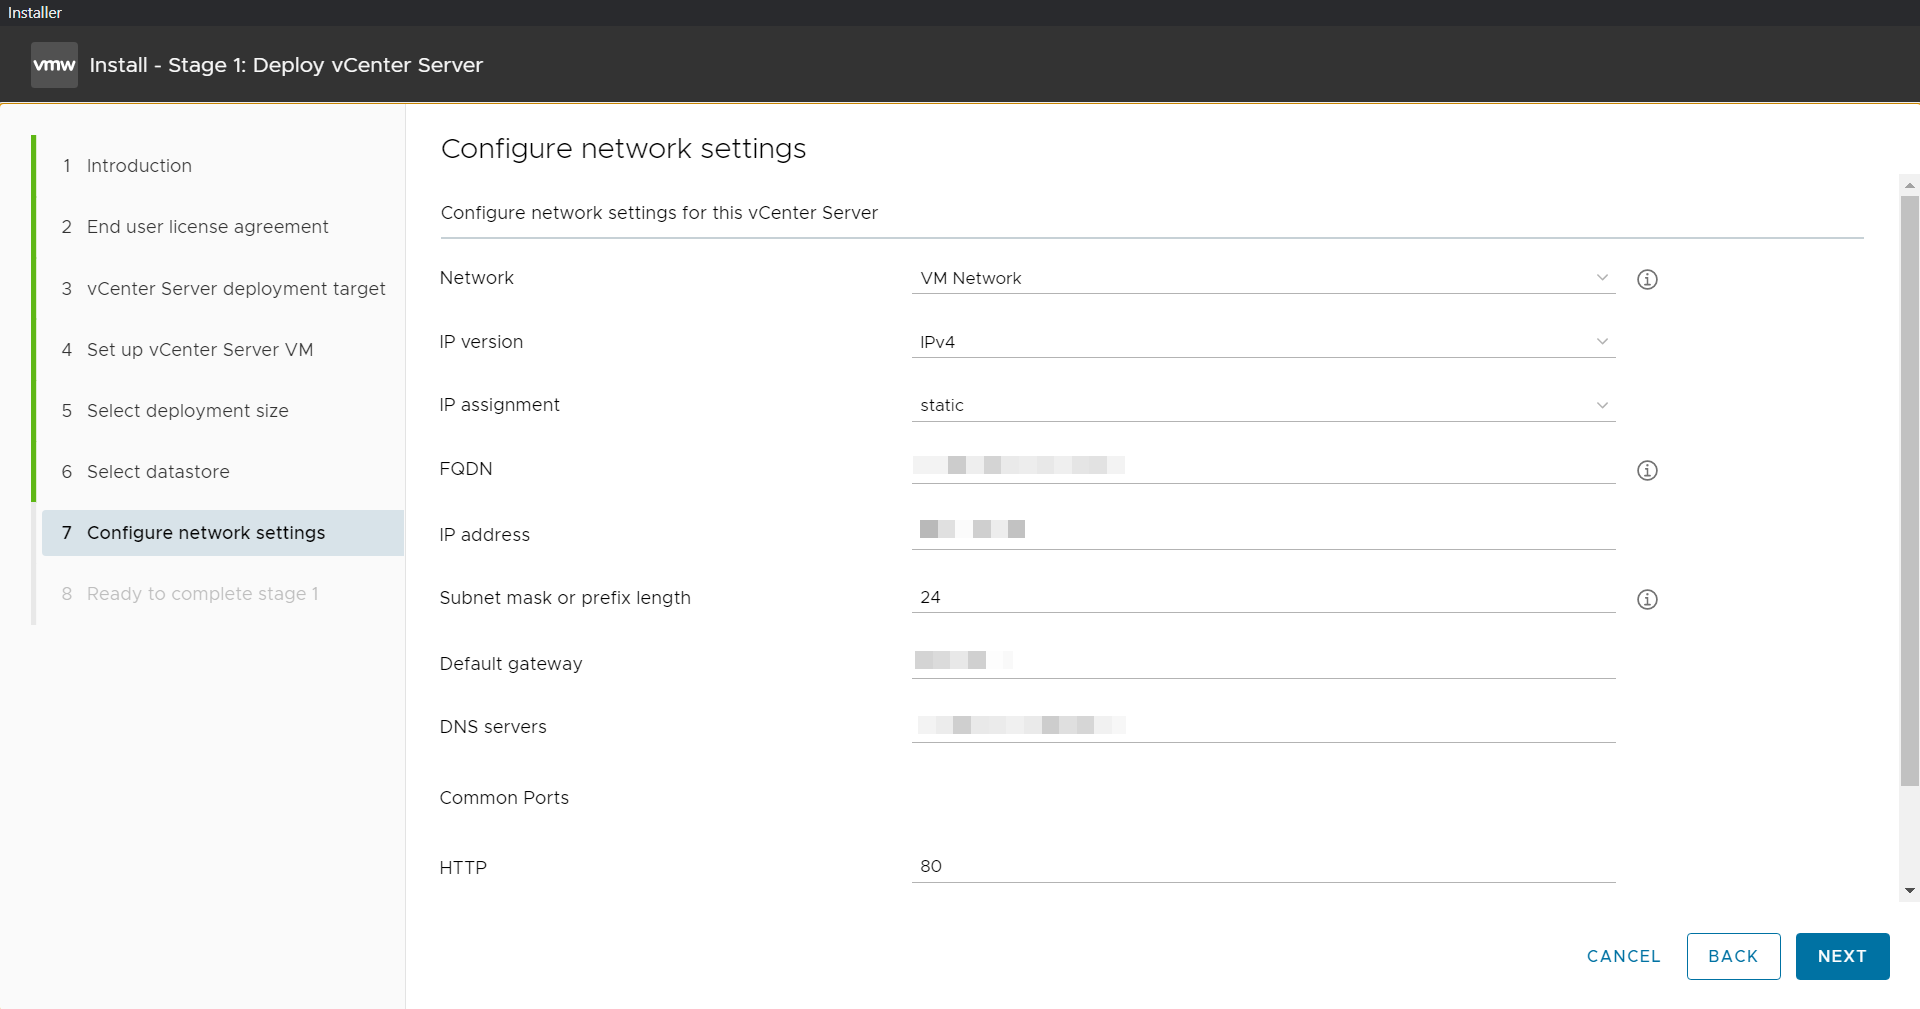
The installer displays the Configure network settings. Before you configure these settings, choose an appropriate static IP address, and enter it into local DNS (e.g., on the Domain Controller). Once you can resolve the address, enter the IP address hostname on the network setting page, then scroll down and enter the remaining items. When all desired settings are complete, select Next.
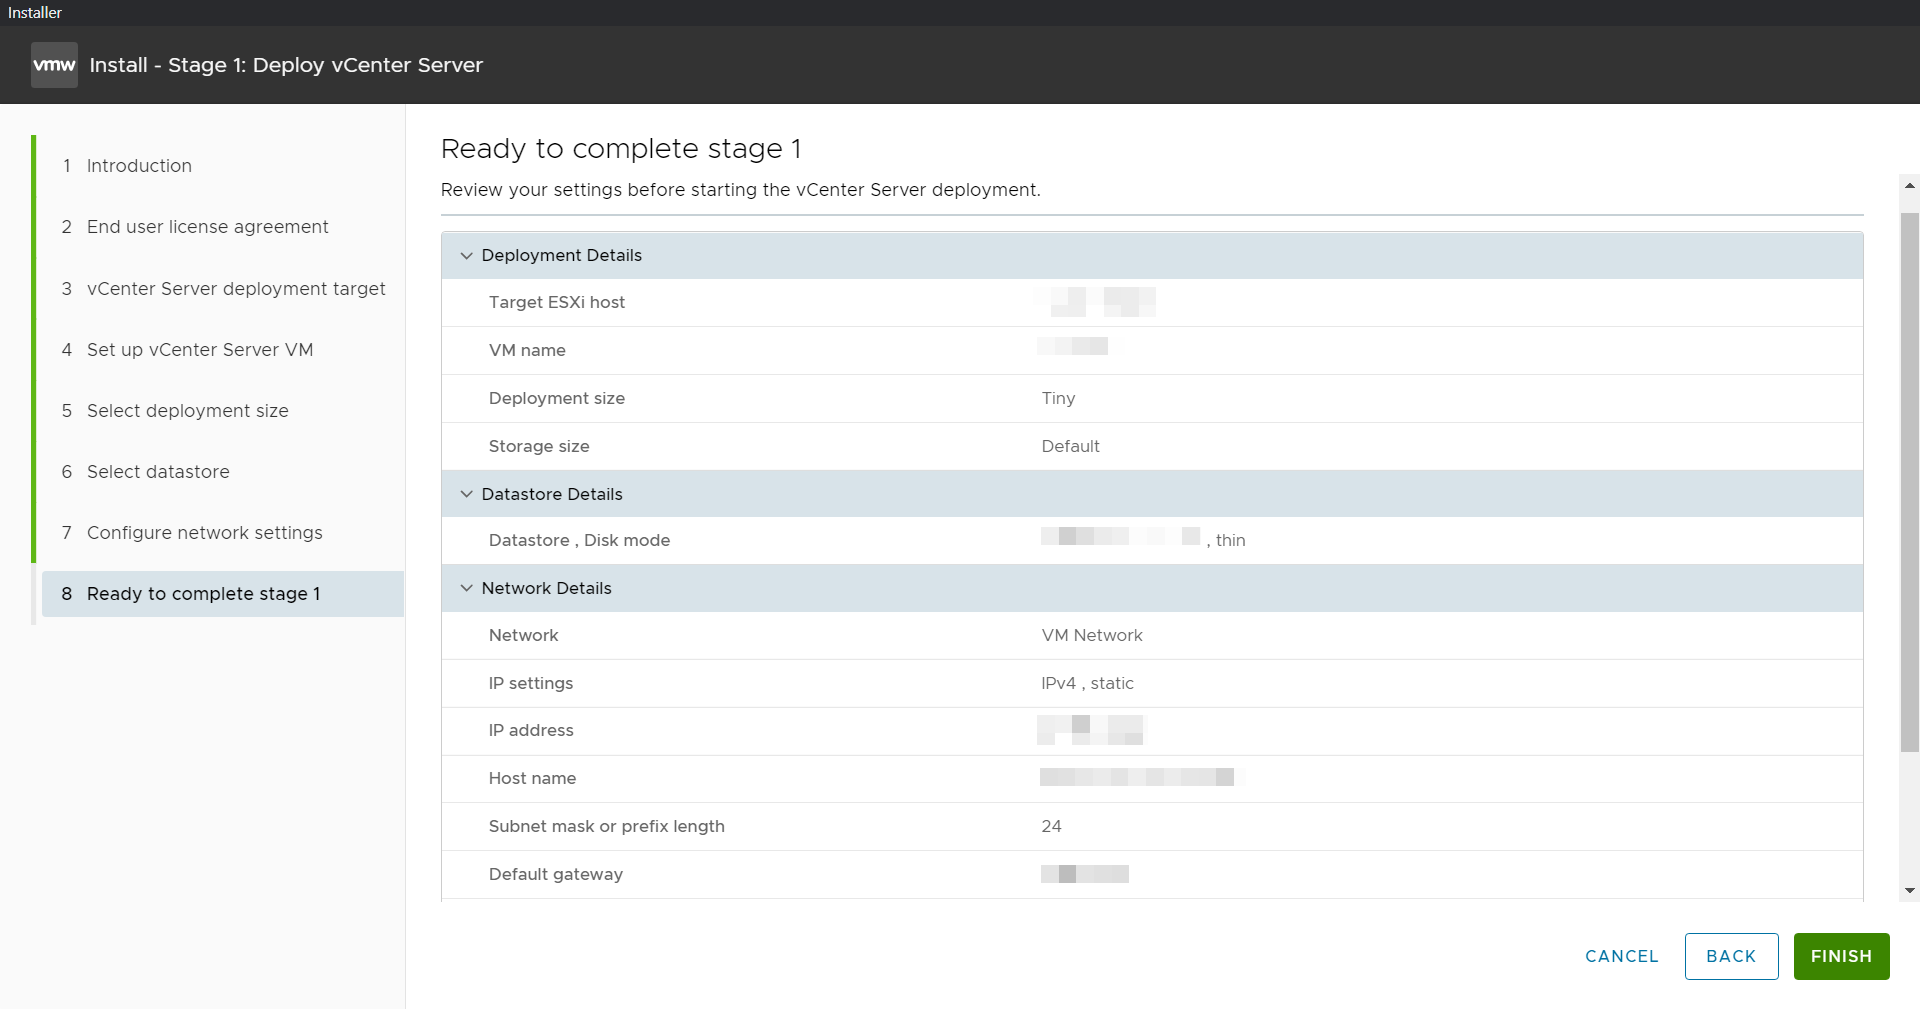
Review the settings before starting the vCenter Server deployment and click Finish to start the installation.
The vCenter Server will start deploying on the specified target ESXi host. Installation progress can be viewed on the screen.
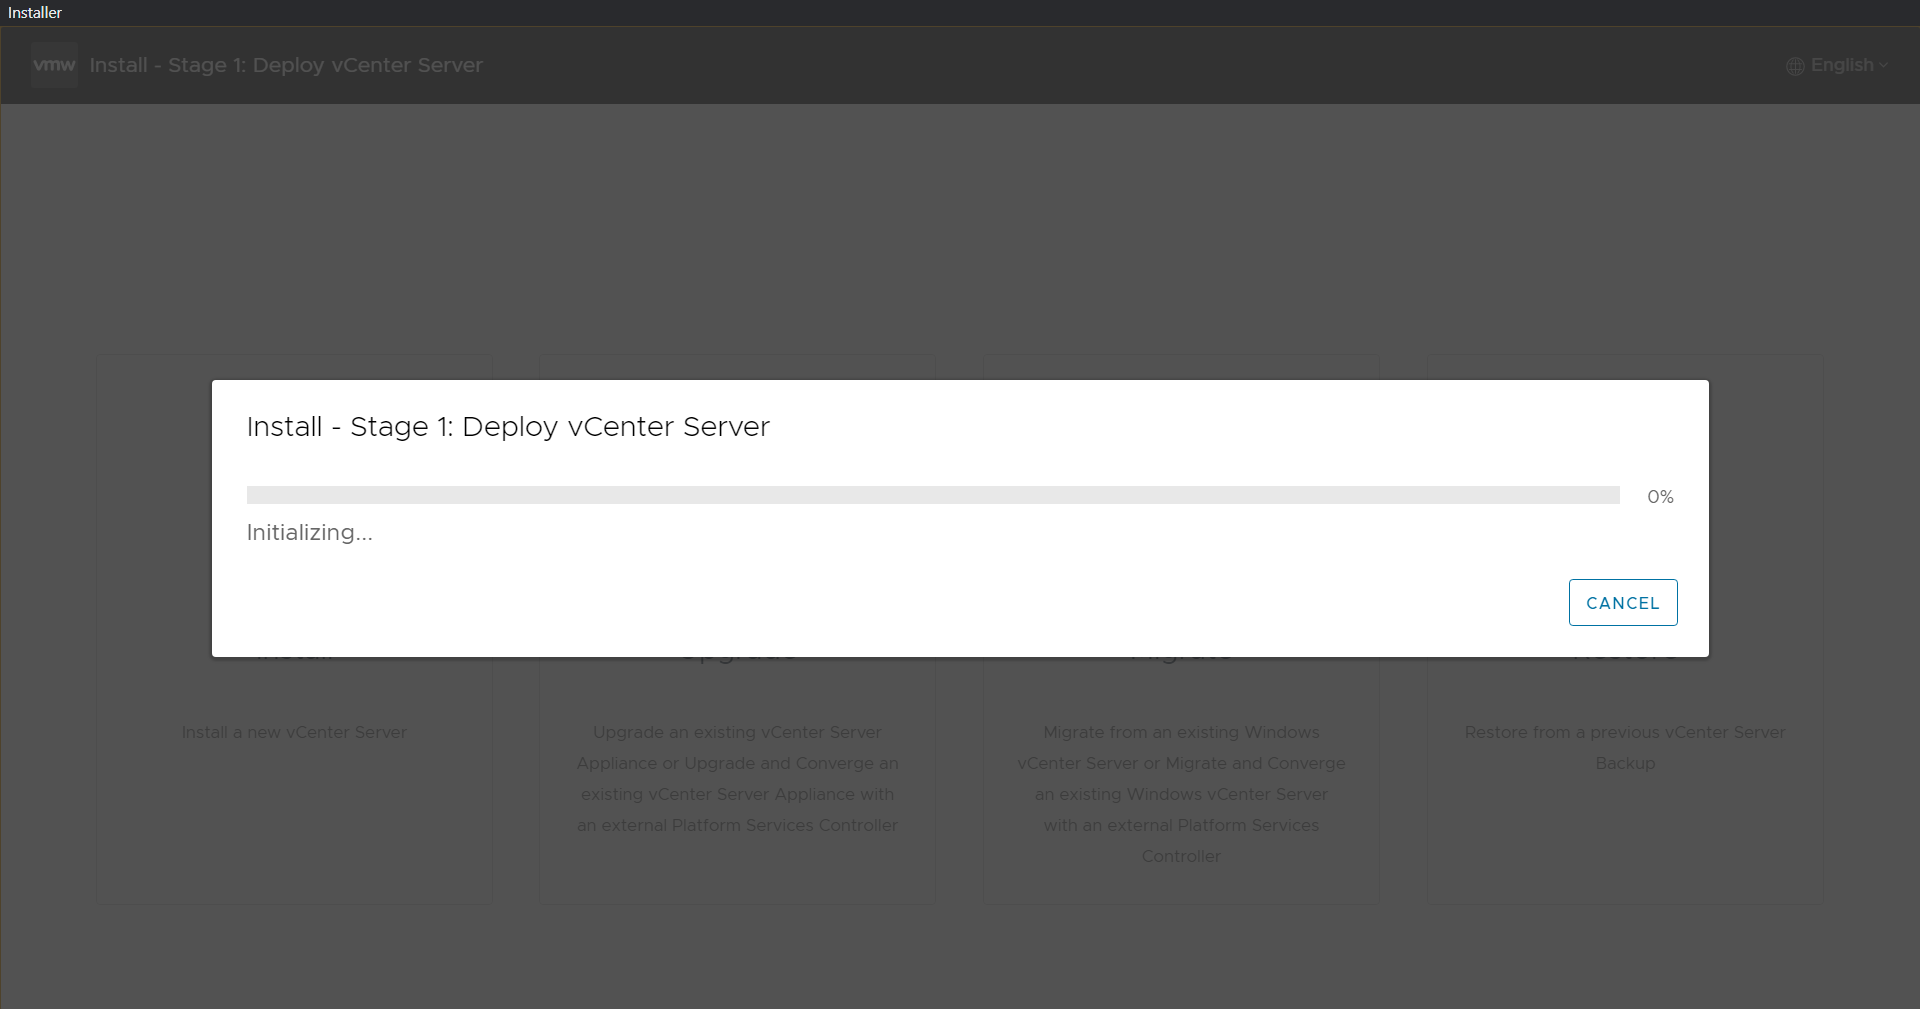
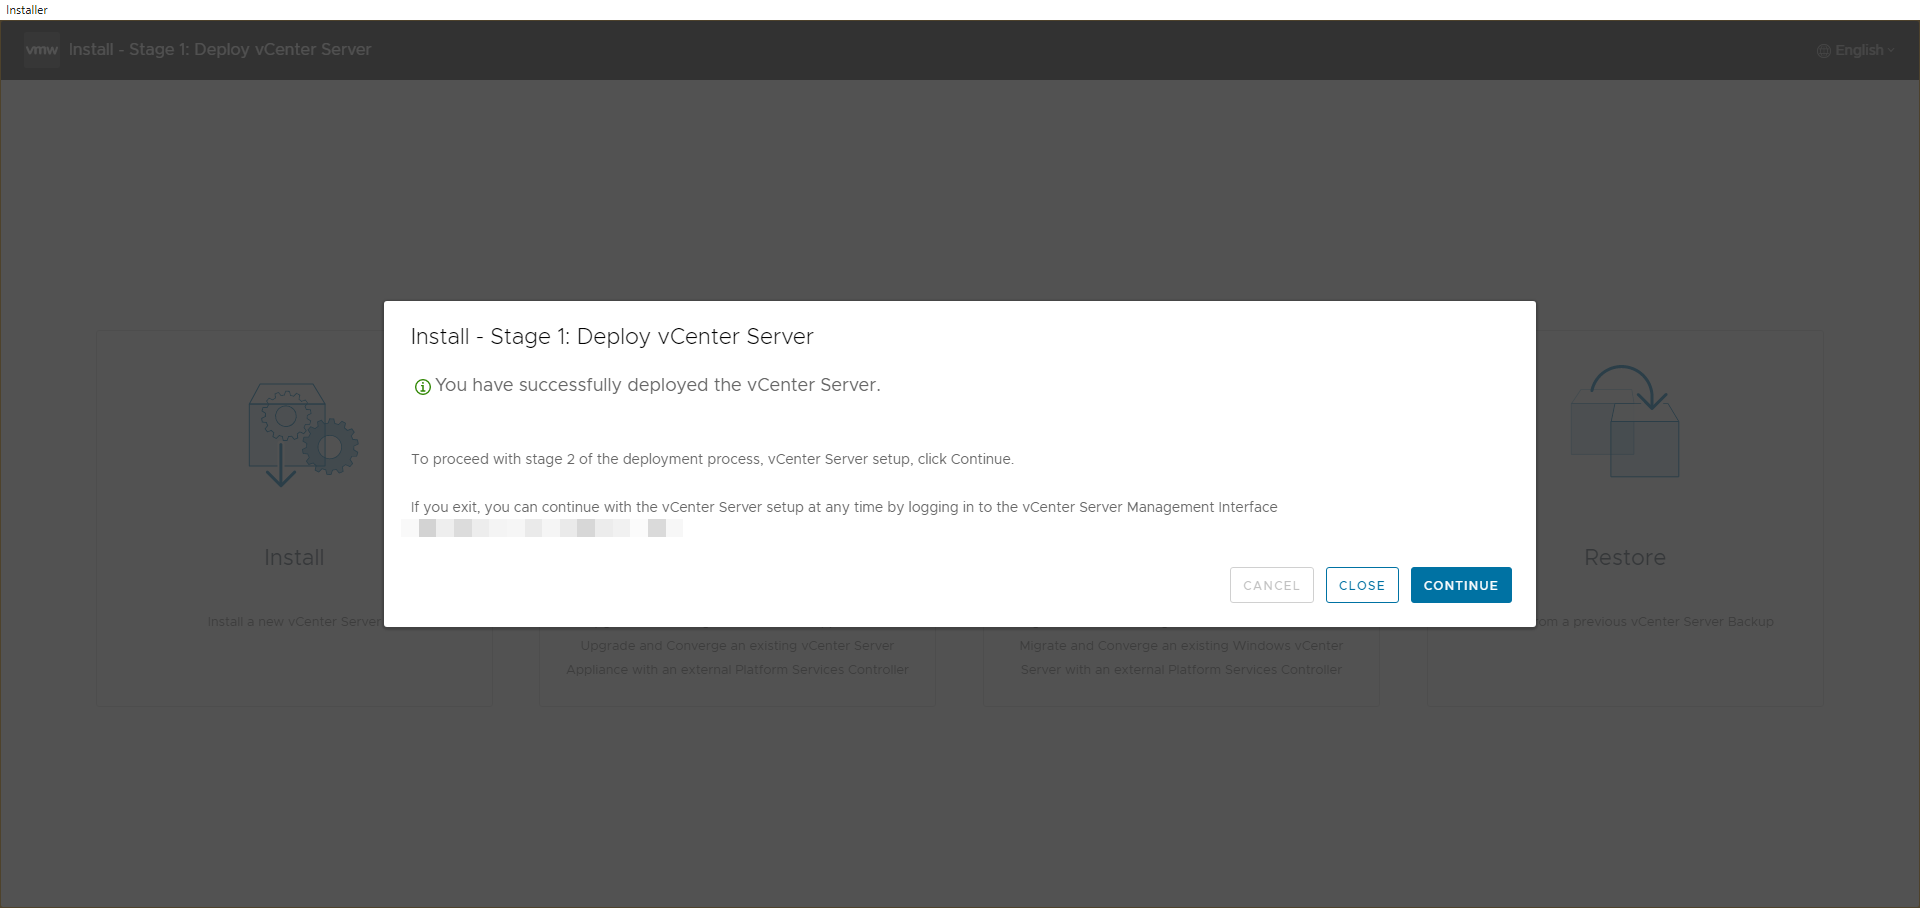
With the VCSA now deployed, move on to stage 2 by clicking Continue.
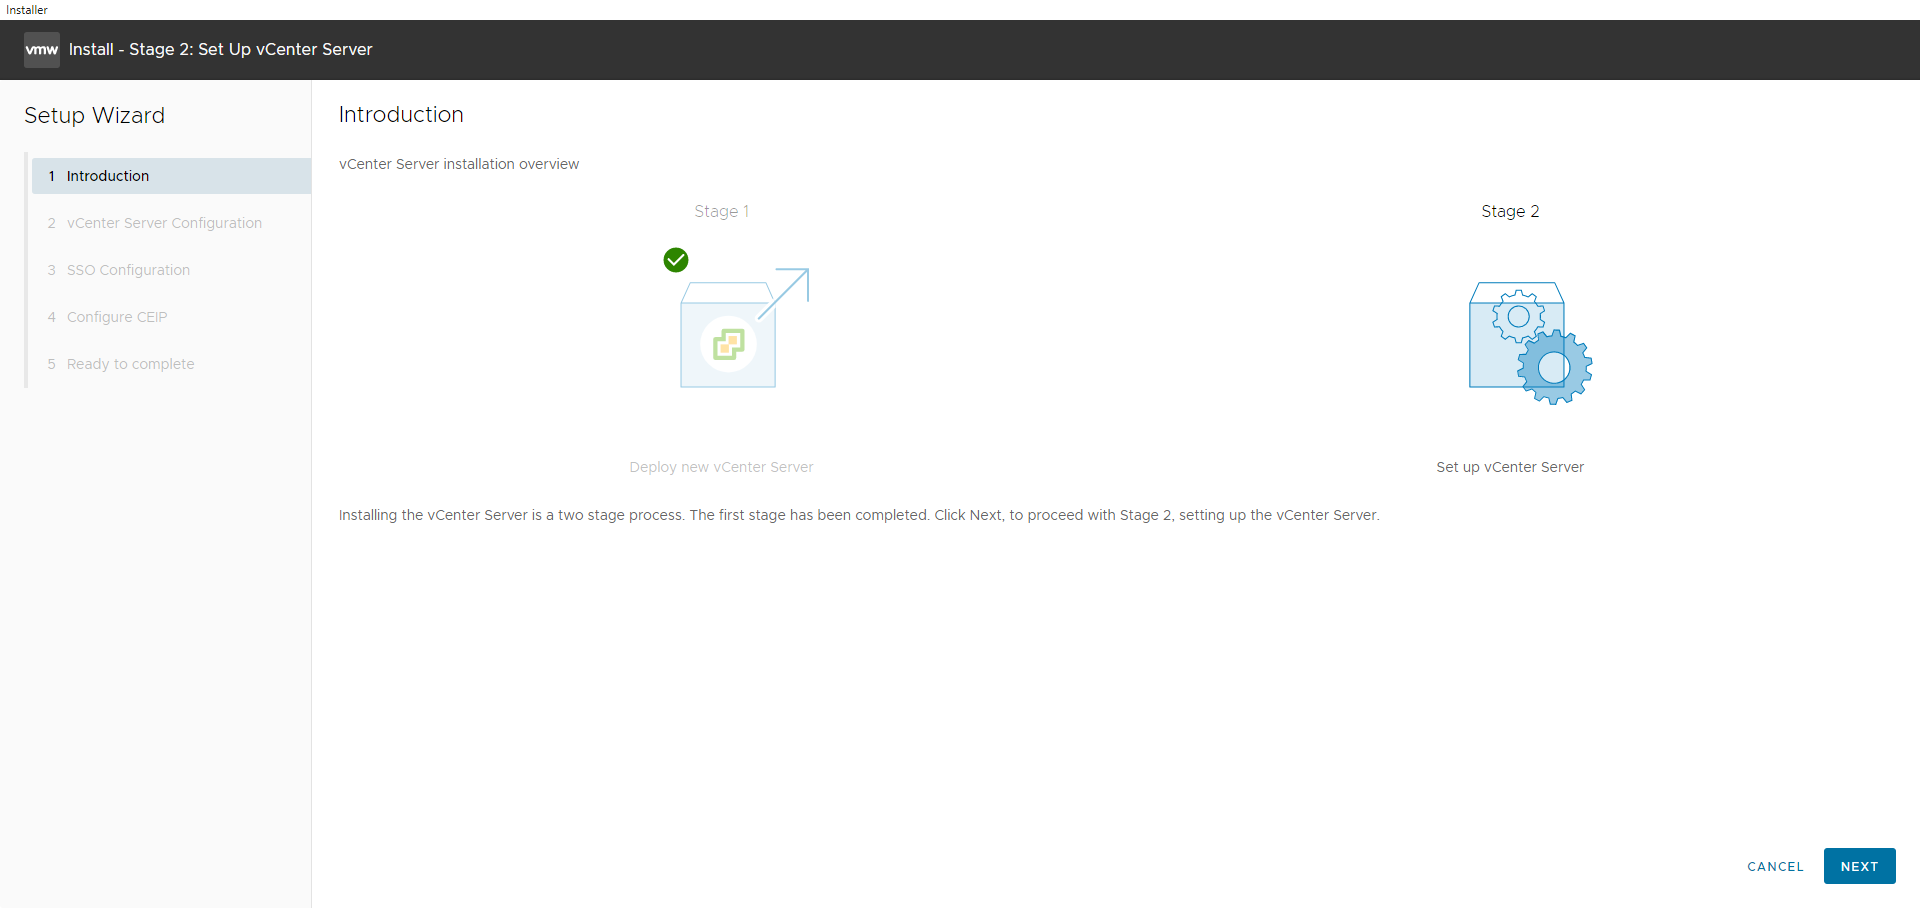
Select Next to proceed with Stage 2, setting up the vCenter Server.
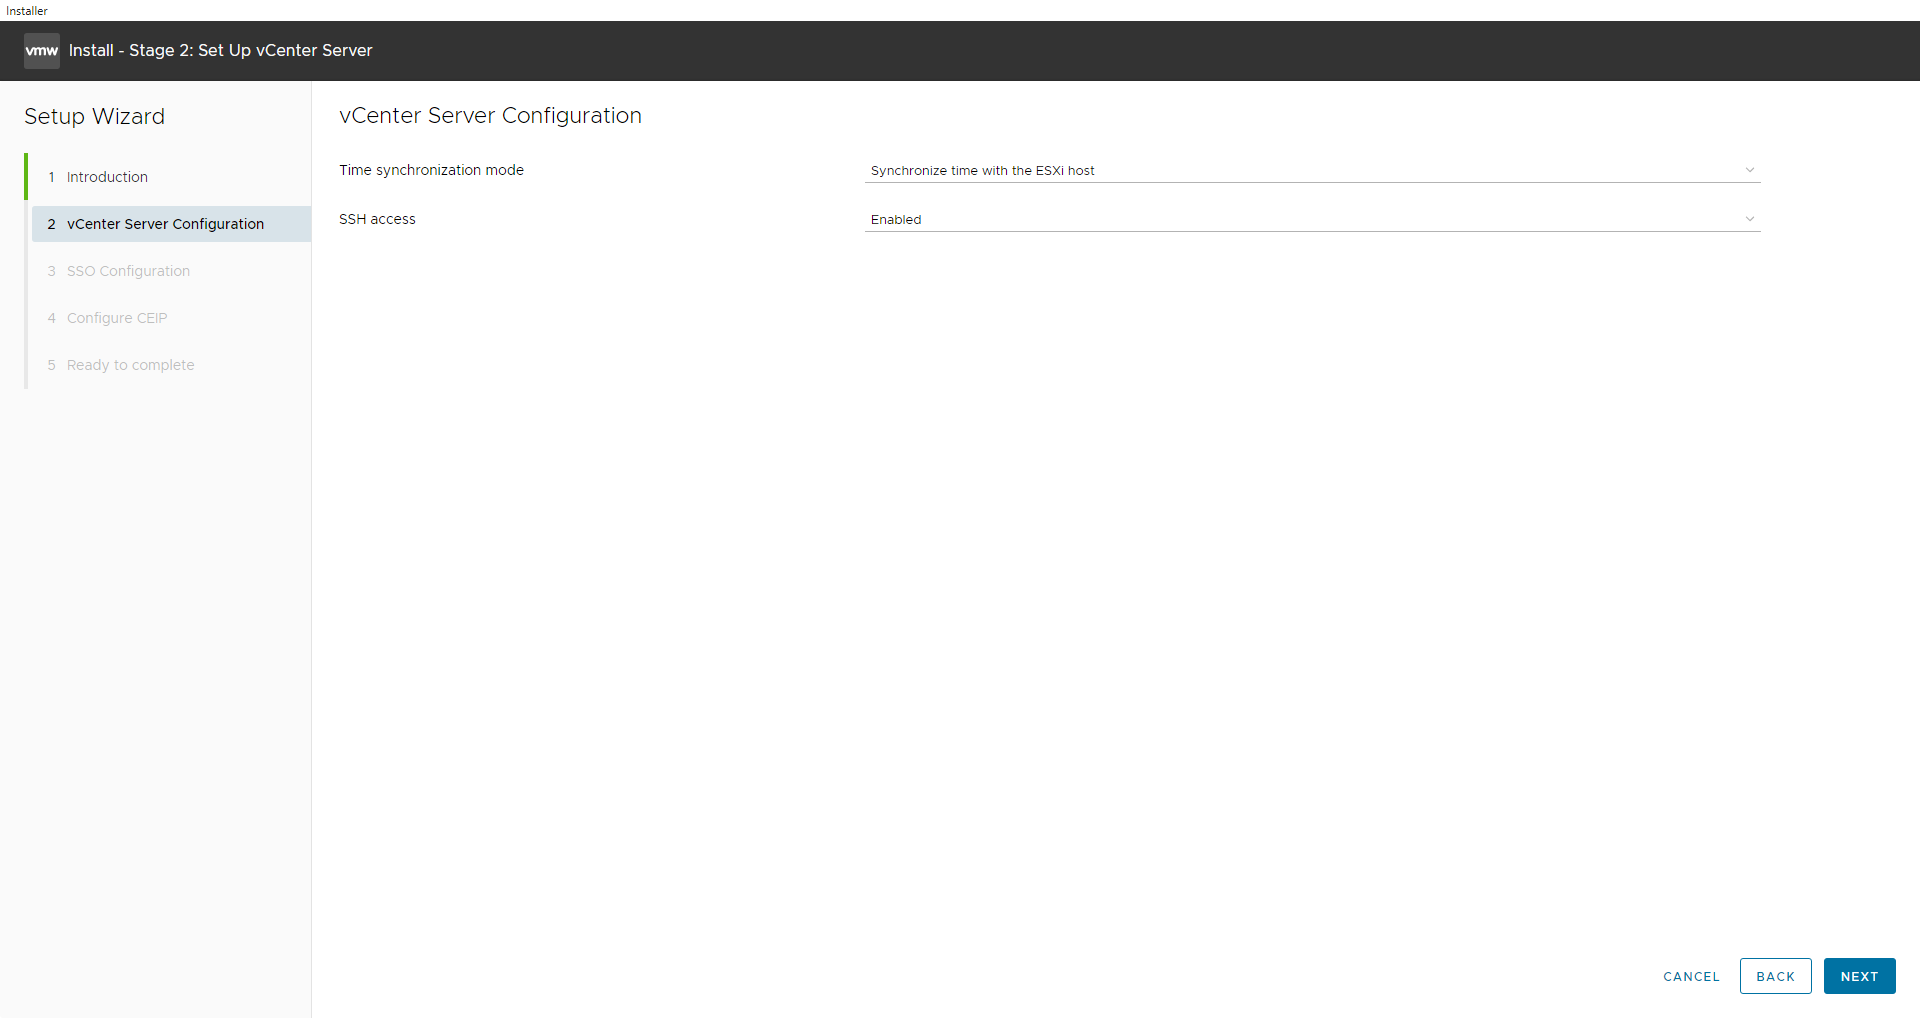
Configure the NTP server by selecting the Time synchronization mode and Enabling the SSH access, then click Next.
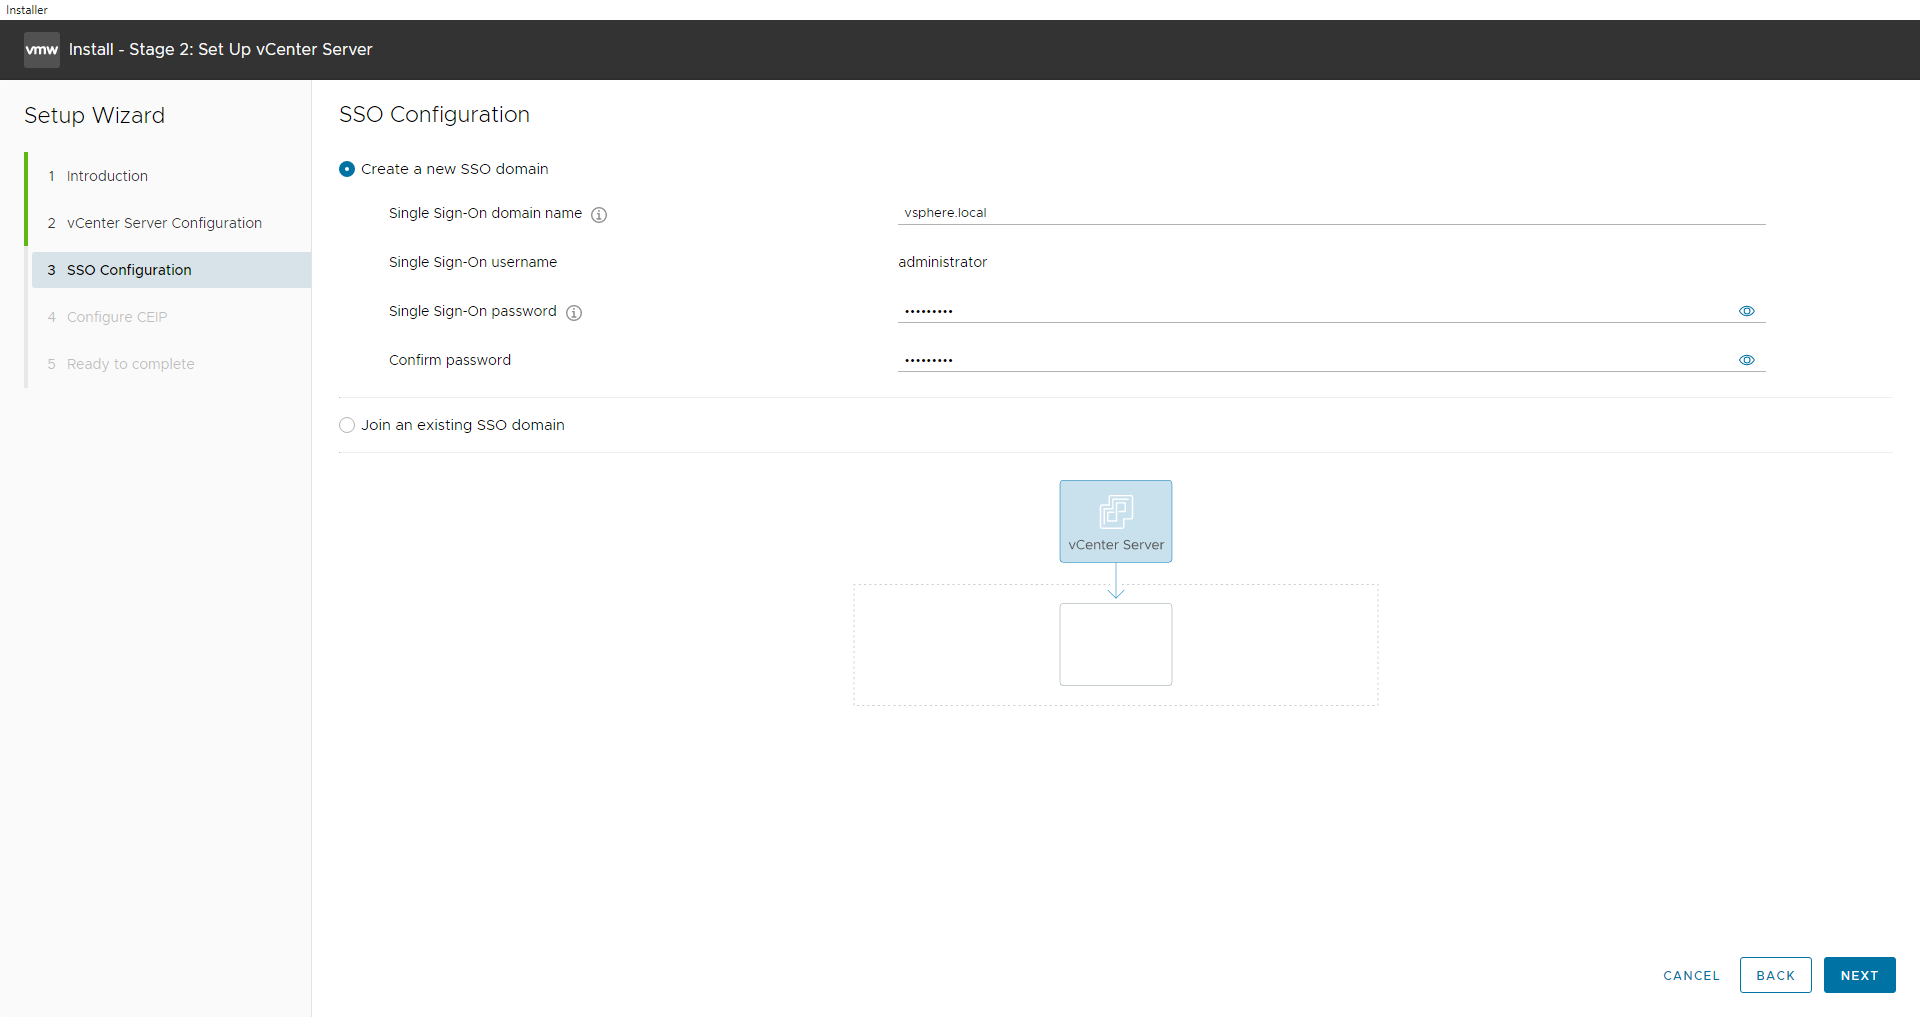
Enter a unique SSO domain name, configure a password for the SSO administrator, click Next.
Note
The default SSO domain name is vSphere.local. The SSO domain name should not be the same as your Active Directory Domain.
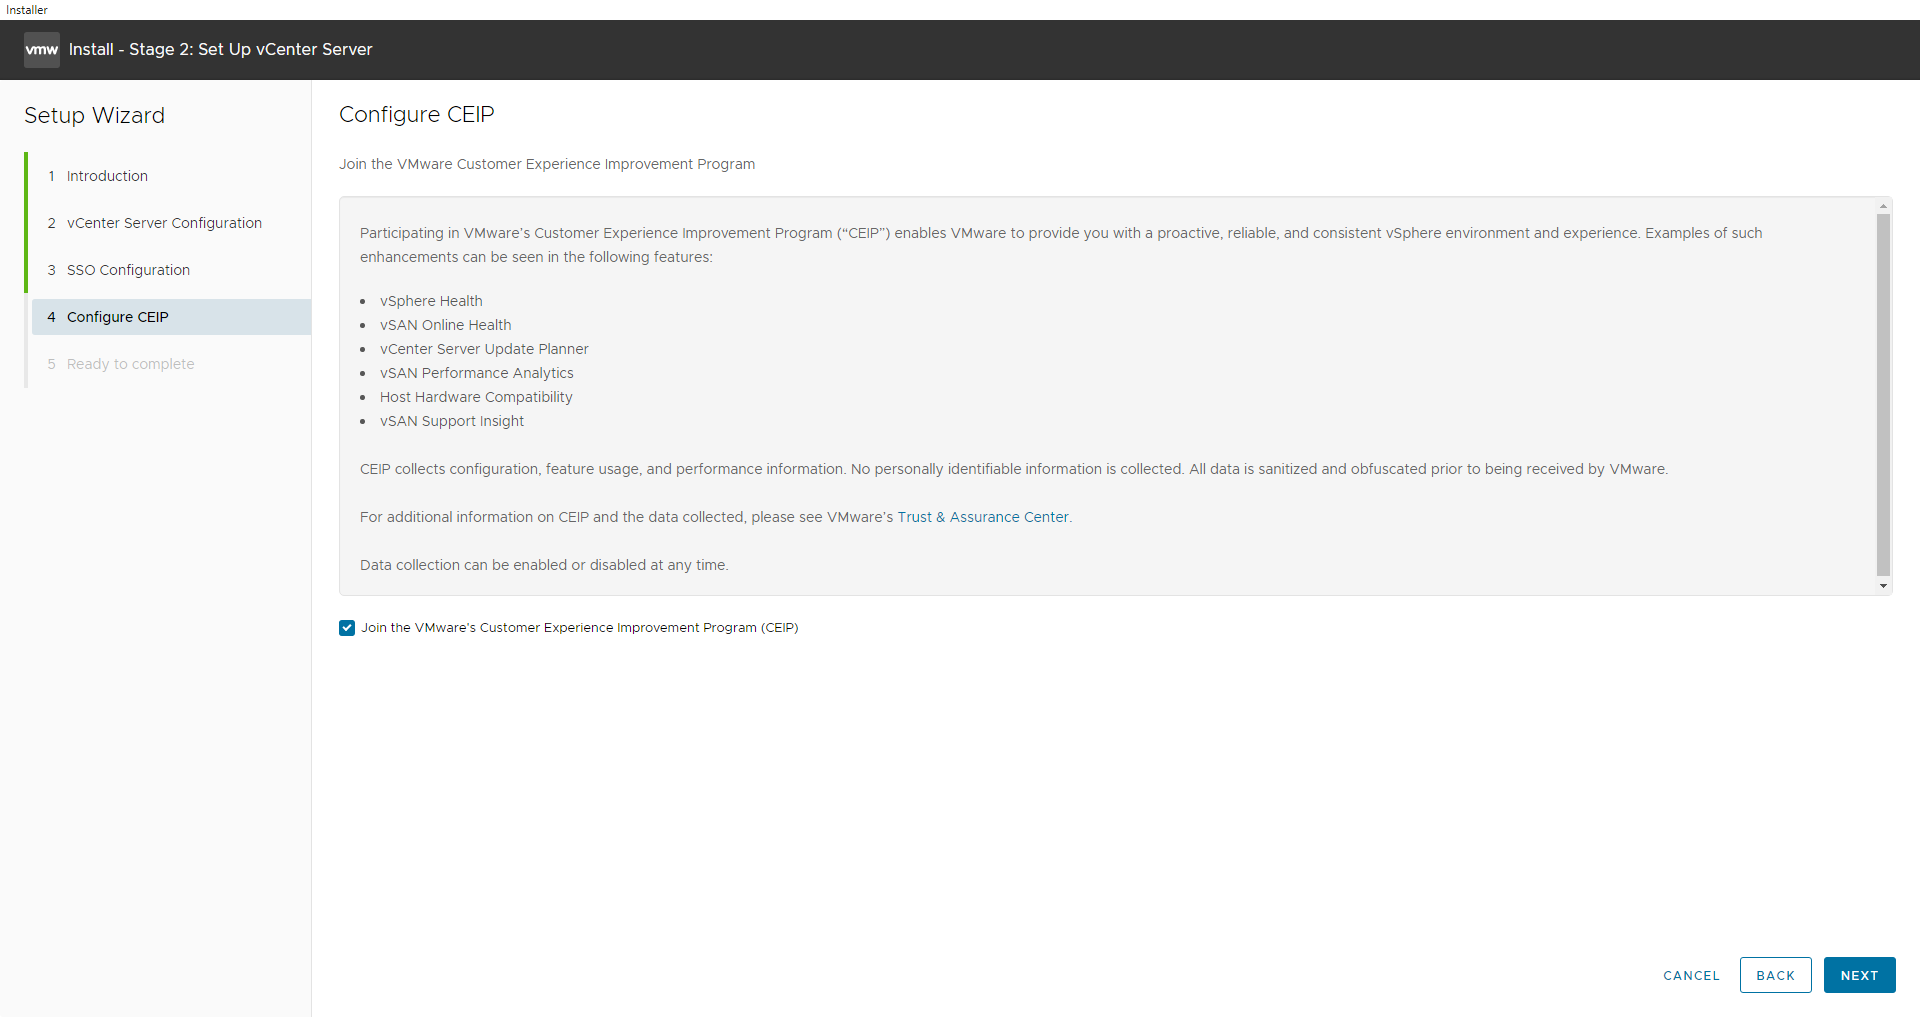
Select or deselect the customer experience improvement program box and click Next.
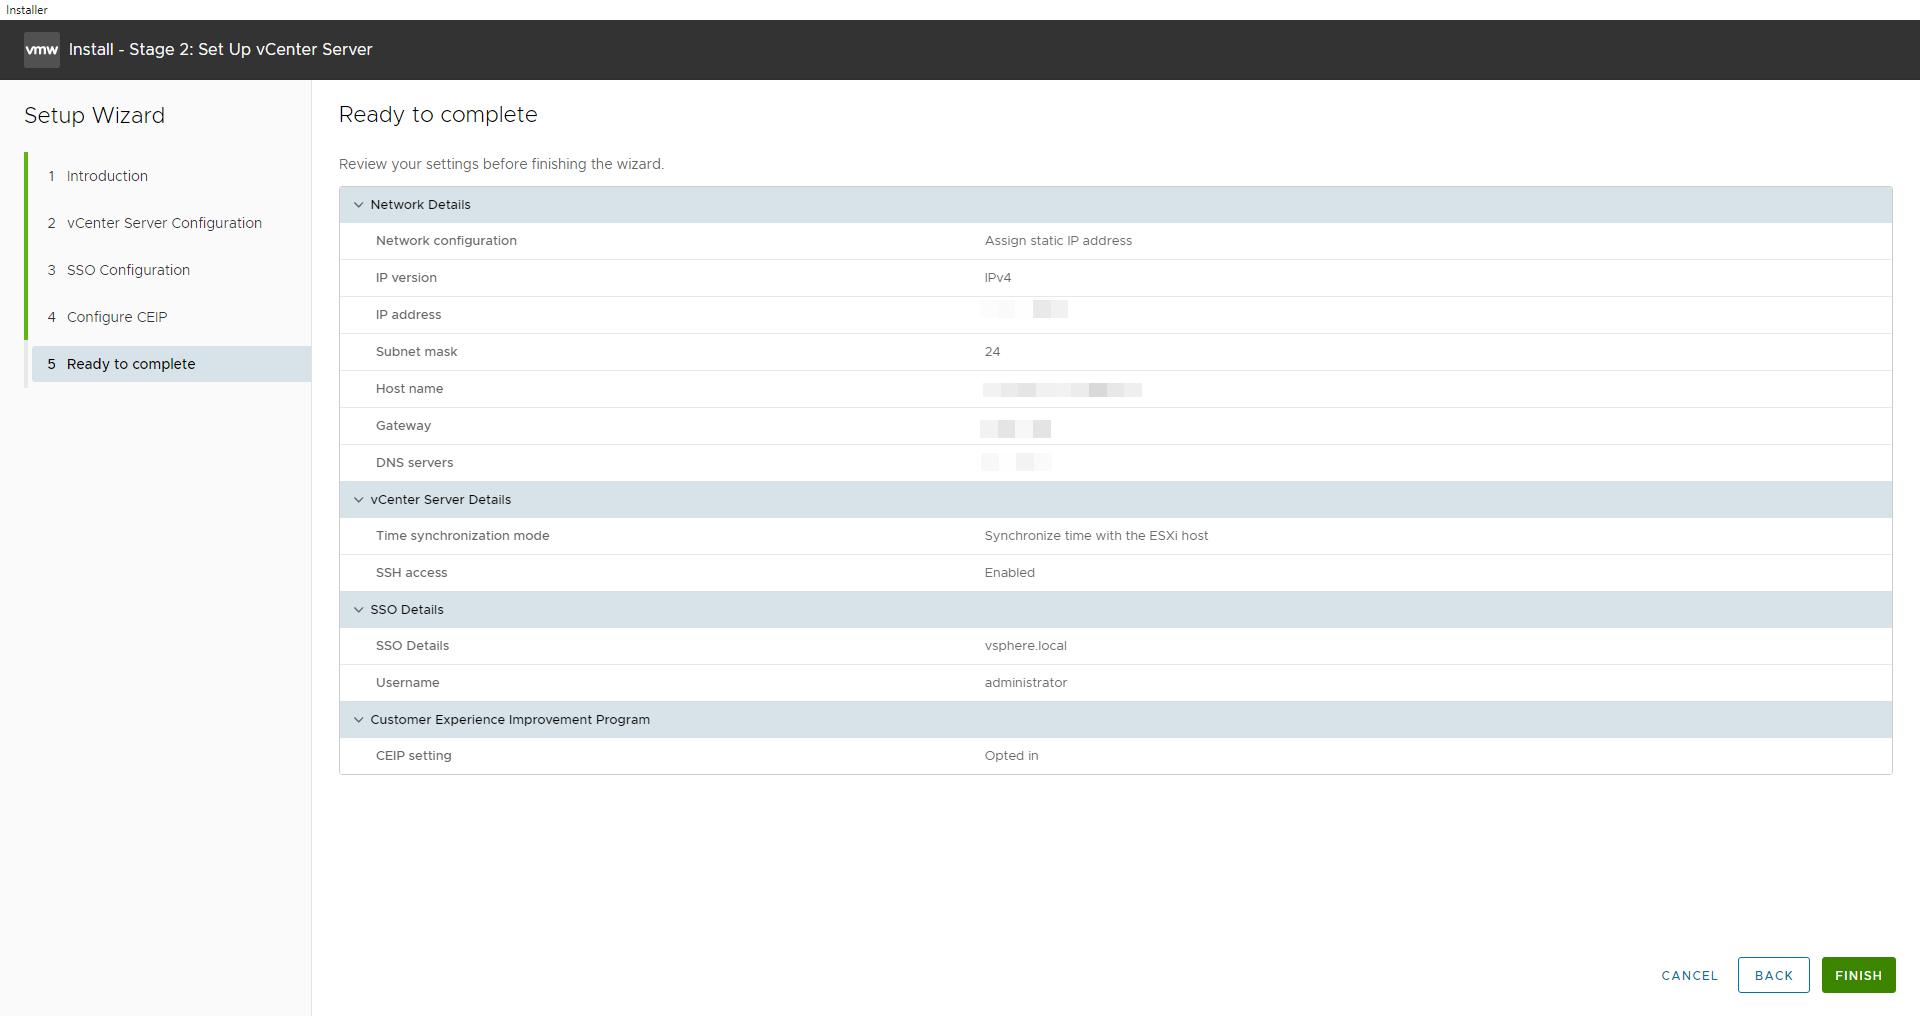
Review the details on the summary page and click Finish to finalize the setup.
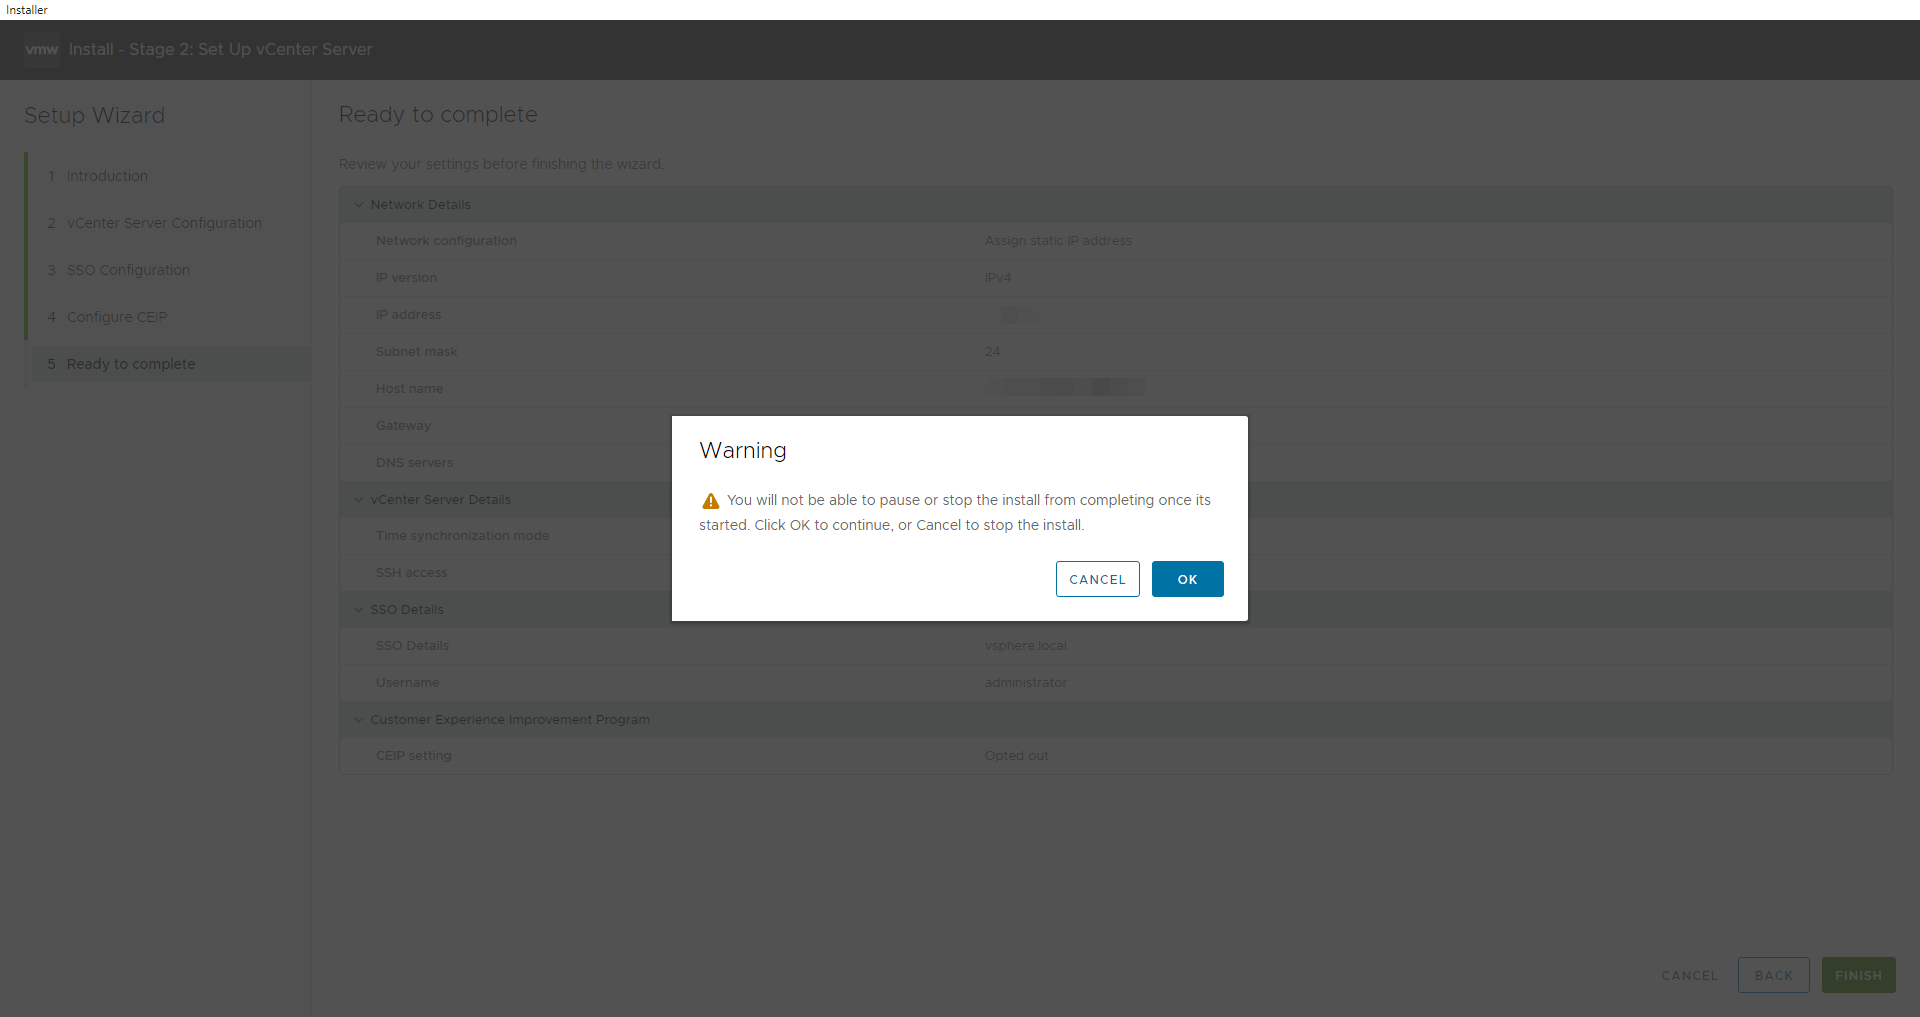
The installer displays a warning that you cannot pause or stop the install once you start it. Click Ok to acknowledge the warning and start the install.
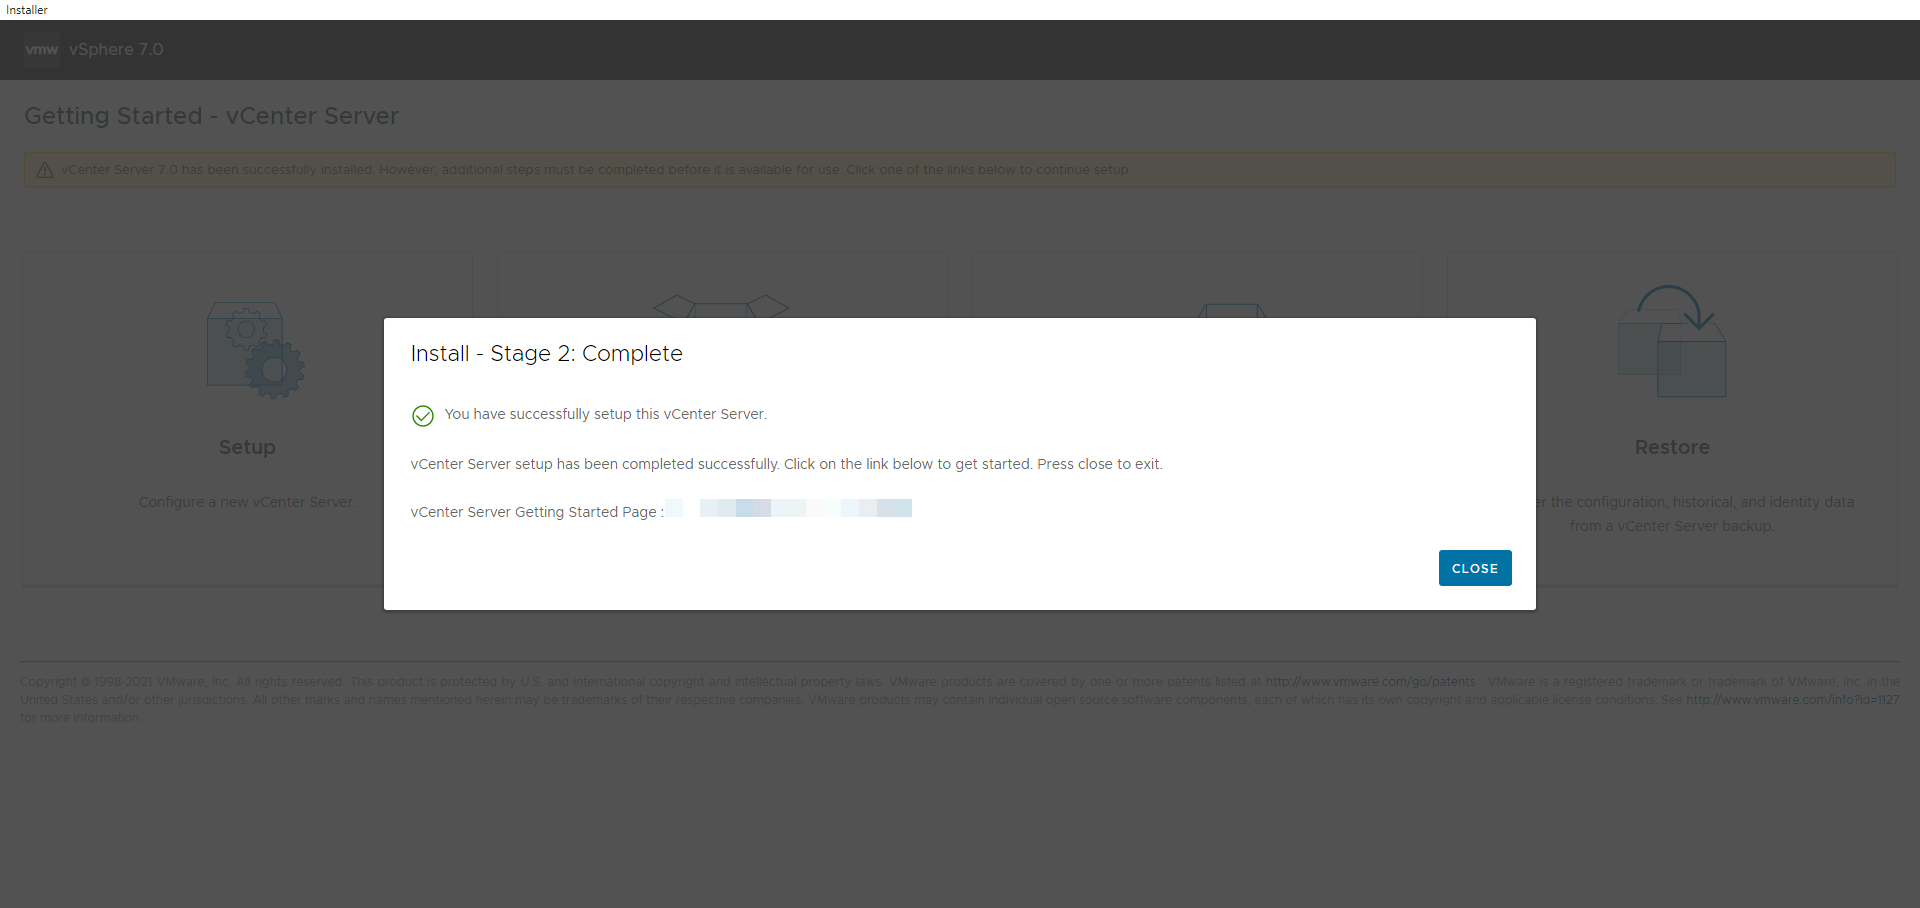
When the install process is complete, click Close to exit the installer and entire Stage 2 of the VCSA setup.
Post Installation#
This section describes the post-install and configuration of the vCenter Server VCSA.
Adding Licenses to the vCenter Server#
Use the following procedure to configure vCenter:
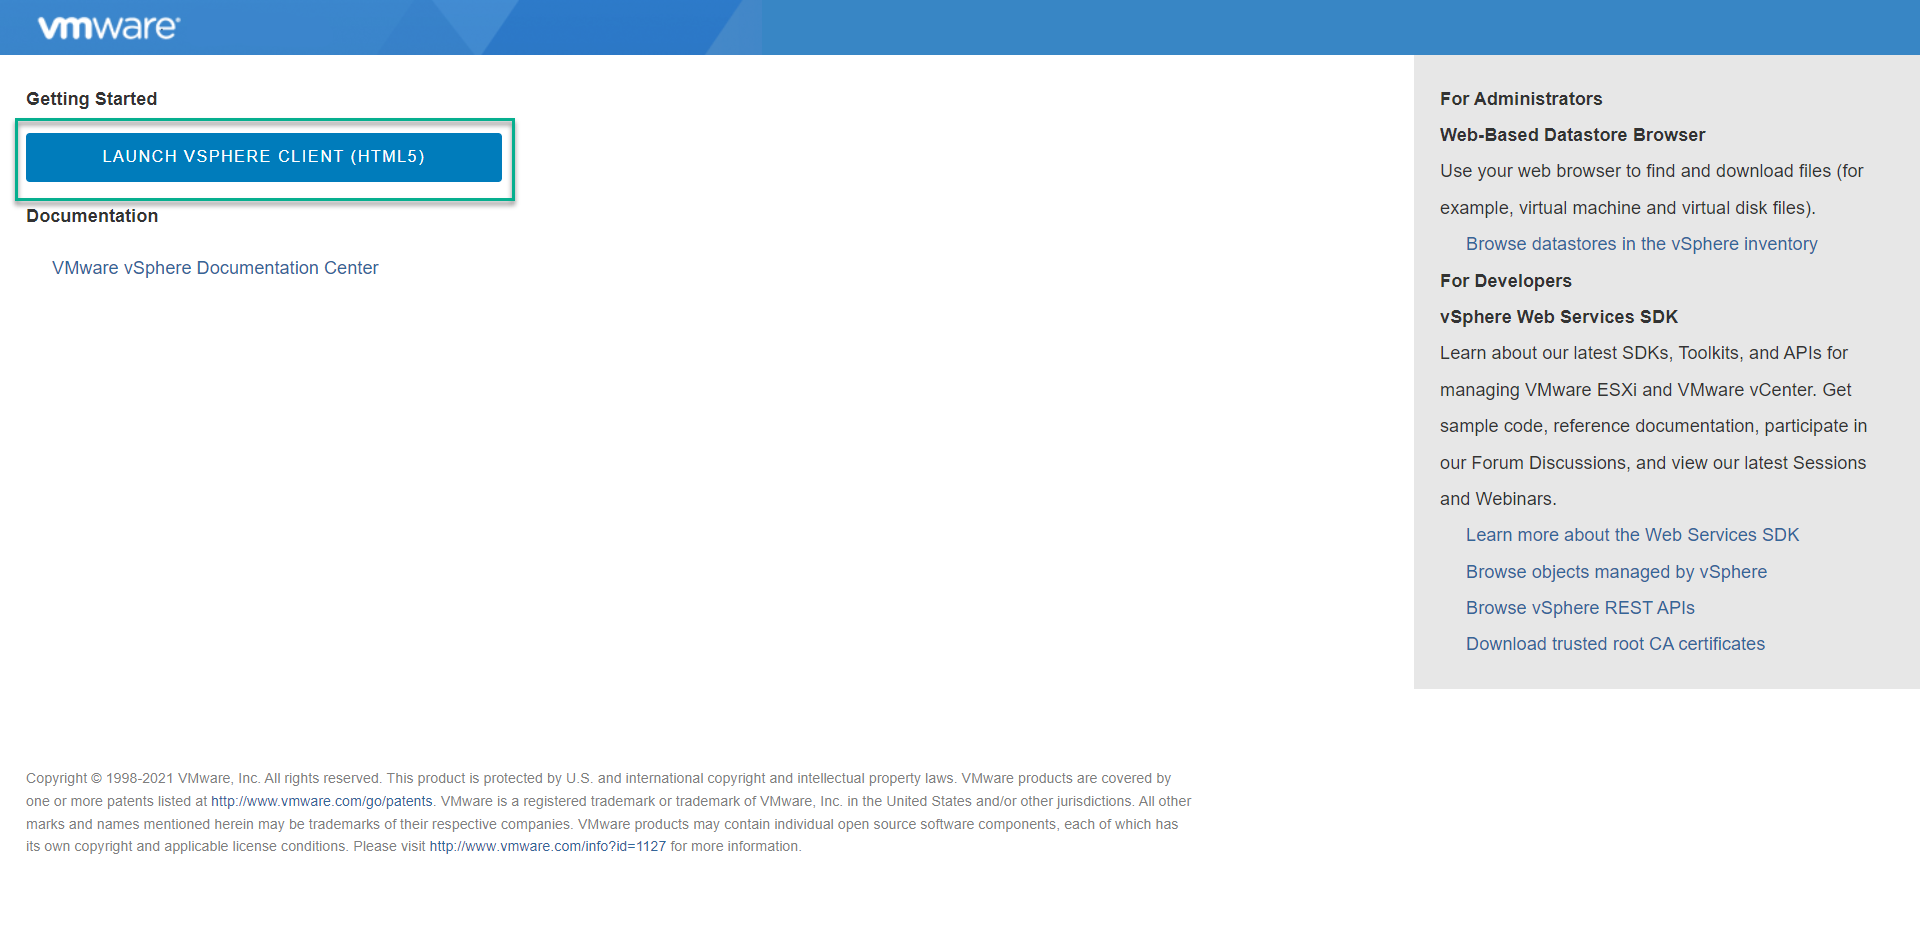
Connect to the vCenter post install using the IP or FQDN of the vCenter. Access vSphere by selecting Launch vSphere Client (HTML5).
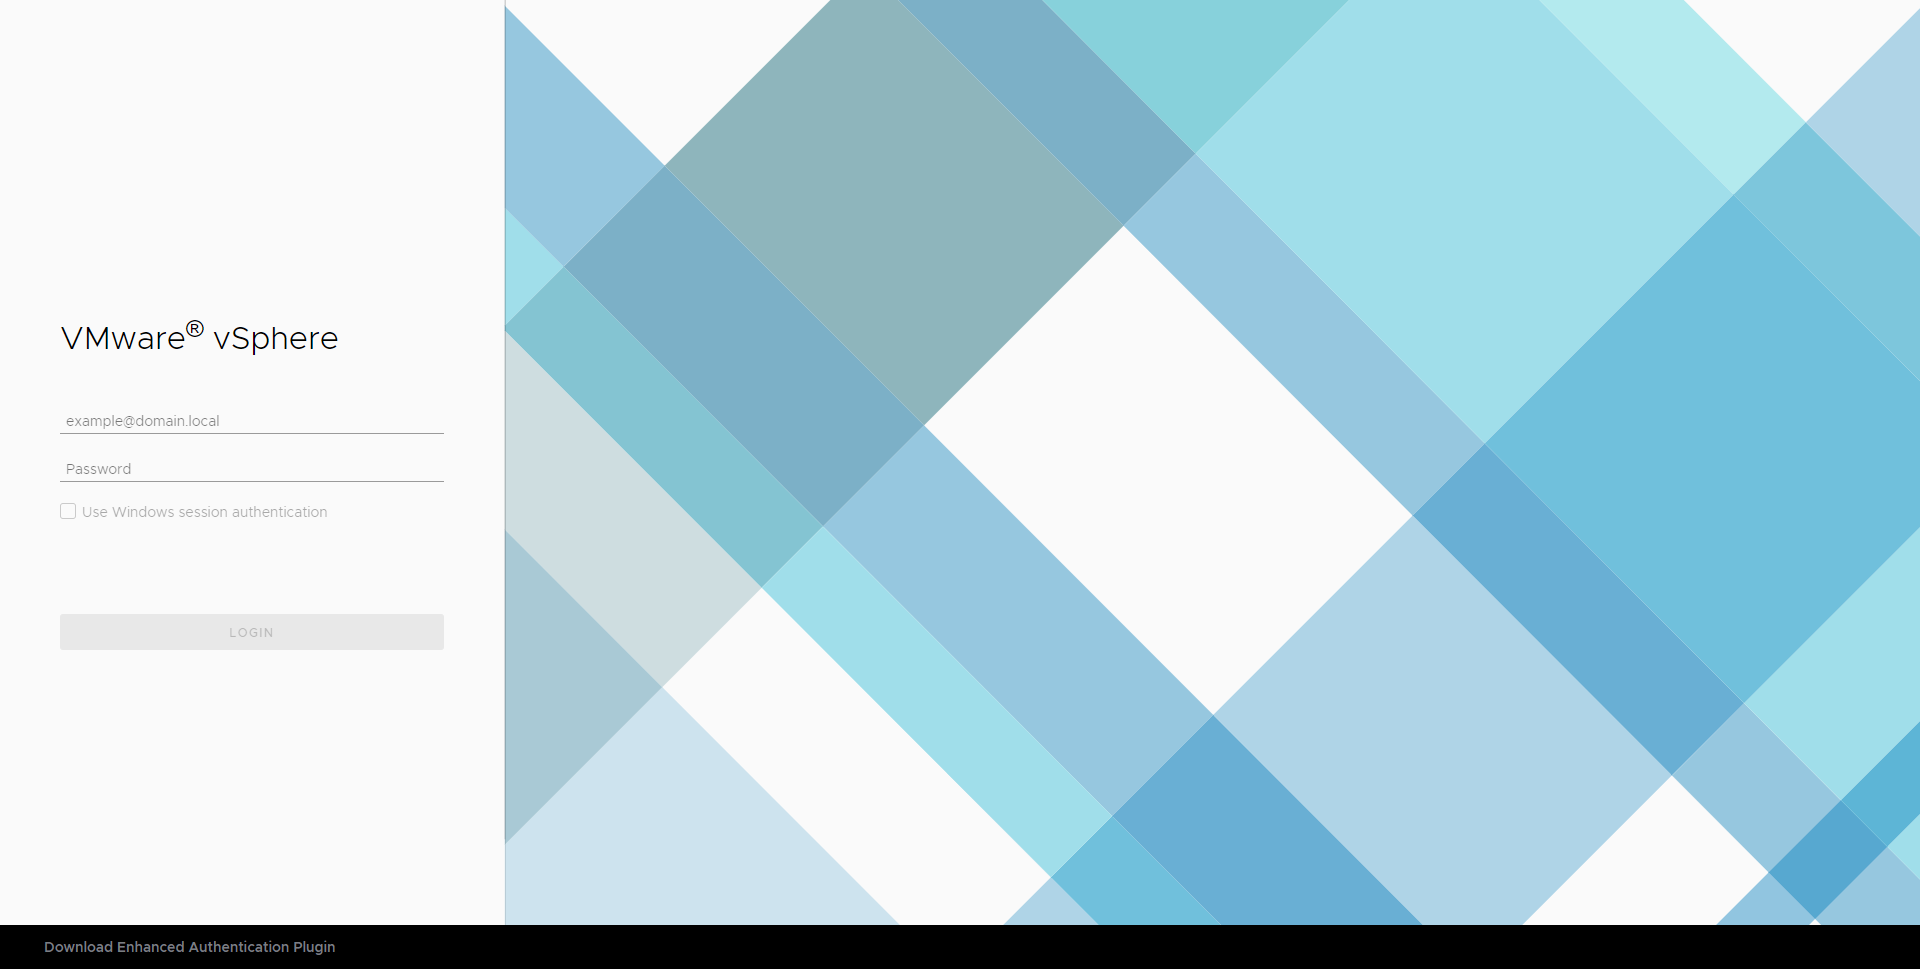
The VMware Single Single-On page displays. Enter the username and password that you specified during installation, then click the Login button.
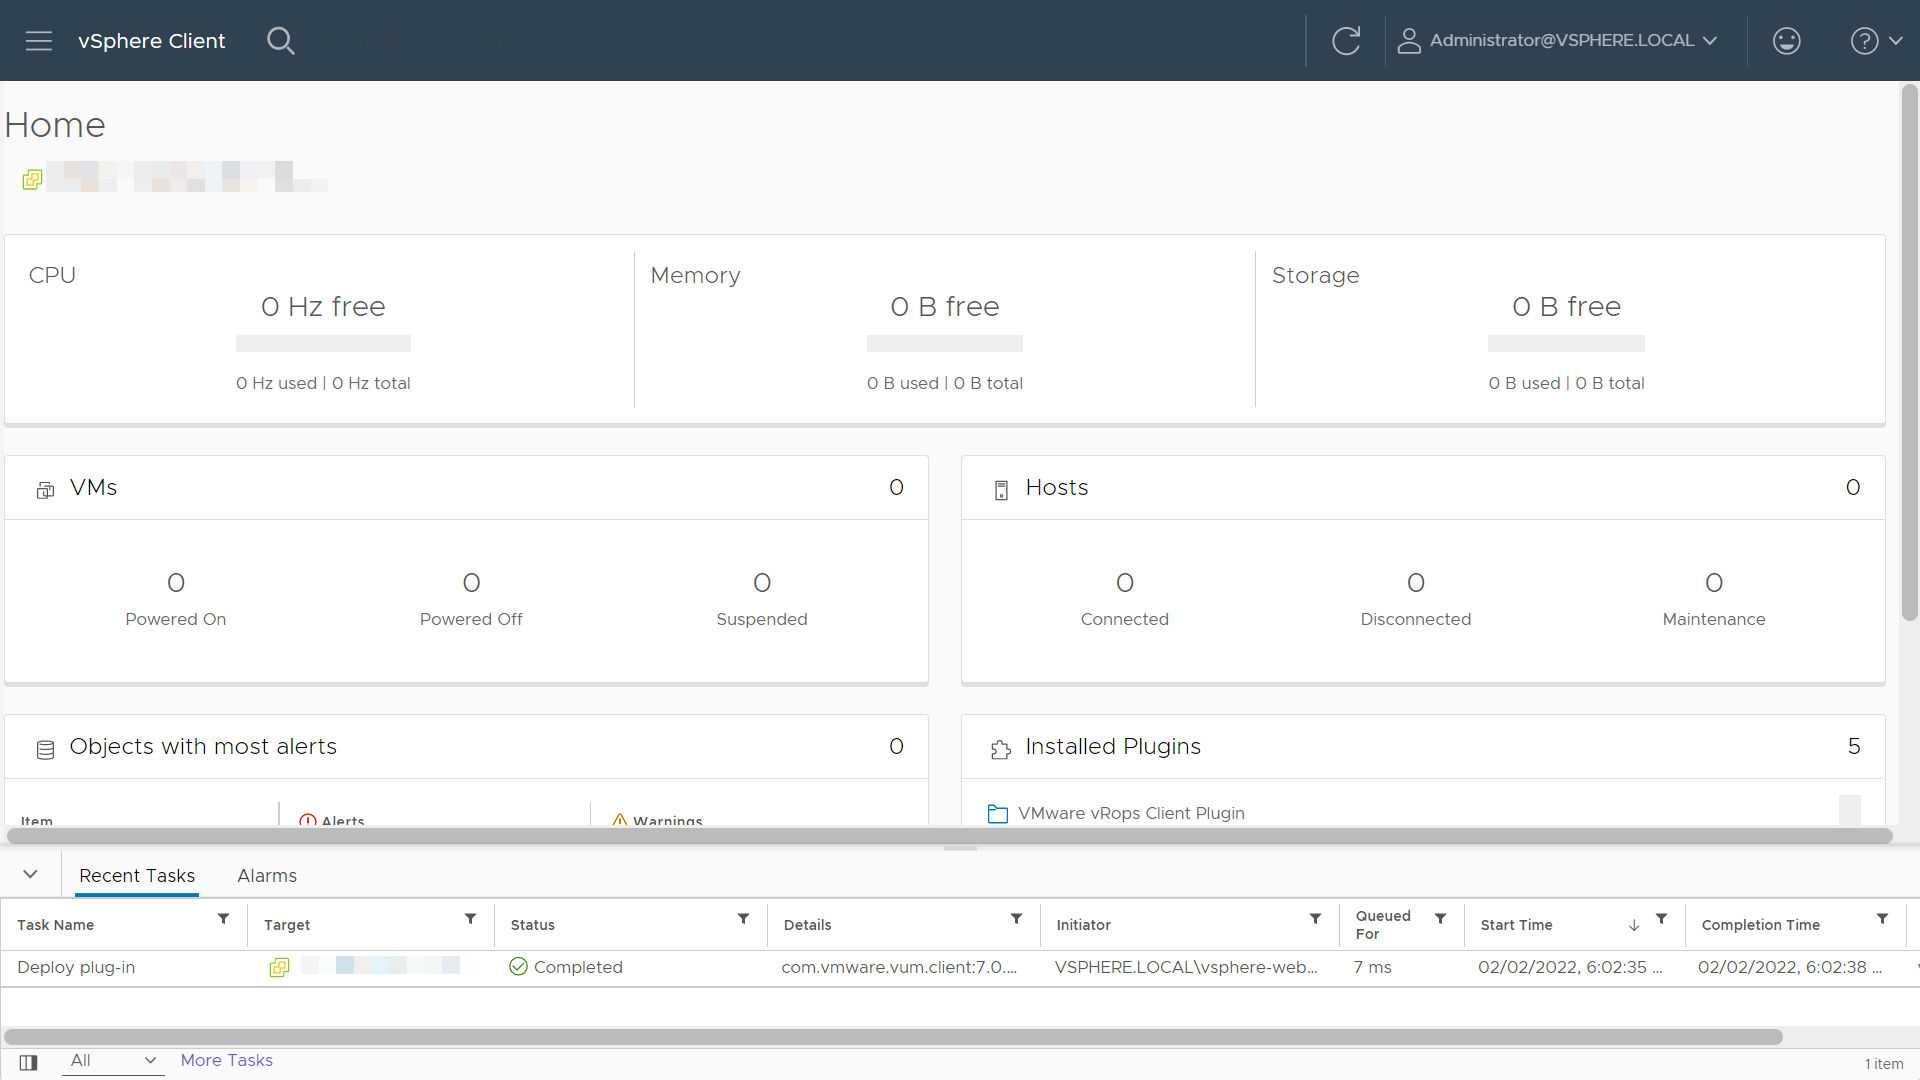
The VMware vSphere Web Client page displays.
You must apply for a new vCenter license key within 60 days. If you have purchased vCenter Server, log in to your licensing portal. Select your license and log in to the vSphere Web Client using the SSO administrator login. (If the license key does not appear, then check with your VMware account manager.)
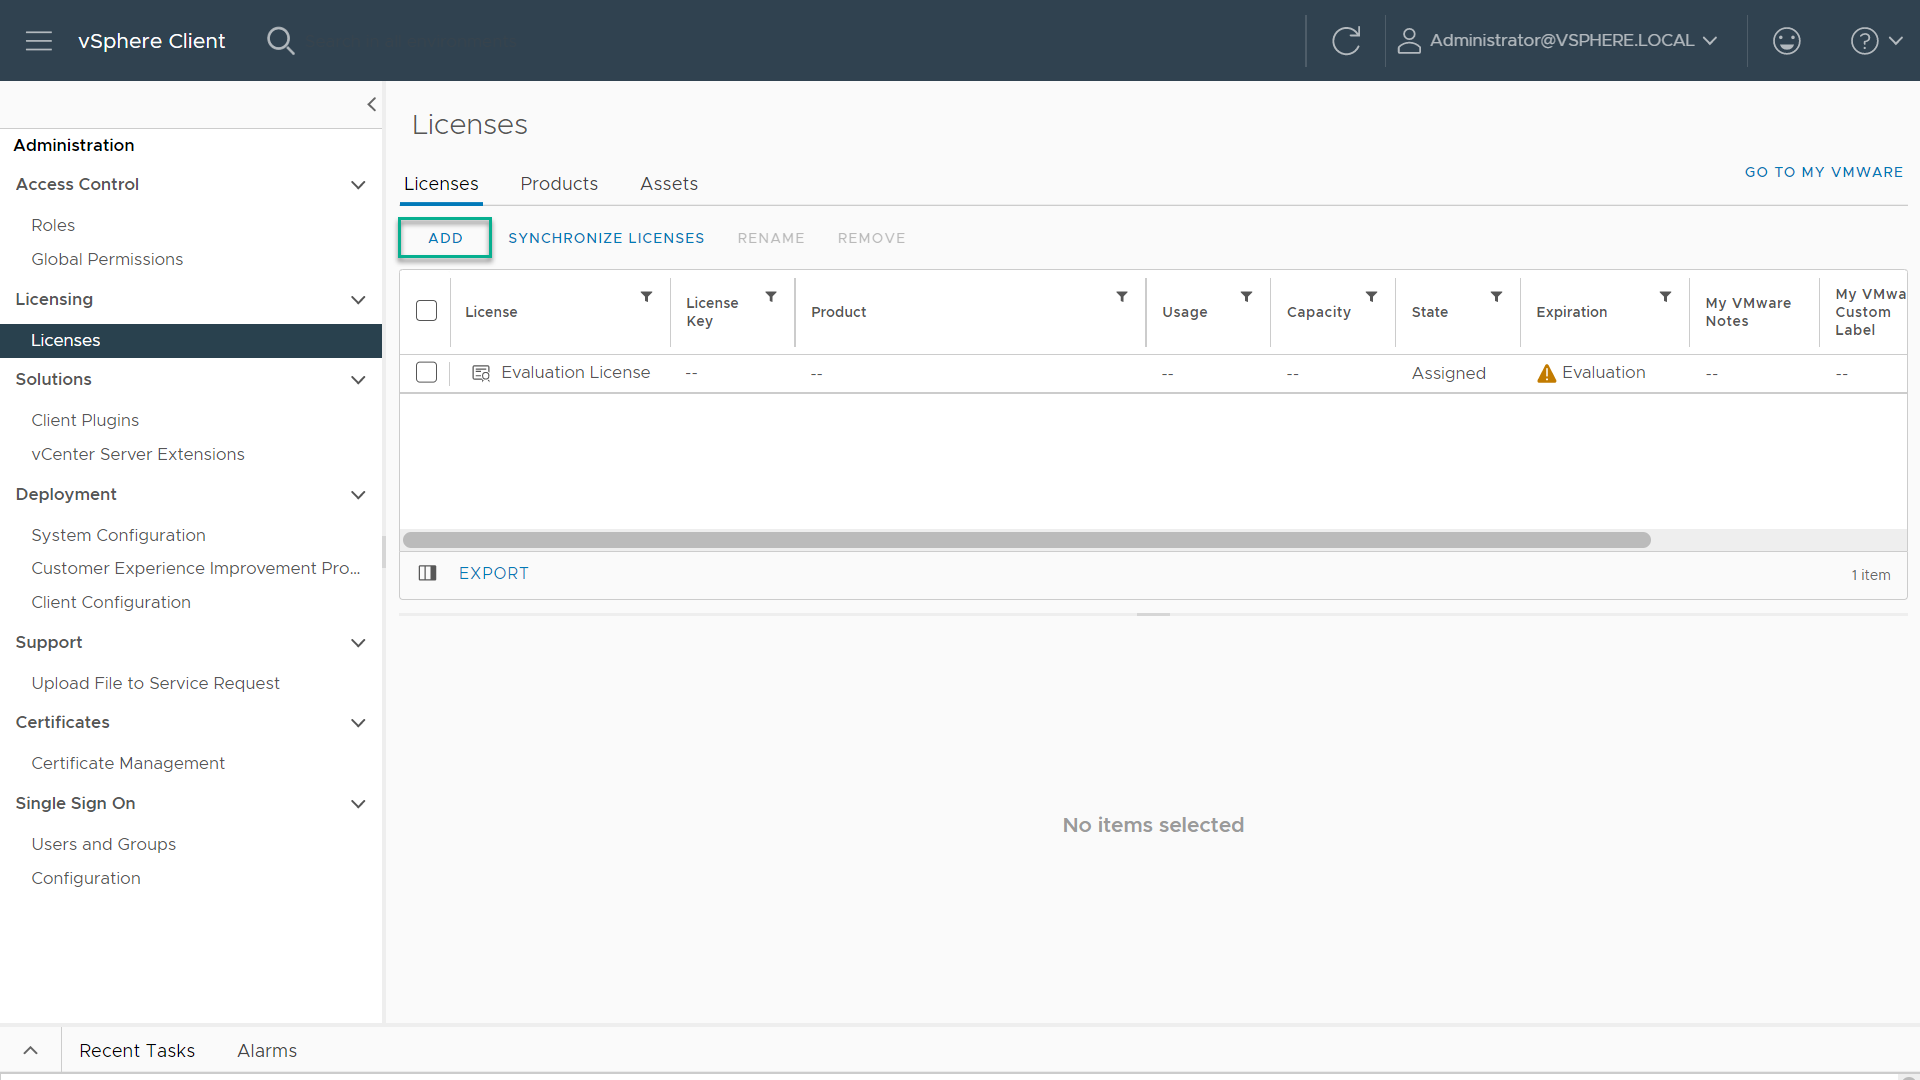
Click the Menu drop-down, then click Administration. Select Licenses from the left-hand menu, then select the Licenses tab. Click Add New Licenses to open the New Licenses dialog.
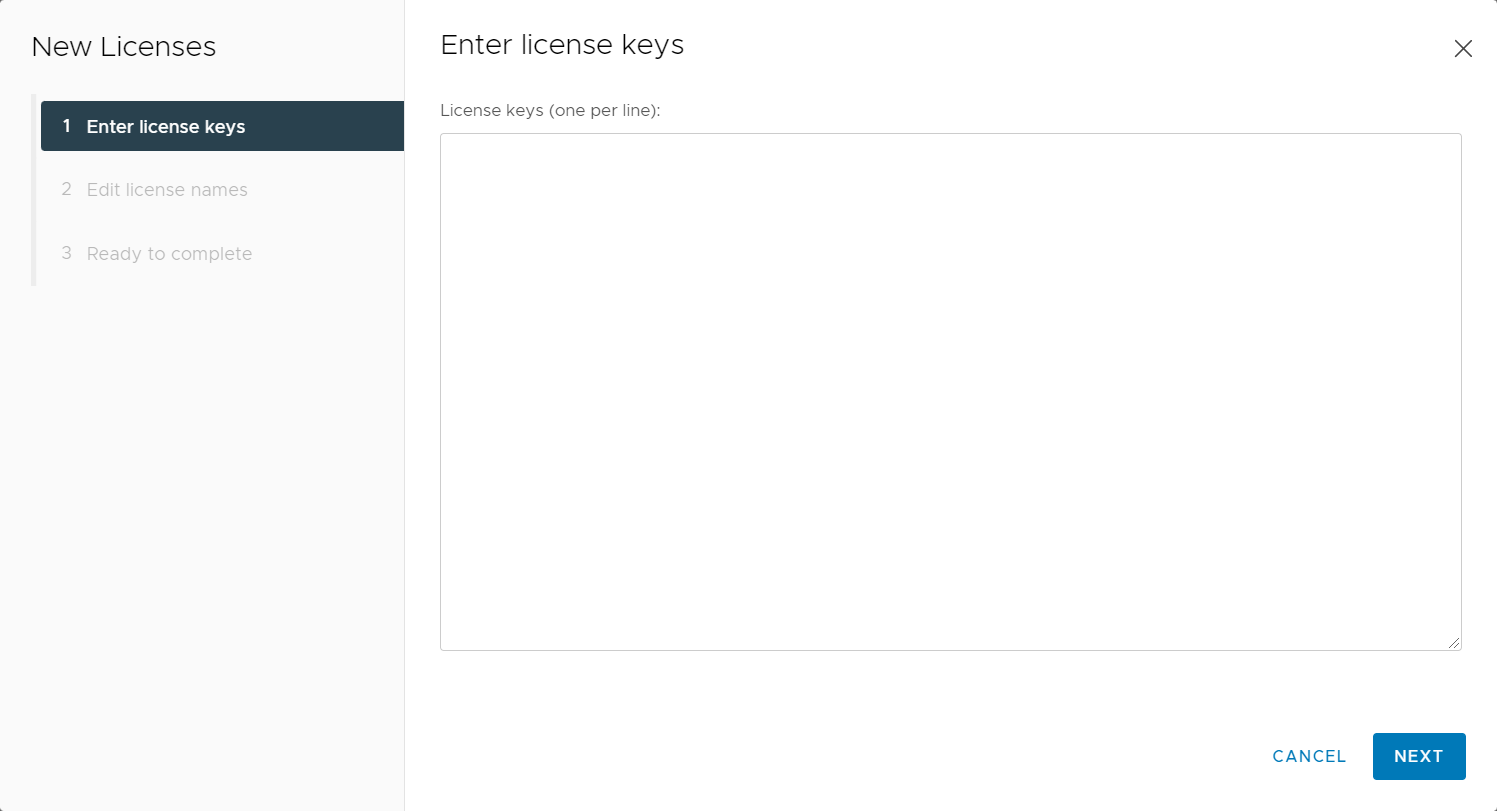
Enter the vCenter Server Standard license key provided at the vSphere Licensing Portal.
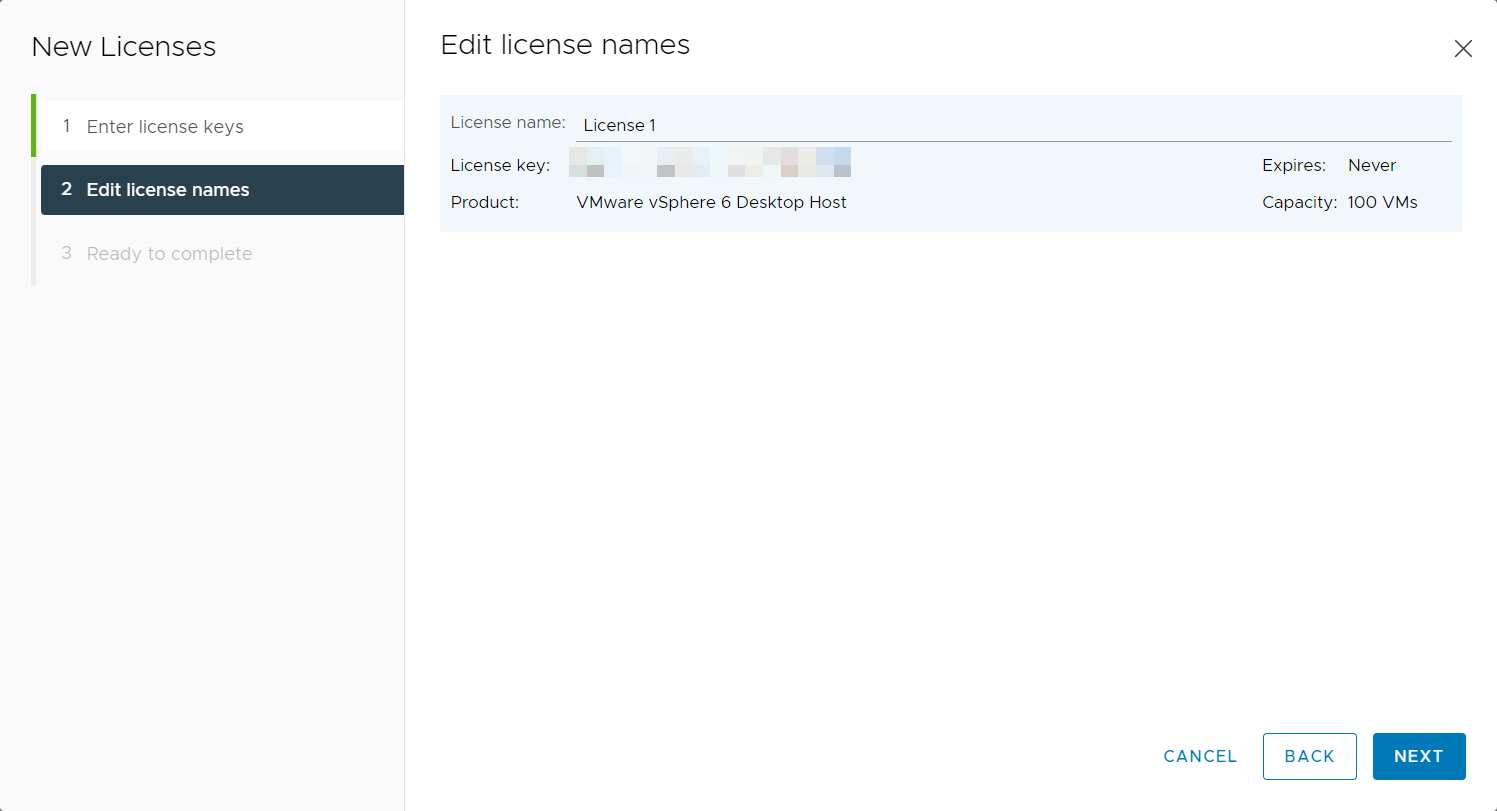
Enter a unique name for the license in the License Name field and then click Next.
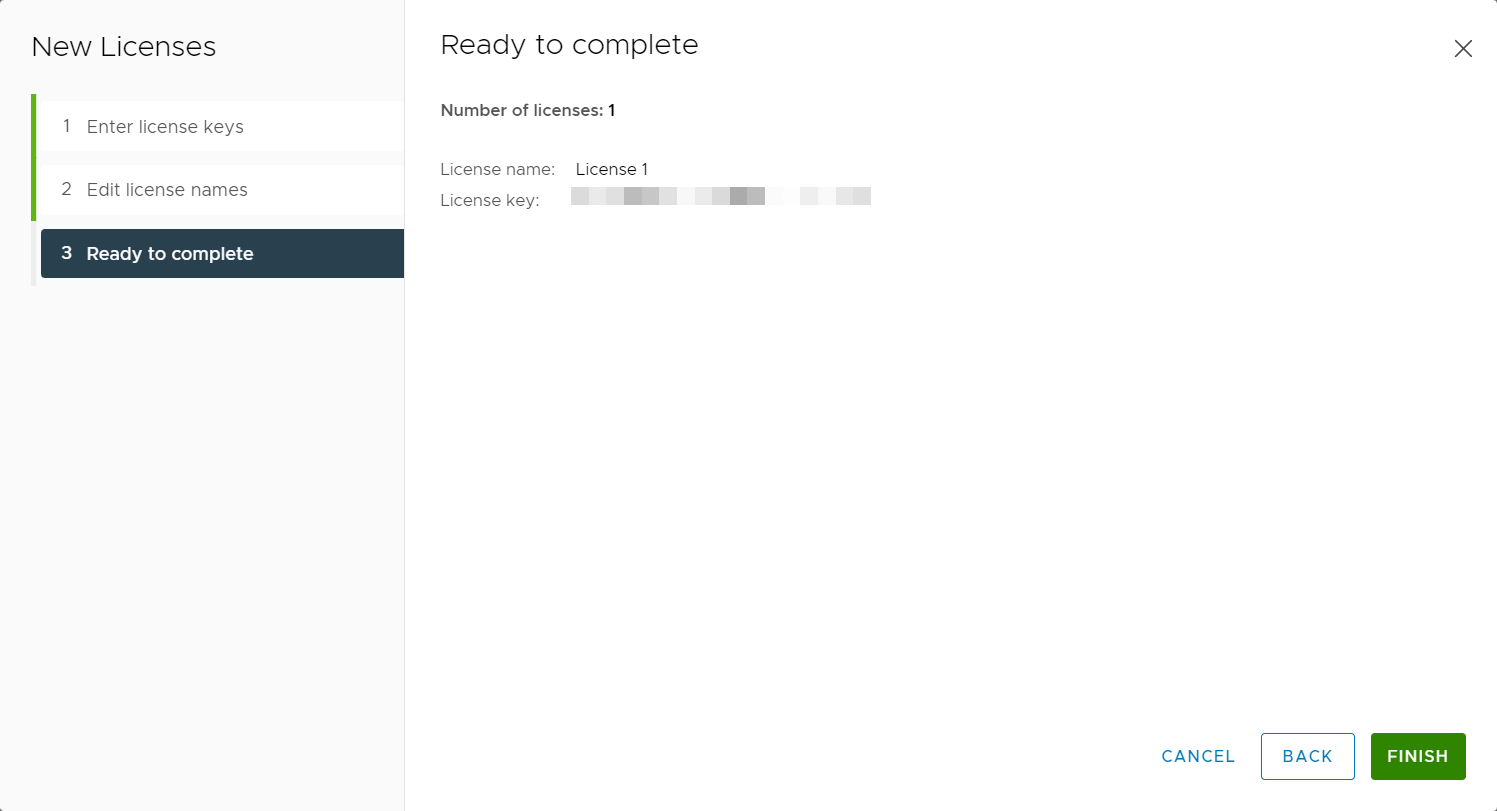
Review your selections, then click Finish to close the Enter New License dialog and return to the VMware vSphere Web Client page.
Adding a Host#
Use the following procedure to add a host in vCenter.
Select the Home icon (house) on the VMware vSphere Web Client page.
Select Hosts and Clusters.
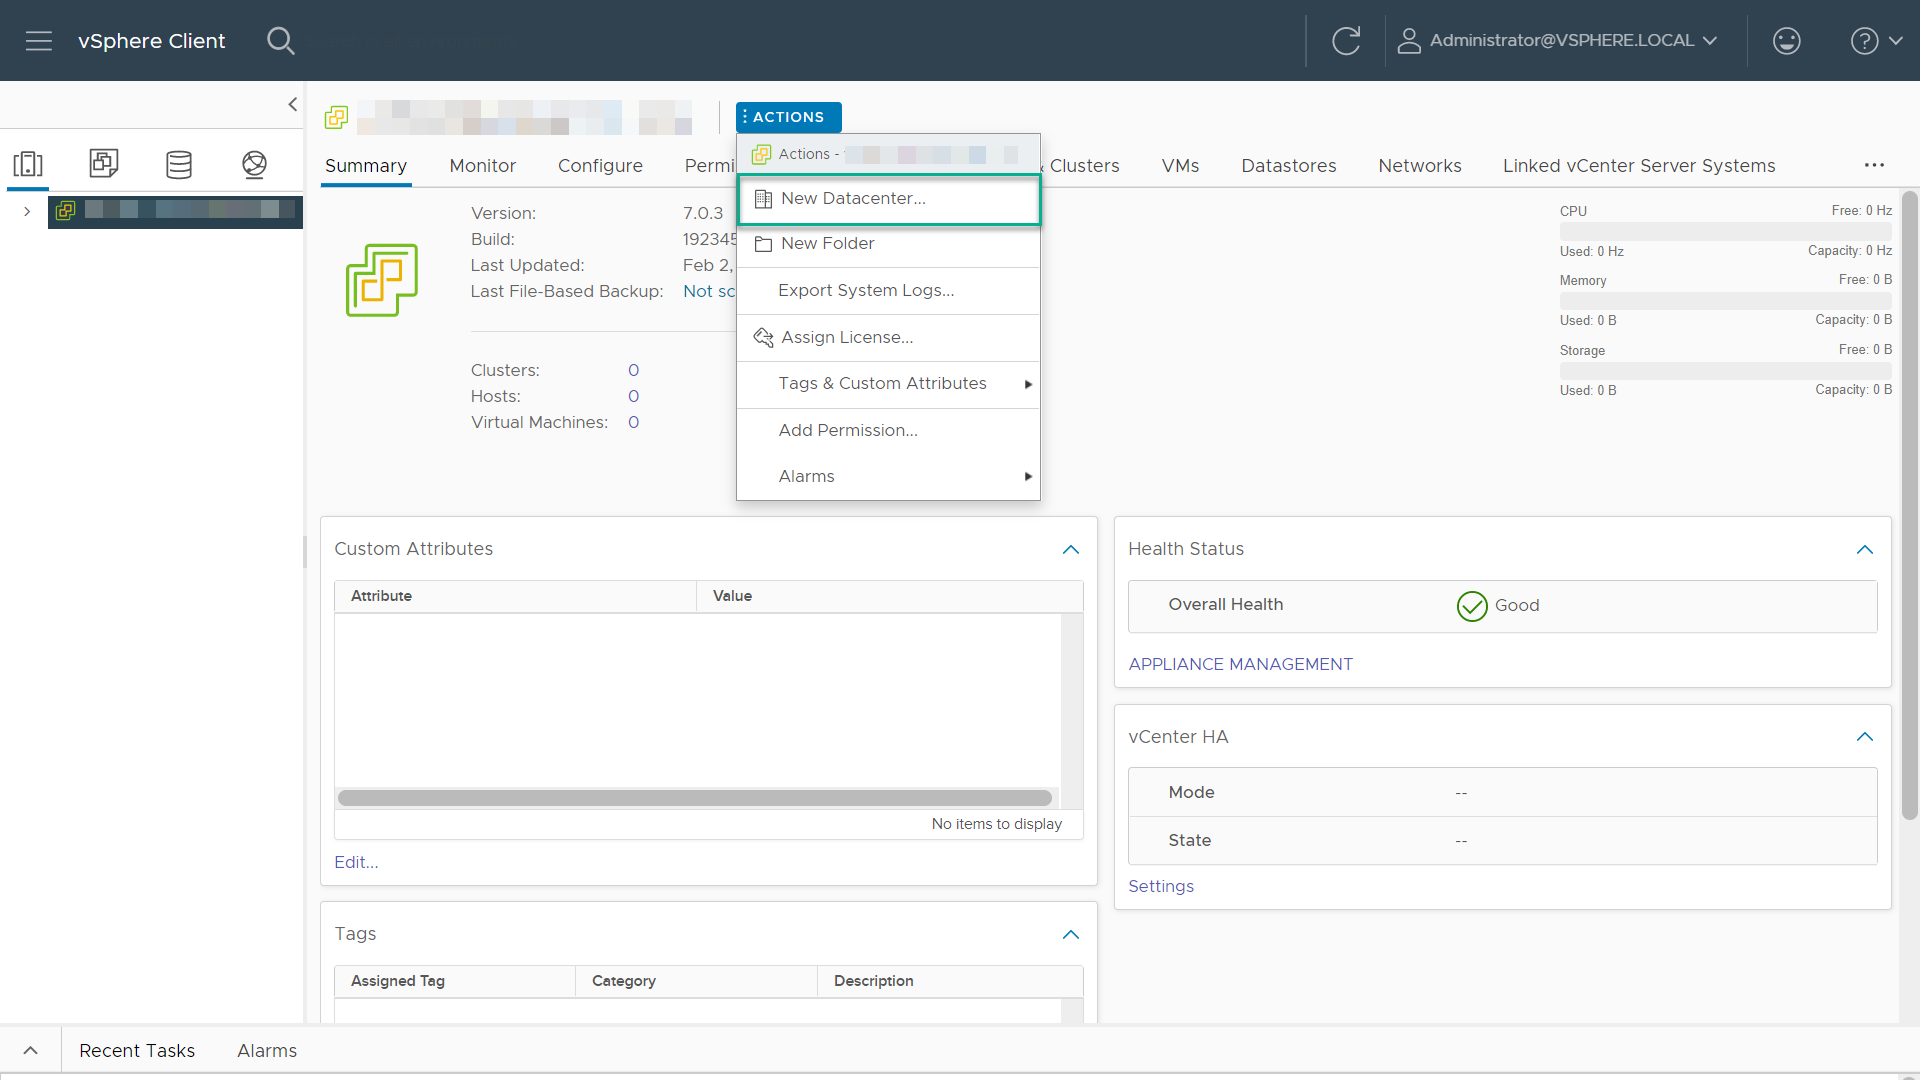
From the Actions drop-down list, select New Datacenter.
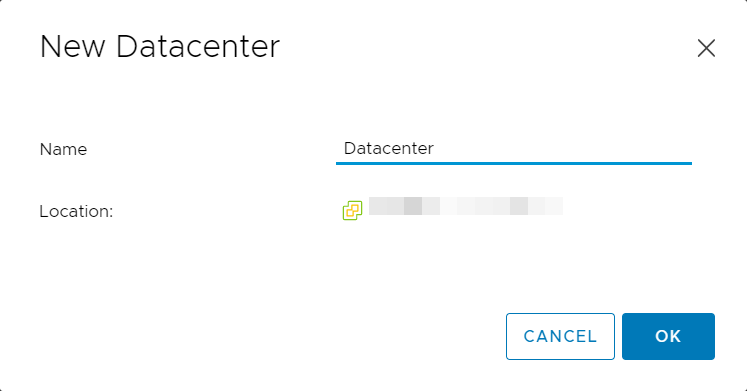
Enter a name for the datacenter in the Datacenter Name field and click Ok.
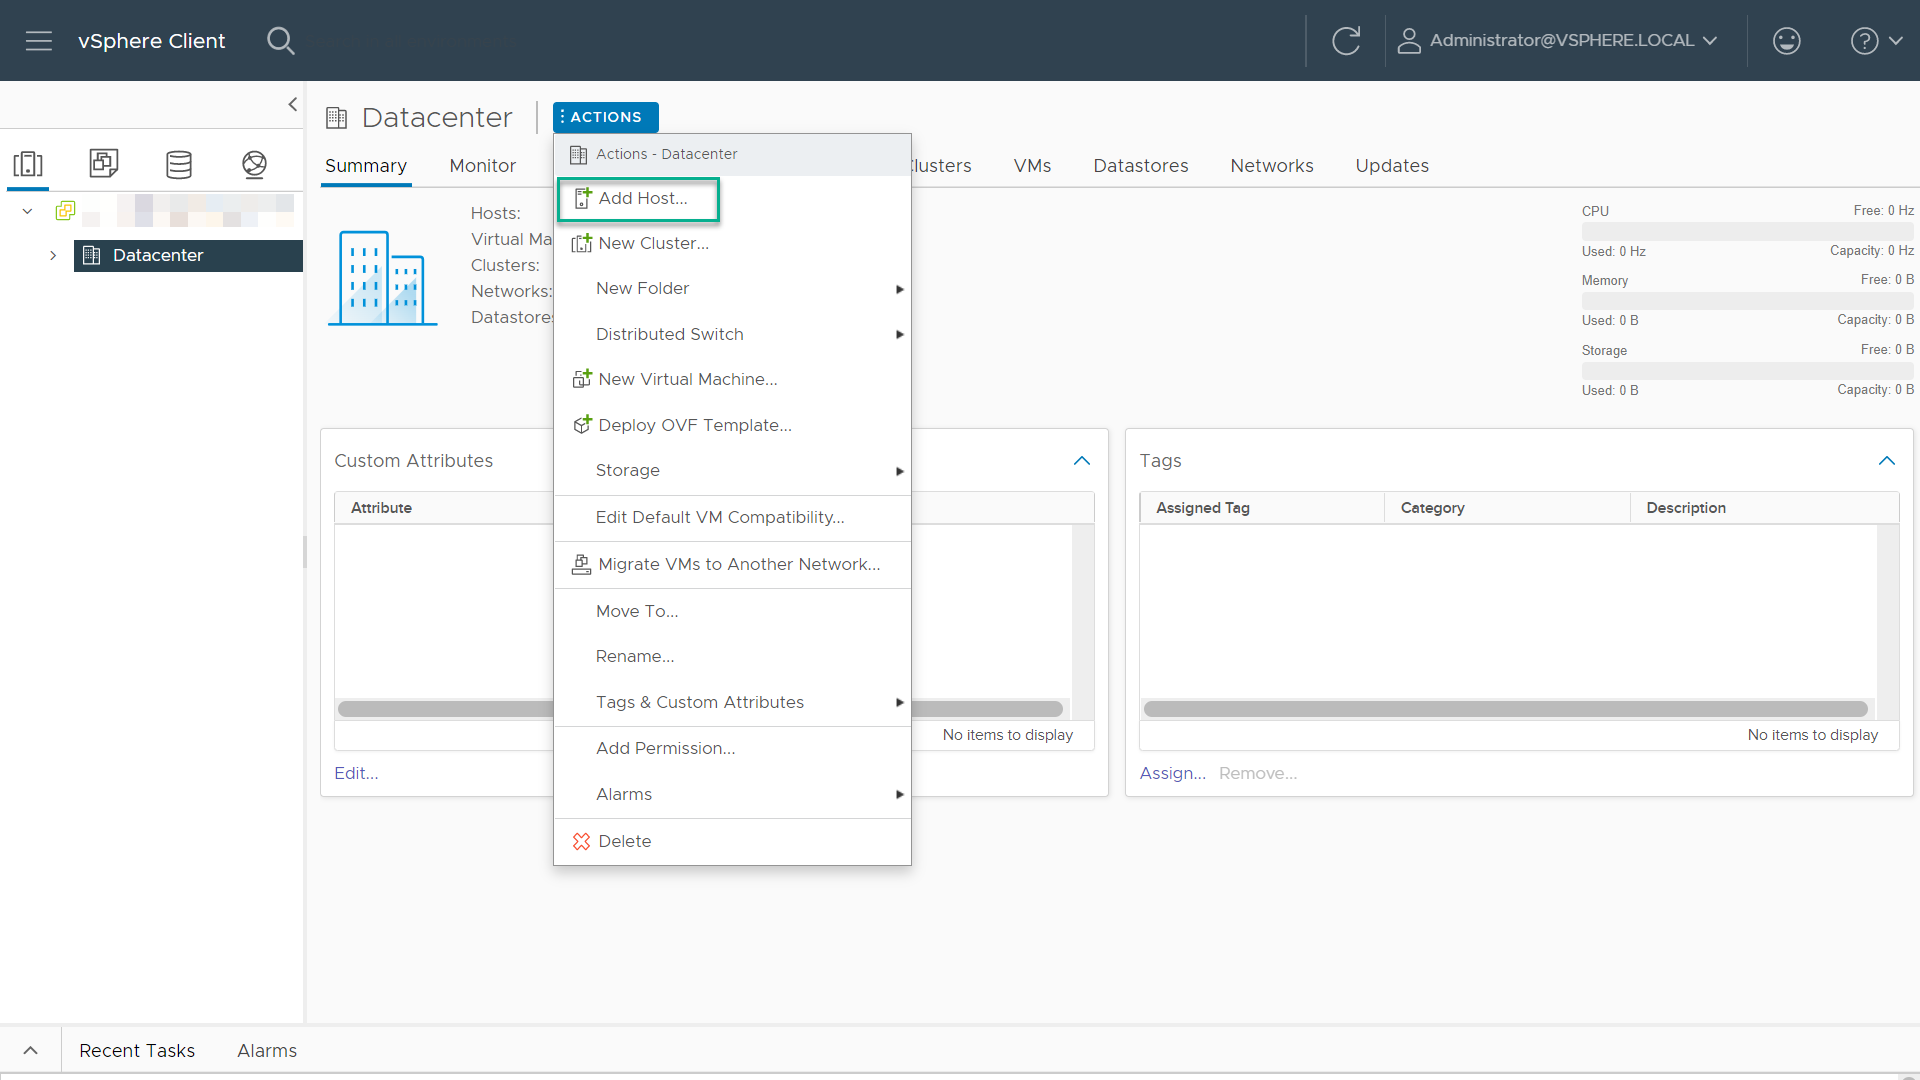
The new datacenter is visible in the left panel of the vSphere Web Client. Click the actions drop-down and select Add a Host.
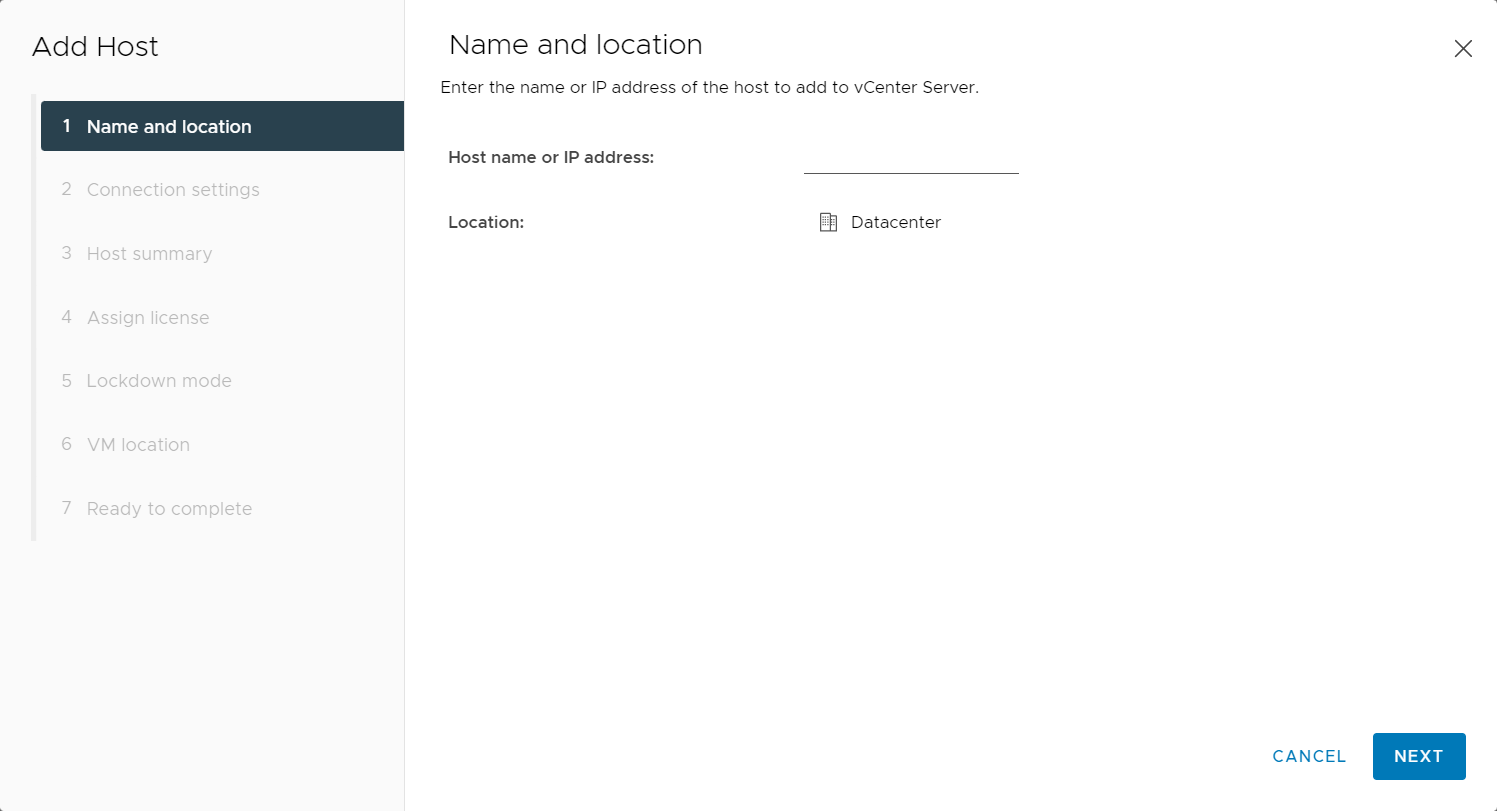
Enter the hostname or IP address of the vSphere host and click Next.
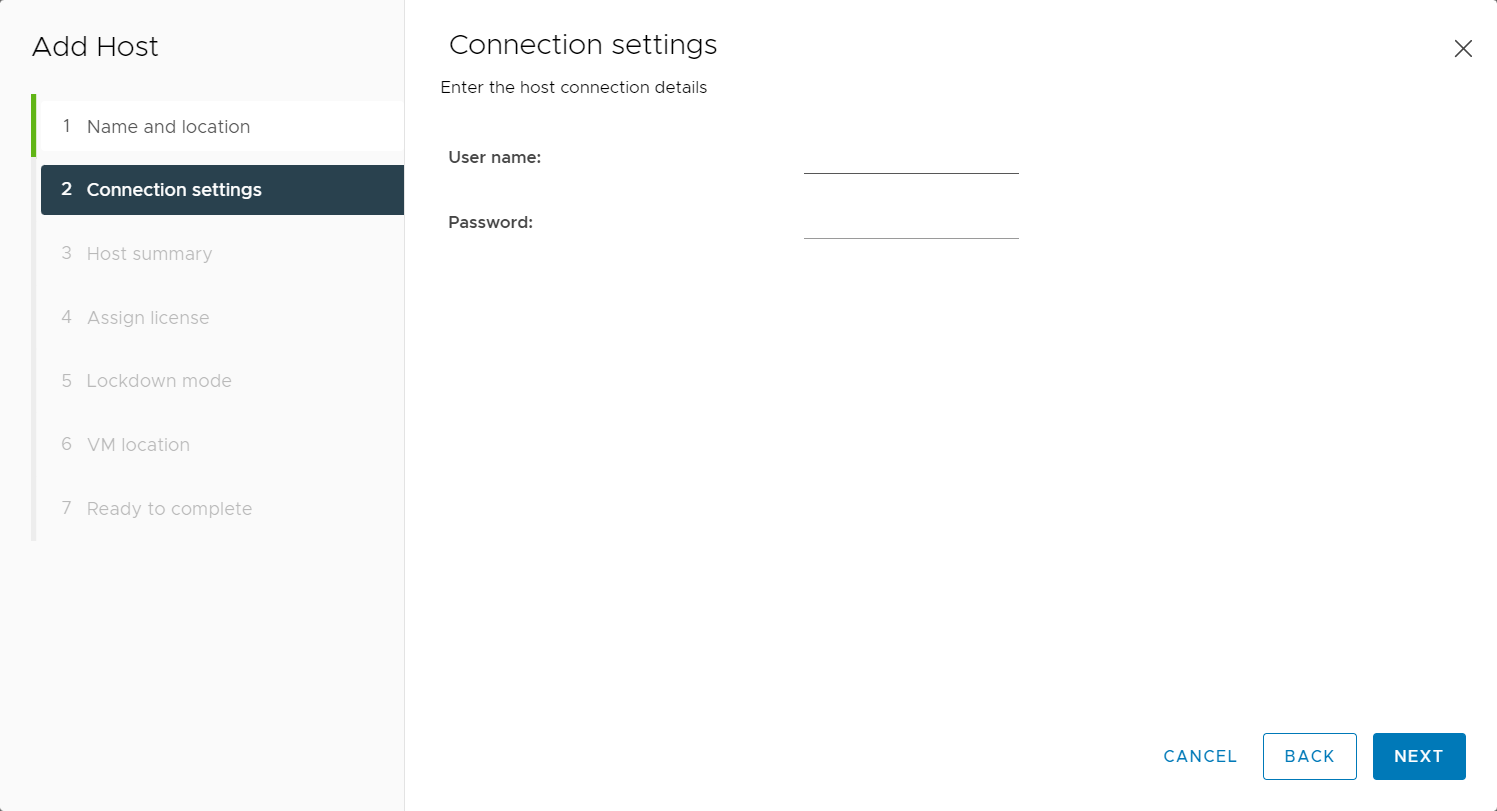
Enter the administrator account credentials in the Username and Password fields and click Next.
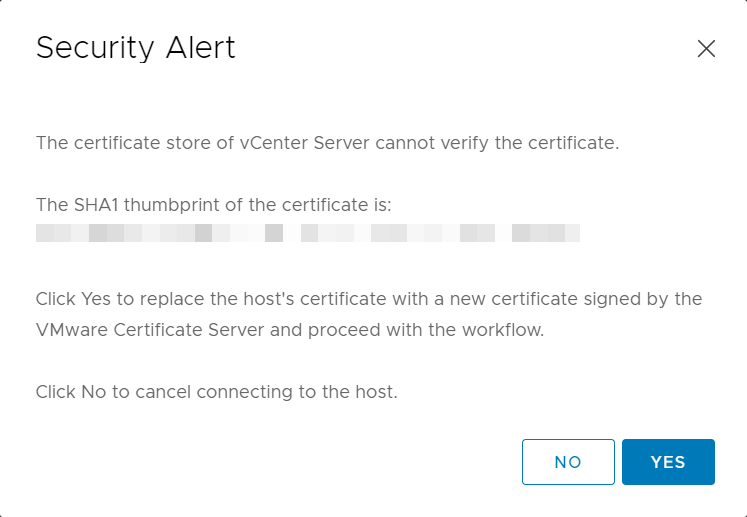
Click Yes to replace the host certificate.
The Host summary dialog displays. Review the settings and click Next to proceed.
The Assign license dialog displays. Confirm the license selection and click Next.
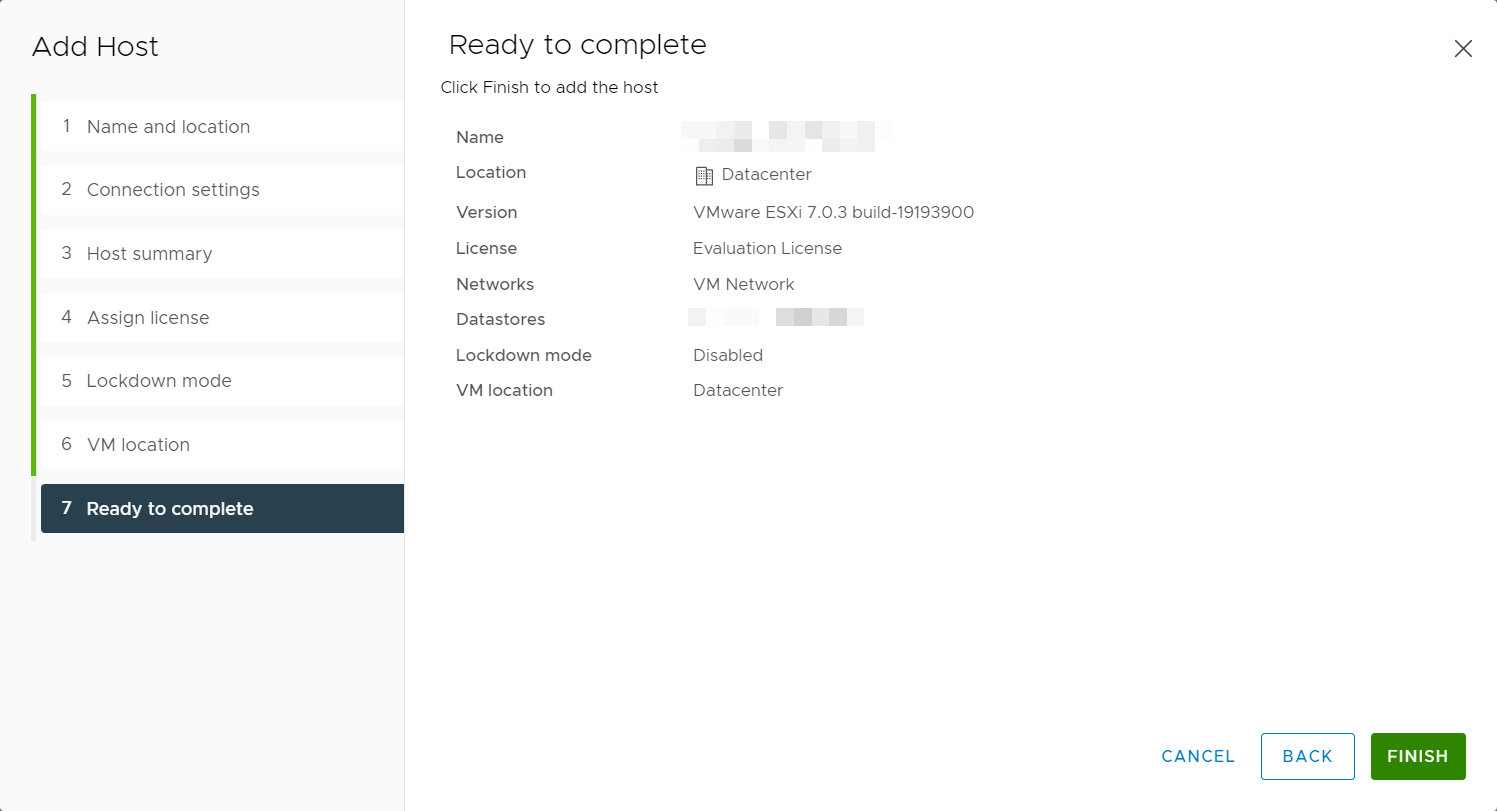
The Lockdown mode dialog displays. Accept the default setting (Disabled) and click Next.
The VM location dialog displays. Select a cluster or accept the default option and click Next to continue.
The Ready to Complete dialog displays. Click Finish to complete adding the new host.
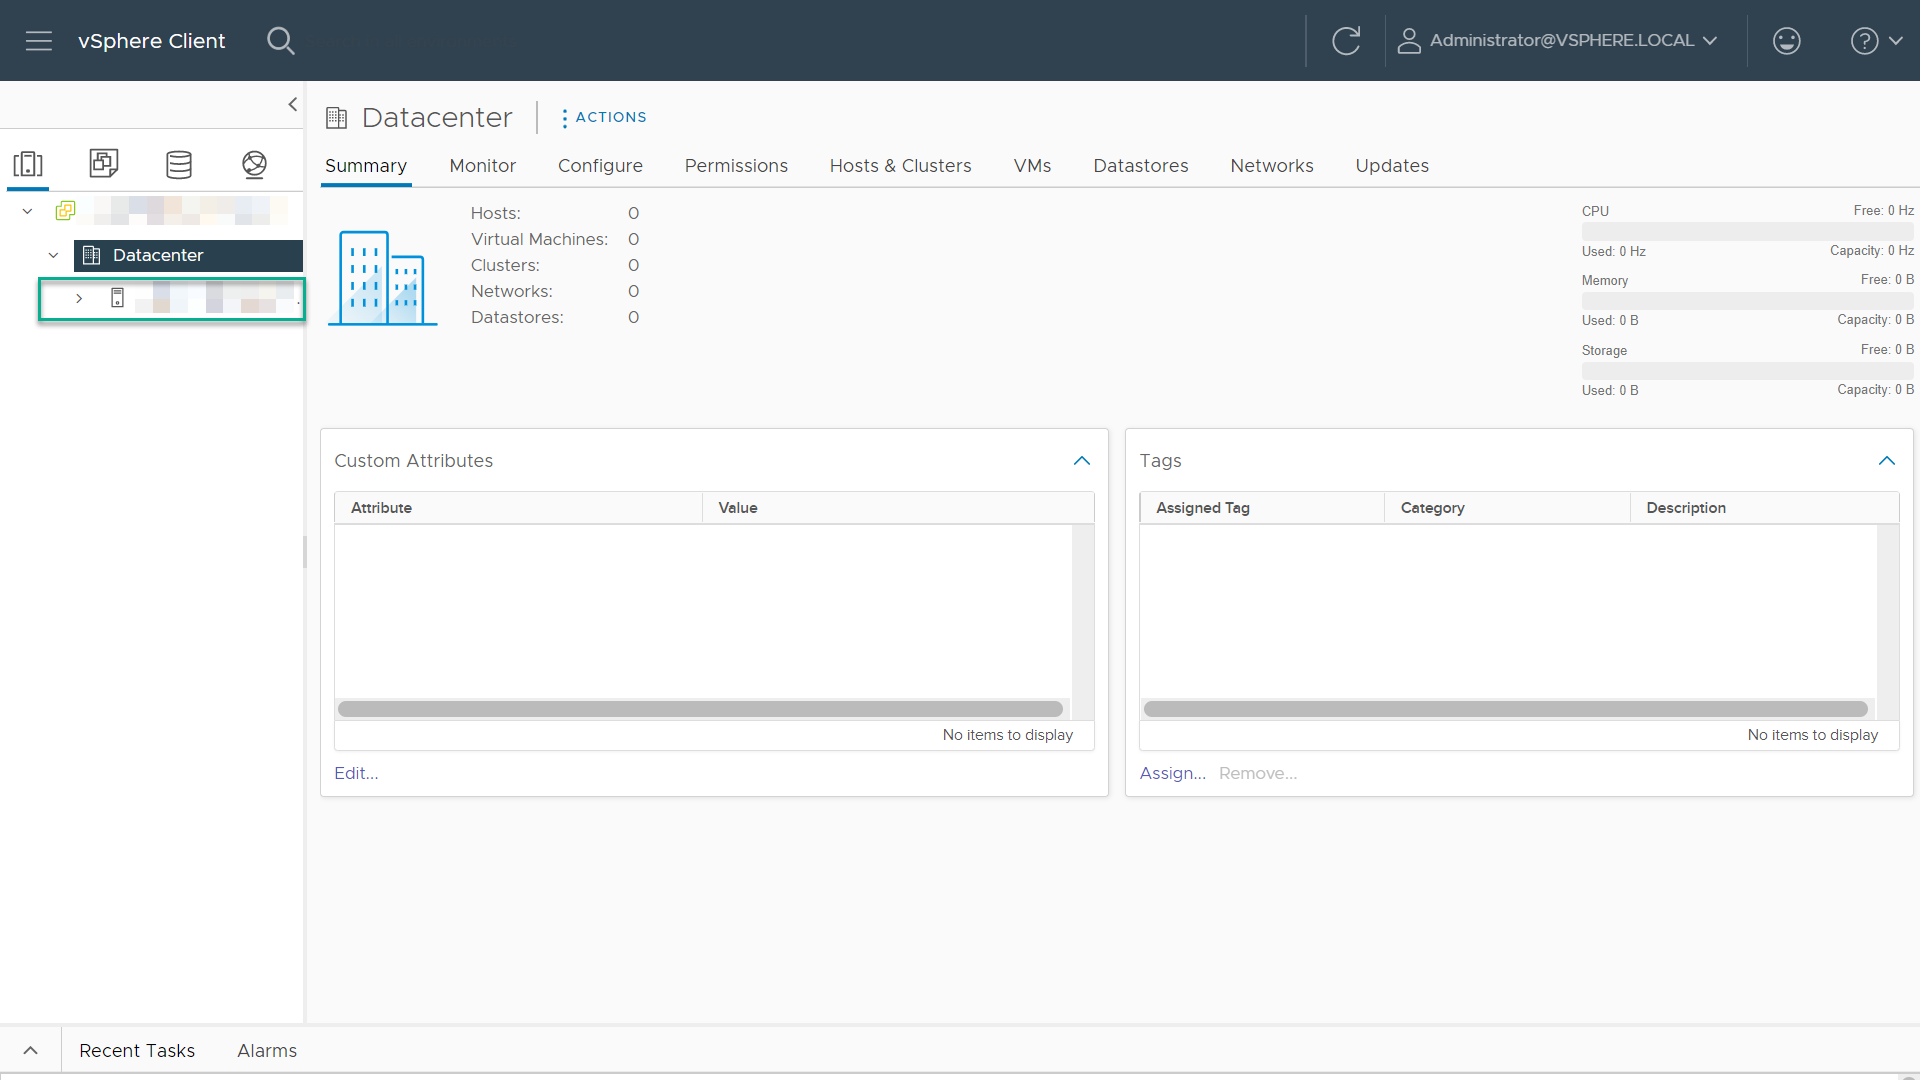
The new host is now visible in the left panel when you click the datacenter name.
Setting the NTP Service on a Host#
Click a host object in the menu on the left, click Configure > System > Time Configuration > Network Time Protocol > Edit.
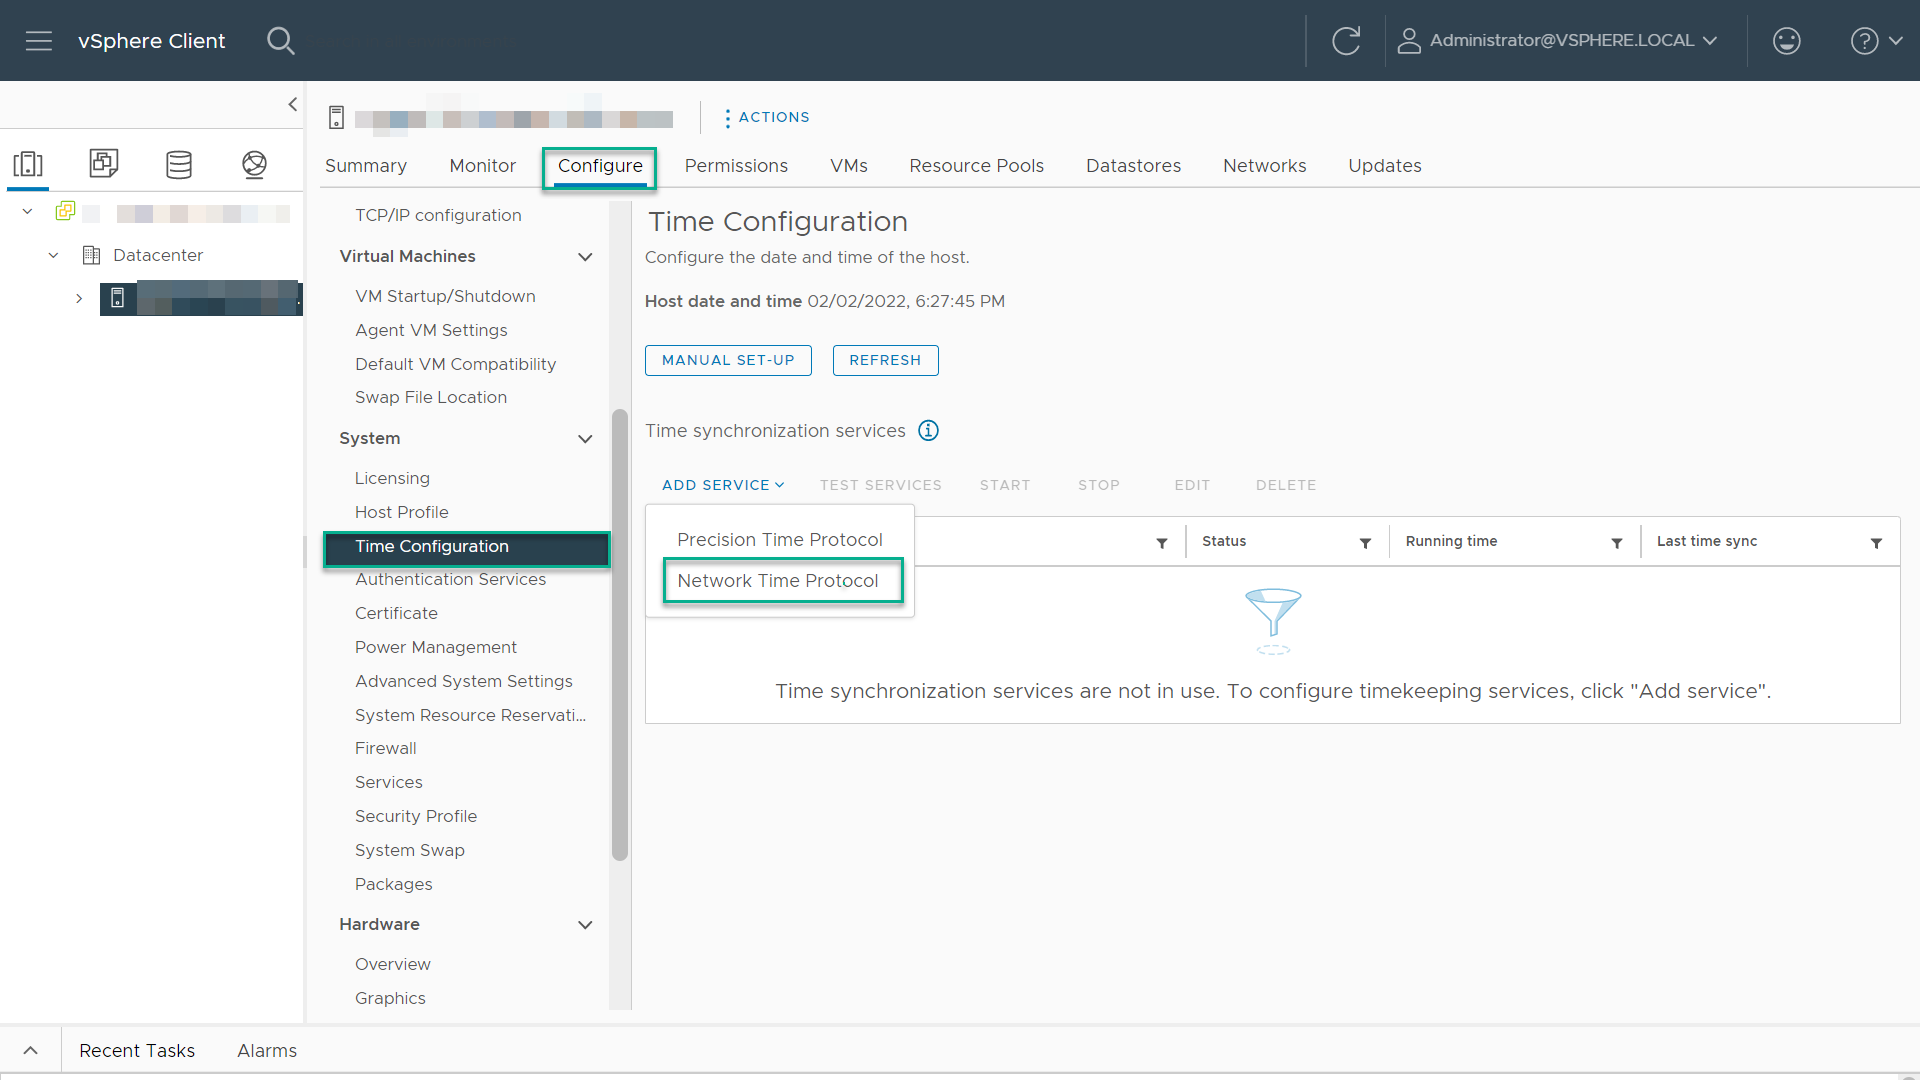
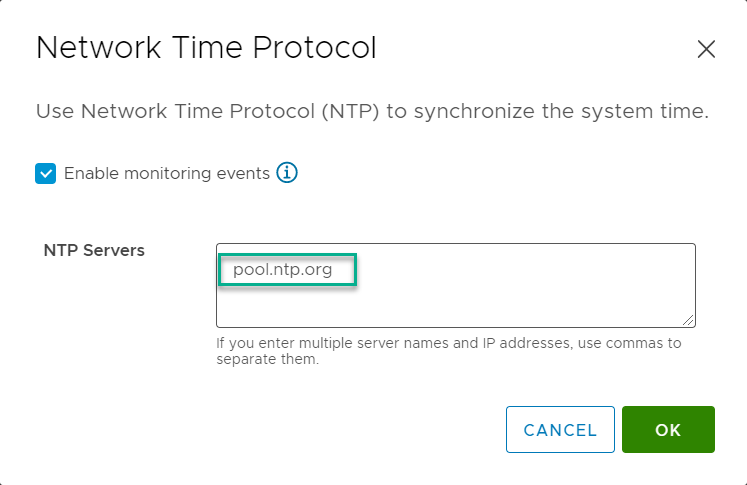
Check the Enable box and enter a valid time server and click OK.
Note
Use a Public NTP Server, a recommended choice is pool.ntp.org
Setting a vCenter Appliance to Auto-Start#
Use the following procedure to set a vCenter Appliance to start automatically:
In the vSphere Web Client, select the host then select Configure > Virtual Machines > VM Startup/Shutdown. Click the Edit button.
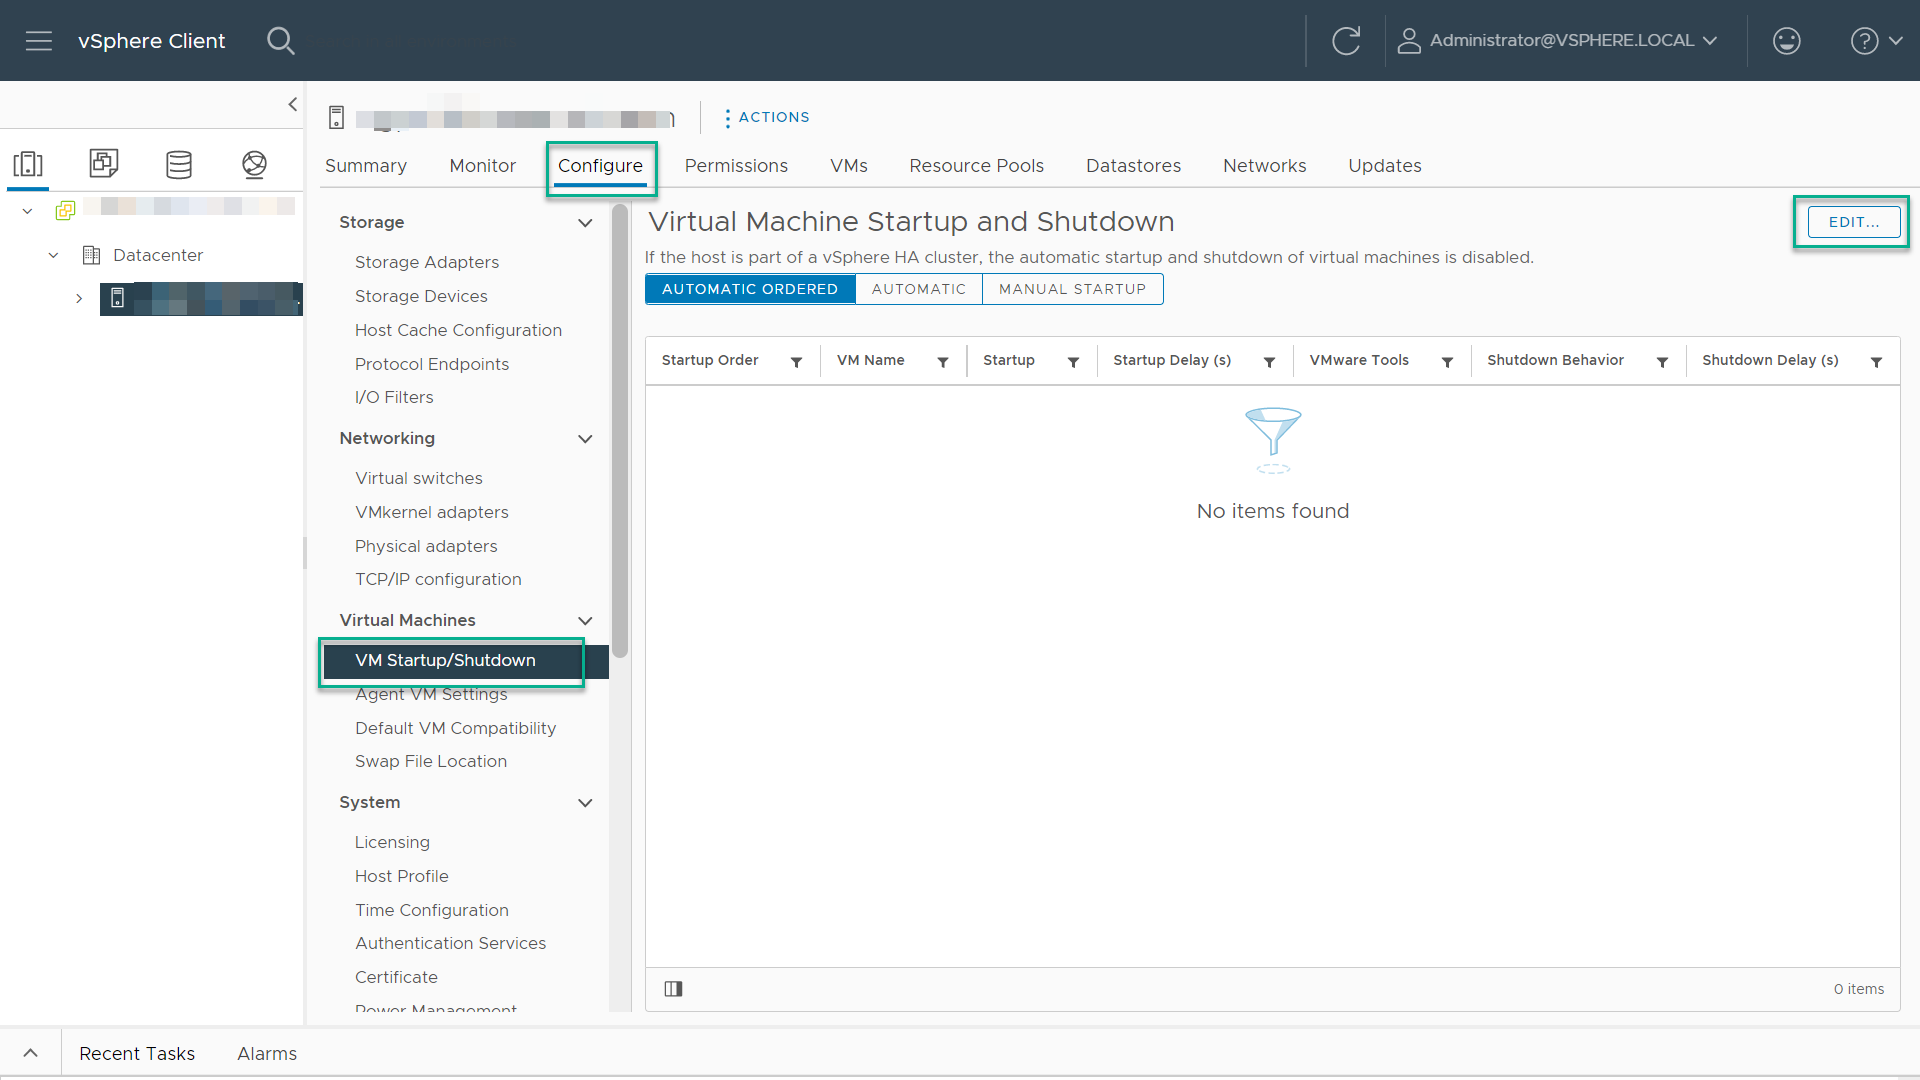
The Edit VM Startup and Shutdown Configuration window displays. Select the vCenter Server, then click the Move To button to move that virtual machine up to the Automatic section of the appliance table. Then click the Edit button.
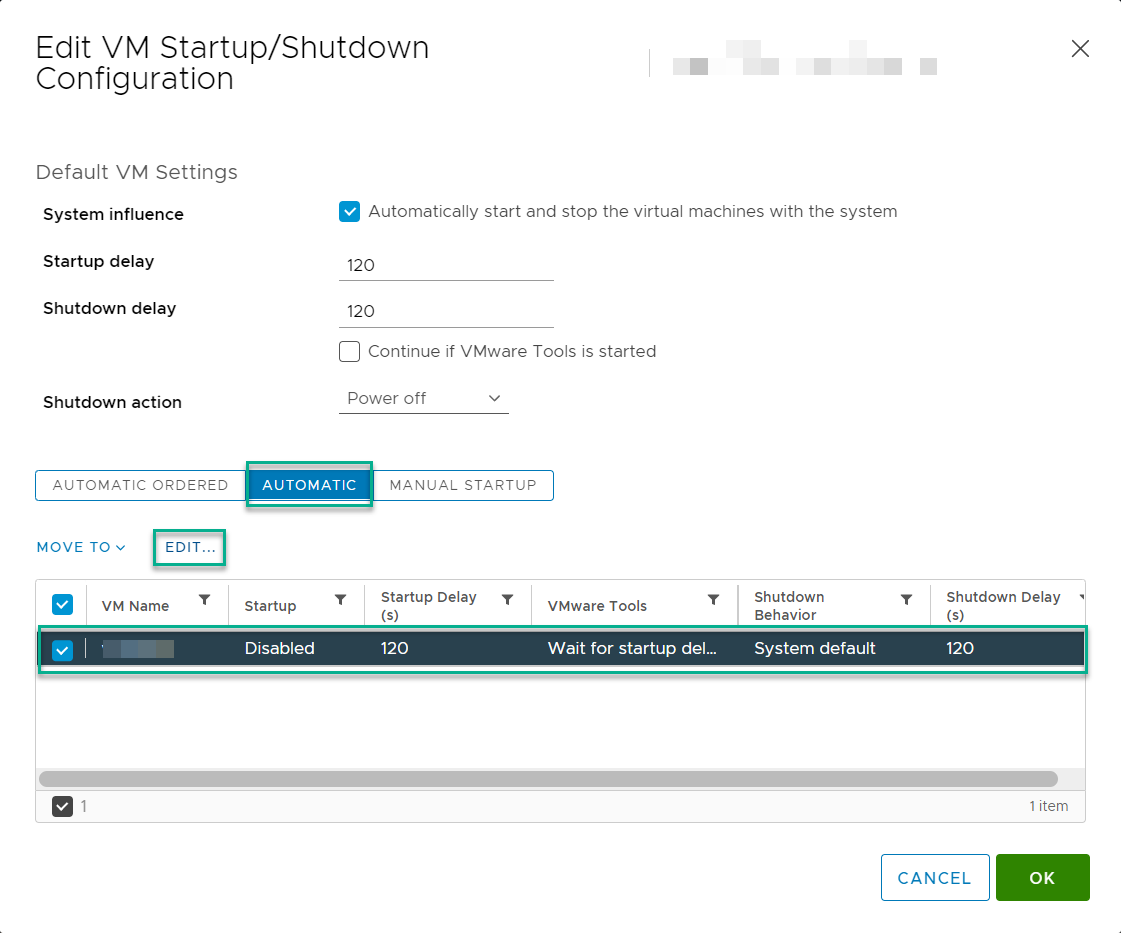
Select and set the following options:
Set Startup Settings to Use specified settings
Select Continue immediately if VMware Tools starts
Set Startup Delay to 0
Set Shutdown Settings to Use specified settings
Set Shutdown Delay to 0
Set Perform shutdown action to Guest shutdown
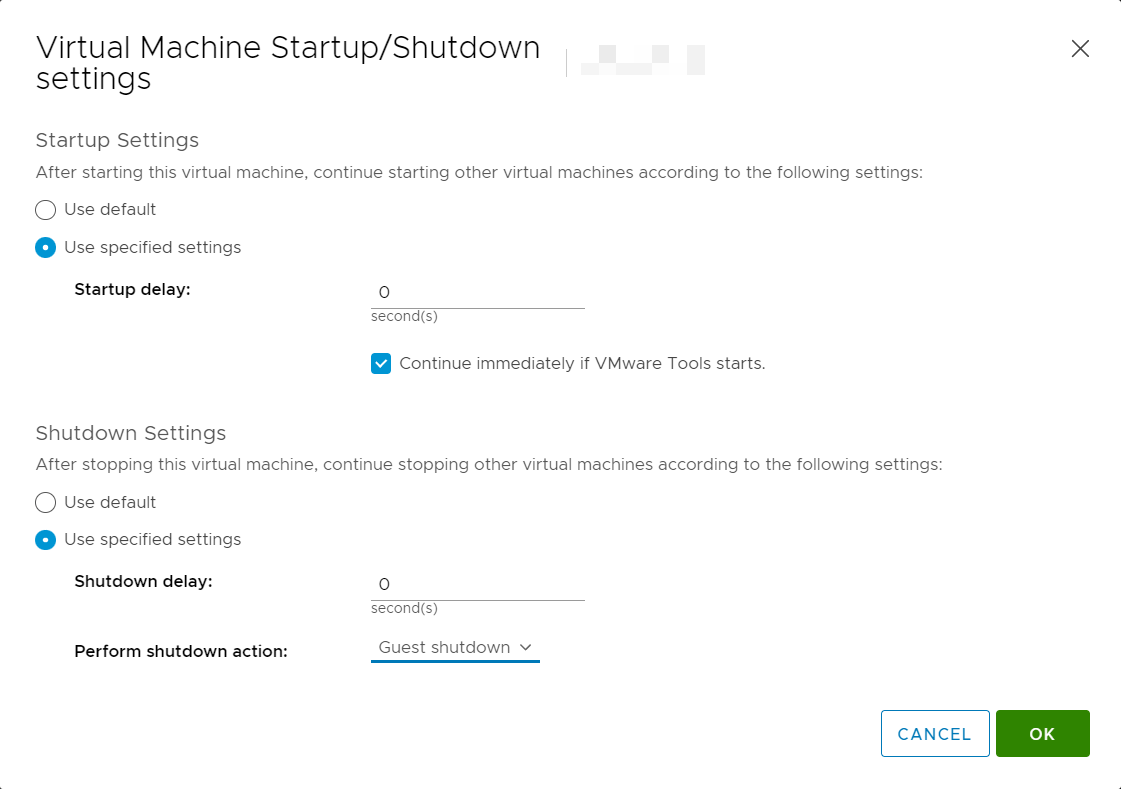
Click Ok to apply the configuration settings.
Note
The vCenter Web Client may not reflect these configuration changes immediately. Either click the Refresh icon or a different configuration group and return to the current setting.
Mounting an NFS ISO Data Store#
Use the following procedure to mount an NFS ISO data store.
In the main vSphere Web Client window, select Hosts and Clusters and select the host.
Select Storage -> New Datastore from the Actions drop-down menu. The New Datastore window displays with the Type tab selected.
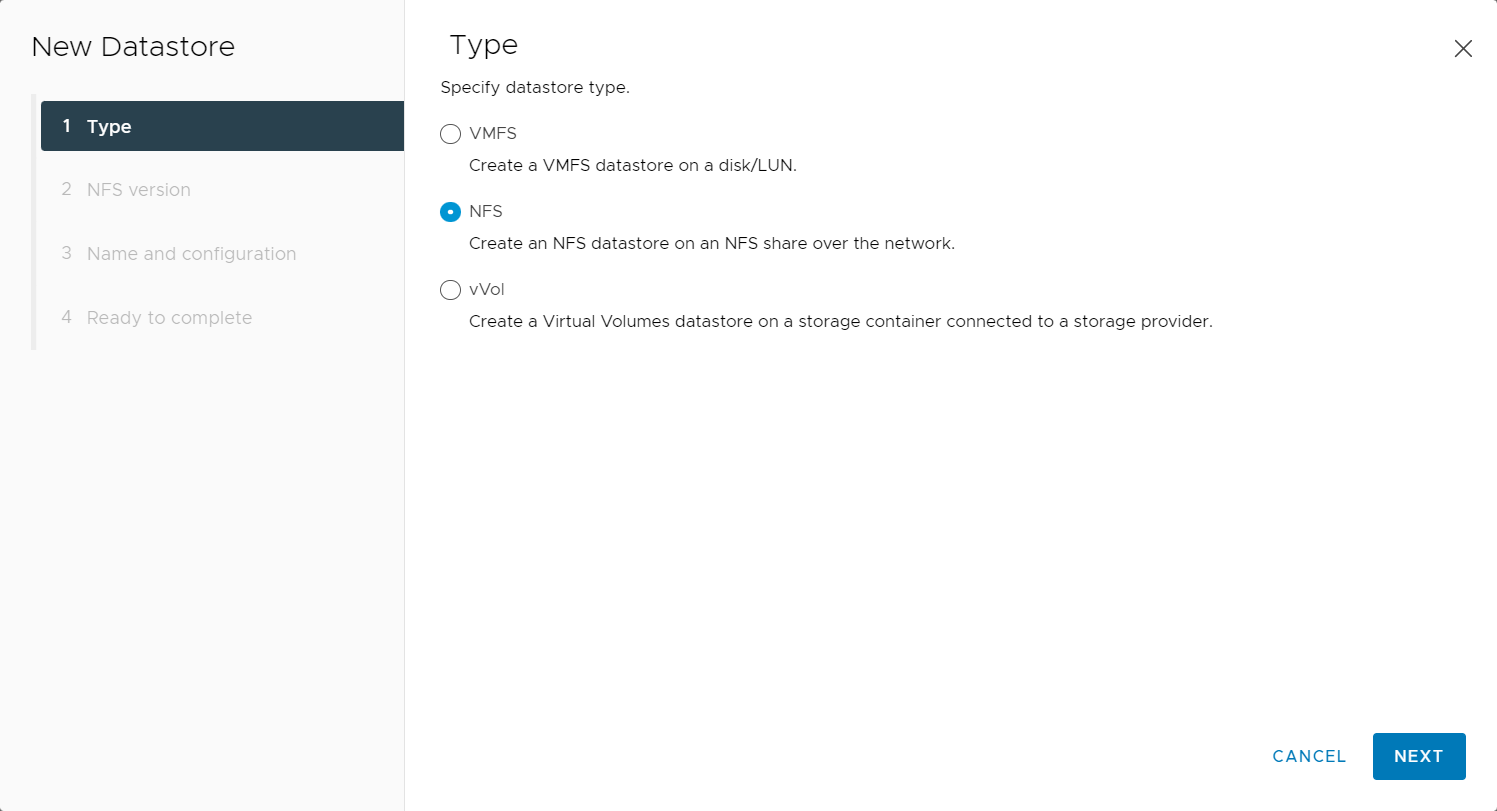
Select NFS and click Next to proceed.
The Select NFS version tab displays.
Select the correct NFS version and click Next to proceed.
The Name and configuration tab displays.
Enter the NFS exported folder path and the NFS server address in the Folder and Address fields.
Because the data store is an ISO data store, consider mounting it as read-only by checking the Mount NFS as a read-only checkbox.
Click Next to proceed. The Host accessibility tab displays.
Select the host that will use the new data store.
Select Next to proceed. The Ready to complete tab displays.
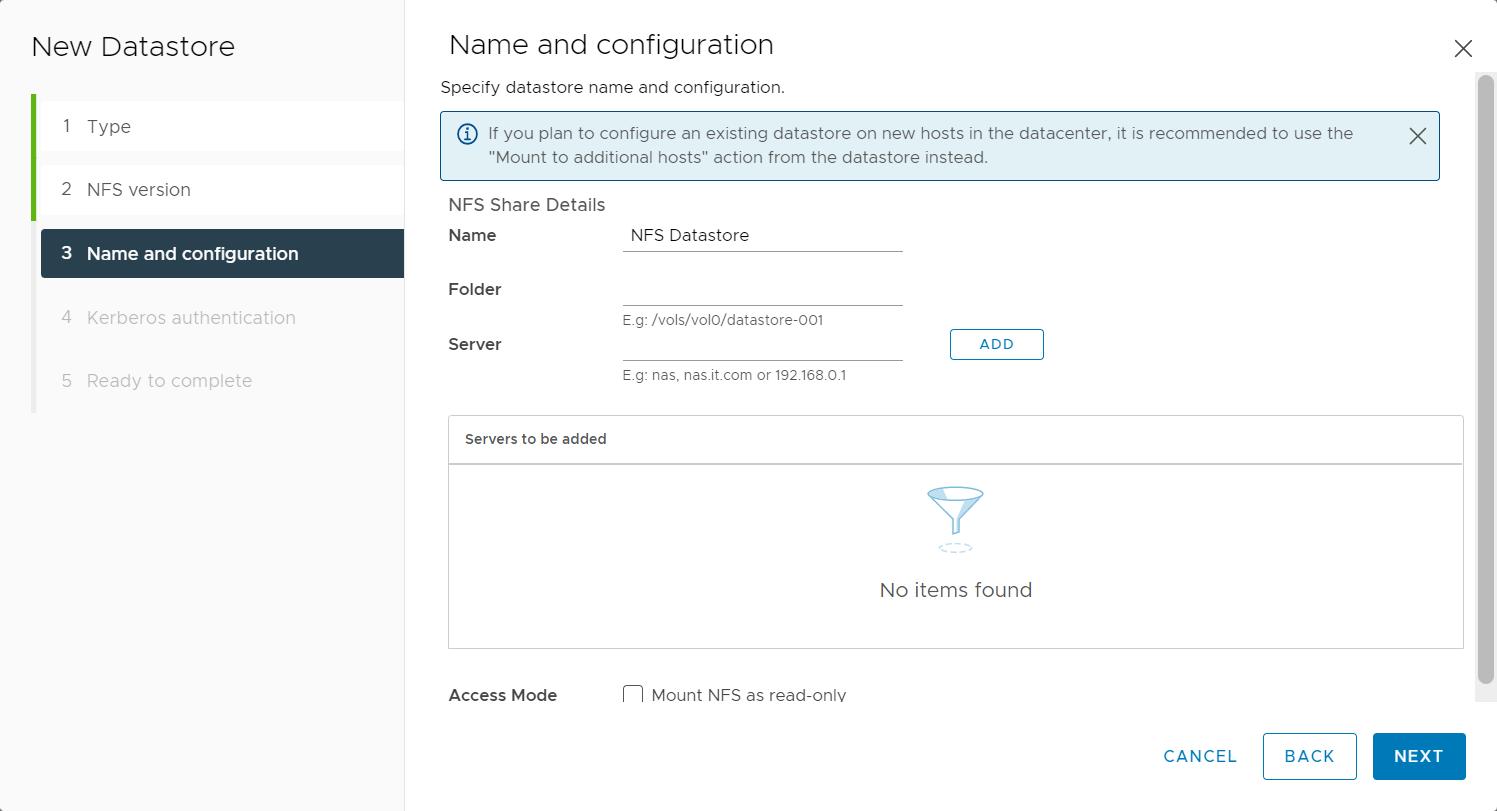
Review the settings.
Click Finish to complete adding the NFS ISO data store. This data store is now accessible as an installation source for virtual machine CD drives.