Develop a Virtual Facility with NVIDIA NIMs
With your Kit app development environment setup, you will now learn how to implement USD-focused NVIDIA NIM containers to develop your virtual facility.
First, we will review how to add them as extensions in your application.
Get Started with USD-focused NVIDIA NIM Containers
Your application may require the use of certain extensions to be automatically loaded when the user launches the application. In this step, we’ll set up the application to automatically load the USD Code and Sample Browser extensions and add a custom setting for the Sample Browser.
Open the Extension window by clicking Developer > Extensions. It may take a moment to load the first time.
Search for “omni.ai.chat_usd.bundle”.
Select Chat USD (Preview).
Select the
copyicon adjacent to omni.ai.chat_usd.bundle.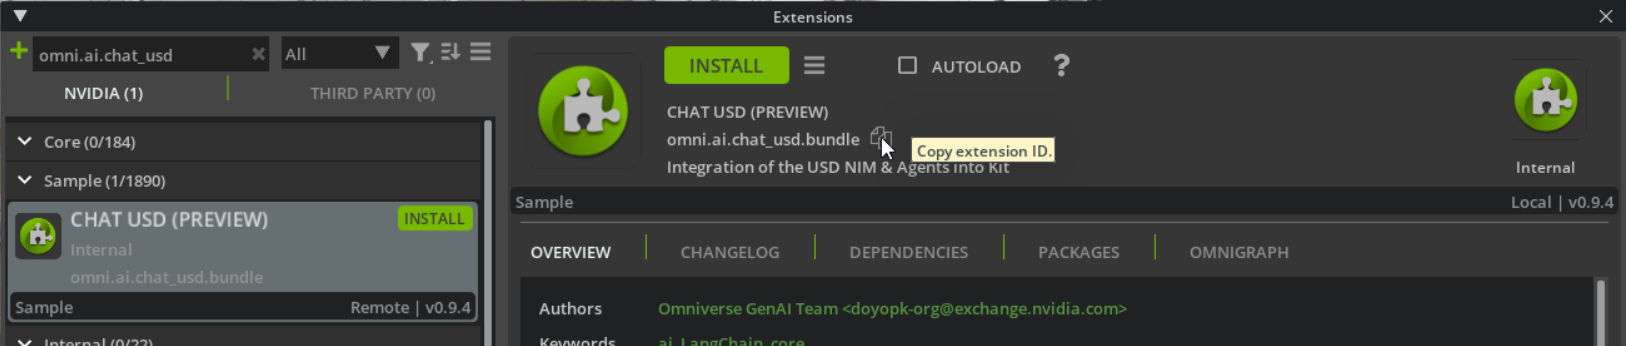
Open the
{full-path-kit-app-template}\source\apps\<your_app>.kitfile and paste the extension at the bottom of the dependency list.Copy and paste the Sample Browser extension in the Kit file.
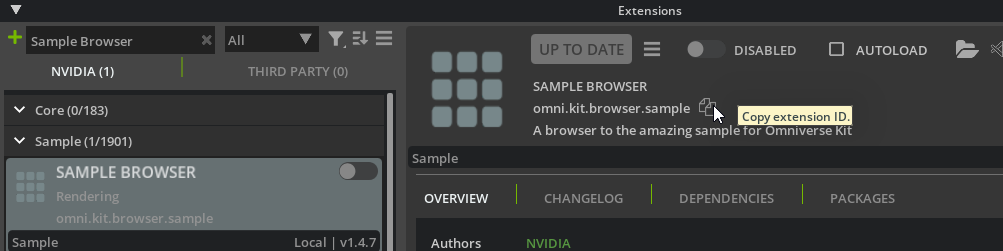
Search for “omni.kit.browser.sample”.
Copy the Sample Browser extension name and paste it to the bottom of the dependency list in the .kit file.
The last 2 extensions in the kit file dependency list should look like:
"omni.ai.chat_usd.bundle" = { version = "#.#.#" }
"omni.kit.browser.sample" = { version = "#.#.#" }
Note
Extension versions are subject to change. Copying the extension name from the extension manager will provide the latest version numbers.
If you have already built your Kit app with these extensions, you can update to the latest by running the custom build option
.\repo.bat build -u.Alternatively, you can remove the version number from the extension and it will automatically pull the latest. For example “extension.name”={}.
To access the example warehouse you’ll need for the use cases portion of this guide, you’ll need to add the following settings in the settings section of your .kit file. The settings are located below the dependencies.
[settings.exts."omni.kit.browser.sample"]
folders = ["https://omniverse-content-production.s3.us-west-2.amazonaws.com/Usd_Explorer/Samples/Examples/2023_2",]
folders_hide_in_category = ["2023_2",]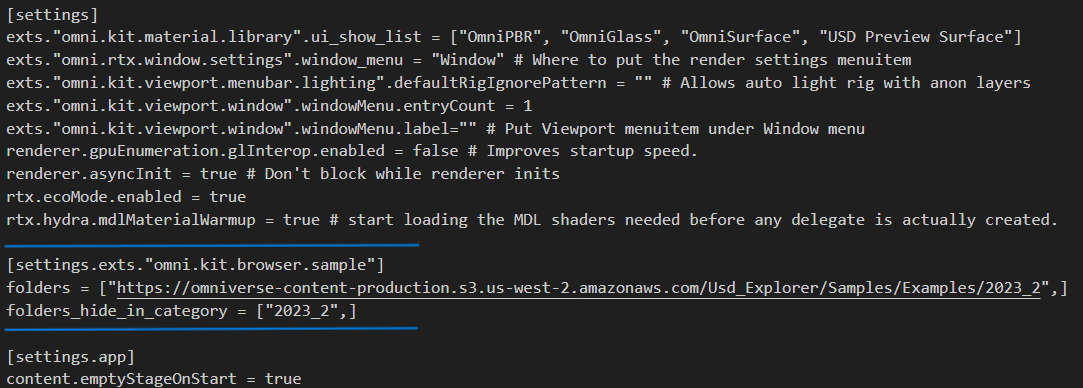
This setting will point the Sample Browser to the proper location to access the warehouse.
Save and close the
.kitfile.Close the kit application.
Rebuild the app with the new extensions.
Linux:
./repo.sh buildWindows:
.\repo.bat build
➤ Next Steps: Example Use Cases